In-app campaign with cross-sell products
In the world of mobile applications, engaging users effectively and generating revenue are paramount objectives. One powerful strategy for achieving both of these goals is the implementation of in-app cross-sell campaigns. These campaigns are designed to present users with complementary product suggestions precisely when they are most likely to make a purchase, thereby enhancing their experience and increasing the app’s revenue potential.
A compelling example of the impact in-app cross-sell campaigns can have is demonstrated through the “product.addToCart” event. In this specific use case, when a mobile app user adds an item to their shopping cart within a mobile application, it triggers a dynamic campaign. This campaign’s unique feature is its ability to display cross-selling products tailored to the specific item added to the cart, all based on event parameters such as the SKU (Stock Keeping Unit). By leveraging these parameters and the underlying code of the cross-sell recommendation campaign, the app can deliver a highly personalized and targeted experience to its users.
The primary purpose of this use case is to optimize the user experience within a mobile application by offering relevant product recommendations at a critical moment in the customer’s journey – when they are actively making a purchase. By harnessing the “product.addToCart” event, this in-app campaign can provide users with product suggestions that align with their interests and the specific product they have chosen.
In this use case, we provide you with ready-to-use campaign code that you can use 1:1 in your business scenario.
Prerequisites
- Implement Synerise SDK in your mobile app.
- Implement transaction events using SDK or API.
- Configure AI engine. Enable Cross-sell recommendations.
- Implement the product.addToCart event in your mobile application.
Process
In this use case, you will go through the following steps:
- Create AI recommendations with cross-sell products.
- Create an in-app campaign with the usage of an event parameter.
Create AI recommendations
In this stage, you will create an AI recommendation campaign which will be used to display products in your in-app message. It will present cross-sell recommendations.
- Go to
 Communication > Recommendations > Add recommendation.
 - Enter the name of the recommendation (it is only visible on the list of recommendations).
- In the Type & source section, click Define.
- From the Catalog dropdown list, select a product feed.
- Select the Cross-sell recommendation type.
- Confirm the recommendation type by clicking Apply.
- In the Items section, click Define.
- Click Add slot.
- Click the Unnamed slot that was created.
- Define the minimum and maximum number of products displayed in the frame according to your needs.
- In Static filters, select the availability parameter and set it to is defined, so the recommendations will show only available items.
- Optionally, you can use filters to include specific items in the recommendation frame.
- Confirm the configuration by clicking Apply.
- Optionally, you can define the Boosting factors and settings in the Additional settings sections.
- In the right upper corner, click Save.
- Copy the recommendation ID from its URL to use it in in-app campaign.
Create an in-app campaign
In this part of the process, you create an in-app campaign triggered by the product.addToCart event. After that, the recommendation campaign with cross-sell products for the products added to cart will be displayed.
- Go to Communication > In-app messages > Create in-app
- Enter a meaningful name for the in-app campaign.
- In the Audience section:
- Click Define.
- Select the Everyone tab.
- Click Apply.
- In the Content section:
- Click Create message.
- Go to Predefined templates folder and choose Carousel with context recommendations template.
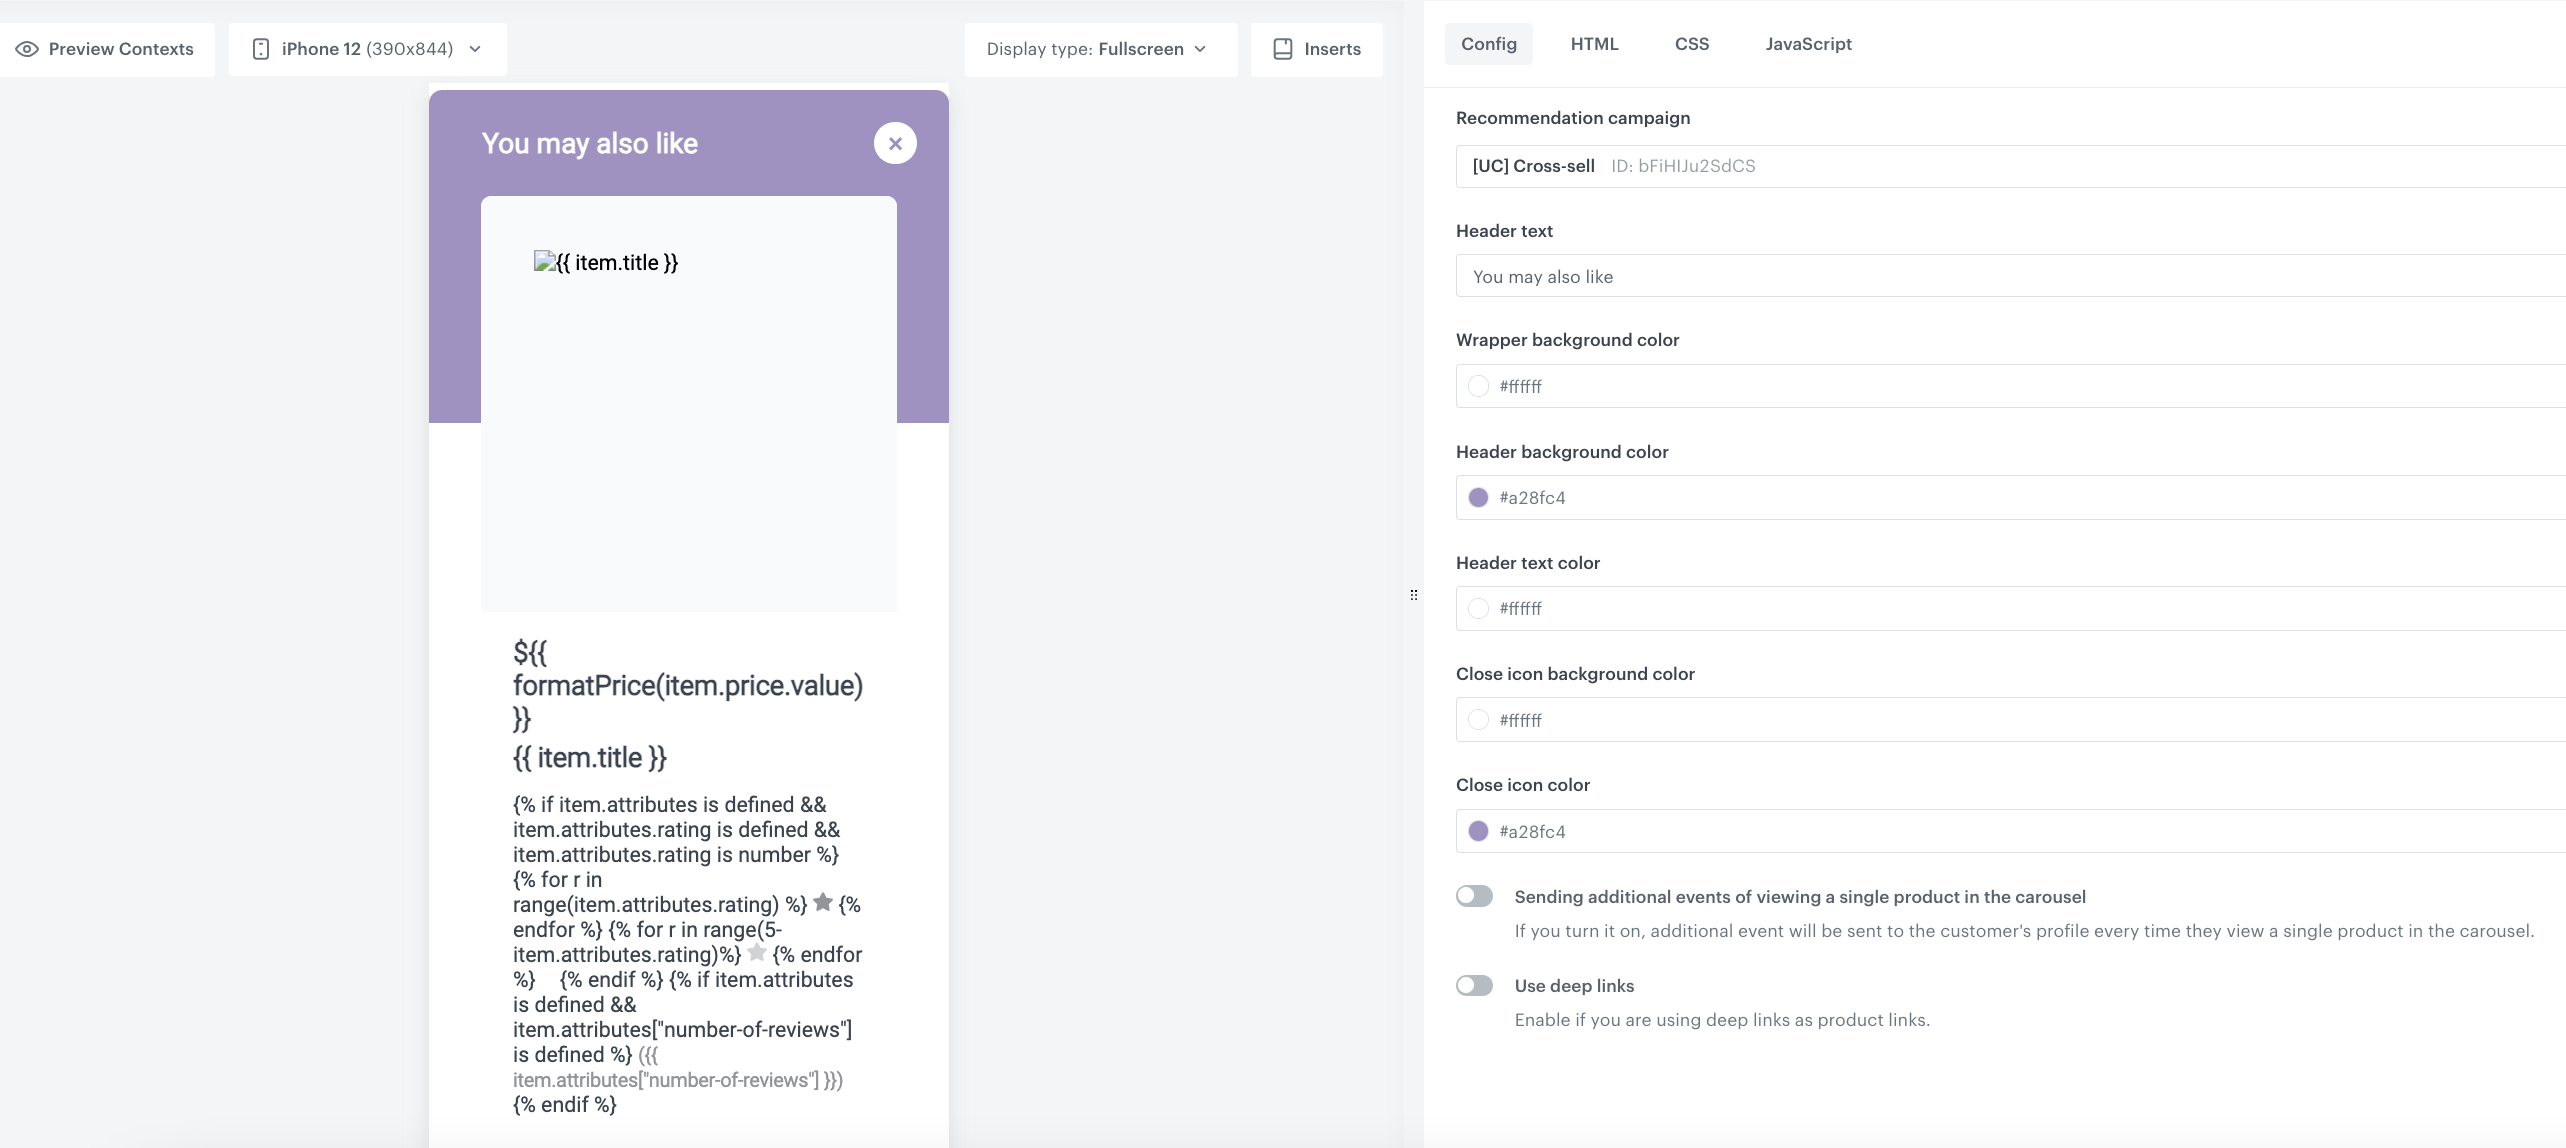
Edit form in the Config tab
The form in the Config tab is already filled in with default values. You can keep them or change them to fit your business needs.
The fields in Config are split into two types: ones for dynamic content (related to Jinja) and ones for in-app appearance. The dynamic content fields must match the values in the catalog and the names of the attributes returned by the recommendations. The appearance fields only affect the visual layer of the in-app message.
-
From the Recommendation campaign dropdown list, select the AI recommendation created in the previous step.
-
In the Header section, add the text you want to display as the header of the in-app message.
-
In the Wrapper background color field, use the color picker to select the color of the wrapper background.
-
In the Header background color field, use the color picker to select the color of the header background.
-
In the Header text color field, use the color picker to select the text color.
-
In the Close icon background color field, use the color picker to select the icon background color.
-
In the Close icon color field, use the color picker to select the color of the close icon.
-
Additionally, you can enable the following options:
- Sending additional events of viewing a single product in the carousel - when enabled, an event is generated when a single product from the carousel is viewed. The event will be available in the customer’s profile.
- Use deep links - when enabled, instead of refering a user to a product on the website, you refer them to a product in the mobile application.
-
To continue the process of configuring the in-app campaign, click Next.
-
To save your content changes, click Apply.
-
In the Trigger events section:
- Click Define.
- Select Add event and from the dropdown list, choose the
product.addToCartevent. - Click the + where button and as the parameter, choose
$sku. - As the logical operator, select is true.
- Click Apply.
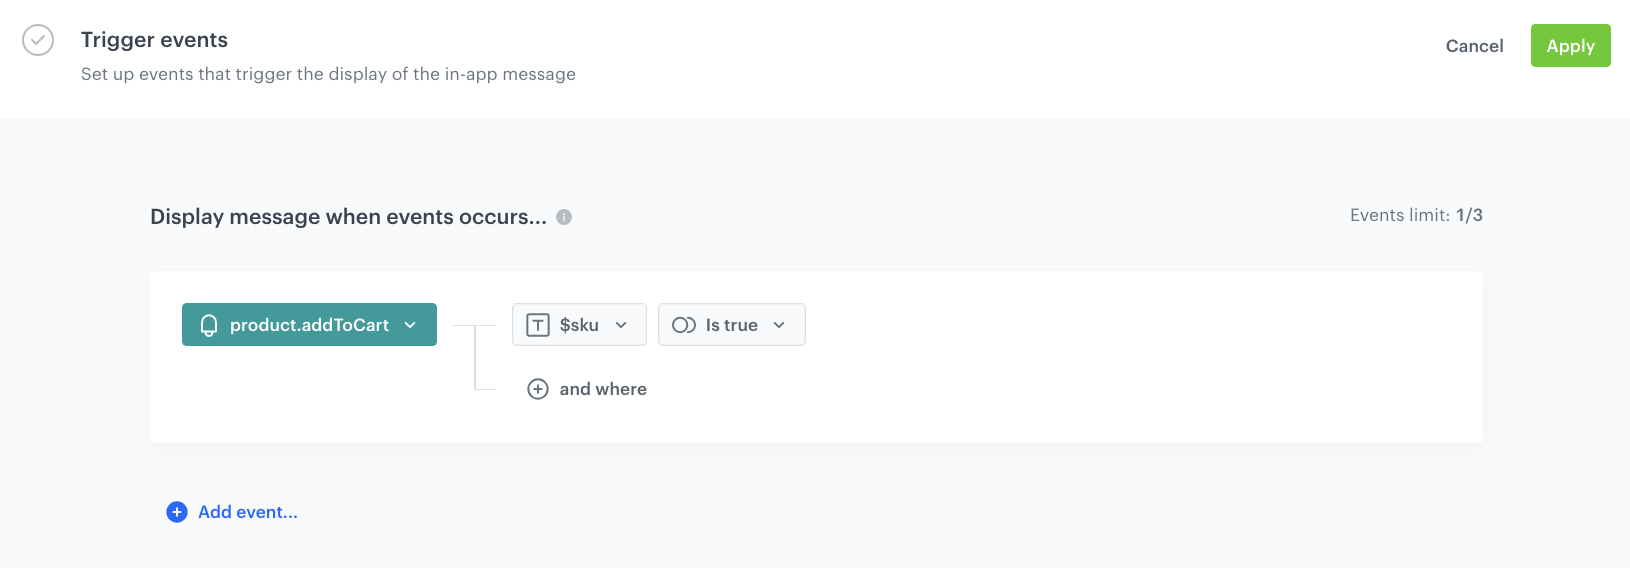
Trigger event settings -
In the Schedule section:
- Click Define.
- Choose the Run immediately option.
- Click Apply.
-
In the Display settings section:
- Click Define.
- Define the Delay display as 0 and Priority index as 1.
- Enable the Frequency limit toggle to manage the frequency of in-app message display in the application.
In our case, we set it to once per hour. - Click Apply.
-
Optionally, you can define the UTM parameters. Otherwise, click Skip step.
-
Optionally, you can add the custom parameters in the Additional parameters section. Otherwise, click Skip step.
-
To start your campaign, click Activate.
Check the use case set up on the Synerise Demo workspace
You can check the configuration of the campaign components directly in Synerise Demo workspace:
If you don’t have access to the Synerise Demo workspace, please leave your contact details in this form, and our representative will contact you shortly.