
Subscription for a product in mobile app
The advantage of creating a subscription model in your mobile commerce is that users can enjoy discounted rates on their desired products, which they buy regularly. This option is also beneficial for offline store owners, as it increases customer loyalty and encourages customers to visit more frequently and make more purchases.
In this use case we will create a subscription service mechanism based on Synerise’s promotions and analytics. The subscription allows to collect one coffee a day for the next 30 days, 30 coffees in total. Customer pays upfront and the price per item is lower than if bought separately.
Prerequisites
-
Integrate Synerise promotions
-
Implement subscription status management using your billing system or payment gateway:
-
When the subscription is enabled (customer paid for a monthly subscription):
- Send a
subscription.statusevent with thesegment_enabledparameter set to1
This parameter is used to track if a customer is eligible for a coffee on each day. It is changed with an Automation after the client buys coffee and resets at midnight.
- Update the customer’s profile with the
subscription.activeattribute set to1
This attribute is used to track if the monthly subscription is paid and active.
- When the subscription ends or is disabled, update the customer’s profile with the
subscription.activeattribute set to0
In this example, Synerise doesn’t de-activate the subscription after its period runs out. Your mobile application must do this.
Security configuration
Before you start working with this module, if you are a Synerise customer or partner, consider reading the section about denylisting events. This natively accessible configuration will allow you to manage the restrictions in points management that may help you prevent fraud.
Process
In this use case, you will go through the following steps:
-
Create an aggregate checking the subscription status.
-
Create a segmentation eligible for the subscription based on the previously created aggregate.
-
Create a promotion in Synerise, that reduces the subscribed item’s price to zero for the customer.
-
Create a workflow that tracks redemptions when the customer redeems a coffee. This is needed to track if a coffee was already picked up on a particular day (by using the aggregate created earlier).
-
Create a workflow which checks the subscription status daily.
Create an aggregate
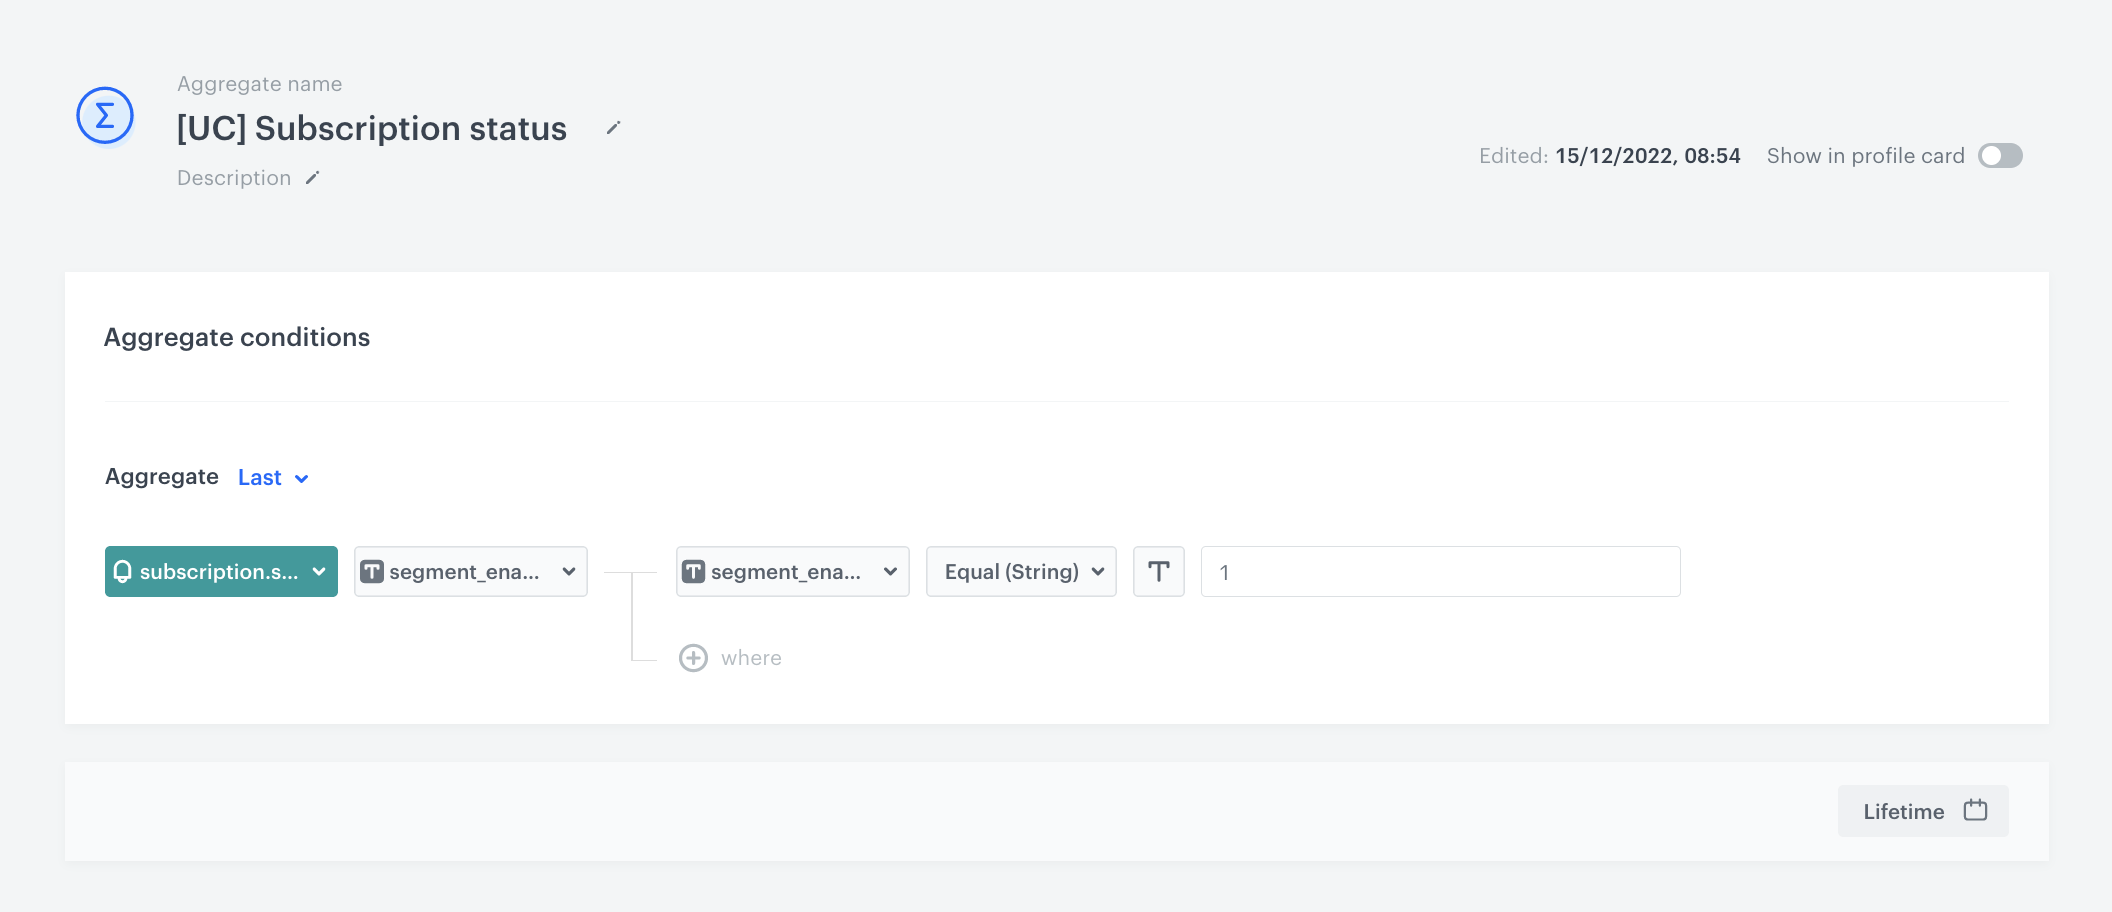
In this part of the process, create an aggregate that returns the customer’s daily redemption status from the most recent subscription.status event.
subscription.status) with the parameter (in this case named segment_enabled) with information if the customer is eligible for their daily coffee and send this event to Synerise (the value should be 1 if yes, or 0 if not).-
Go to
 Analytics > Aggregates > New aggregate.
 -
Enter the name of the aggregate.
-
As the type of the aggregate, select Last.
-
From the Choose event dropdown list, select the
subscription.statusevent. -
As the event parameter, select segment_enabled.
-
Click +where and choose the segment_enabled parameter.
-
From the Choose operator dropdown list, select Equal.
-
As the value set up
1(it means that it is active). -
Define the period from which the aggregate will look up event data - in this case, it is Lifetime.
-
Click Save.
Create a segmentation
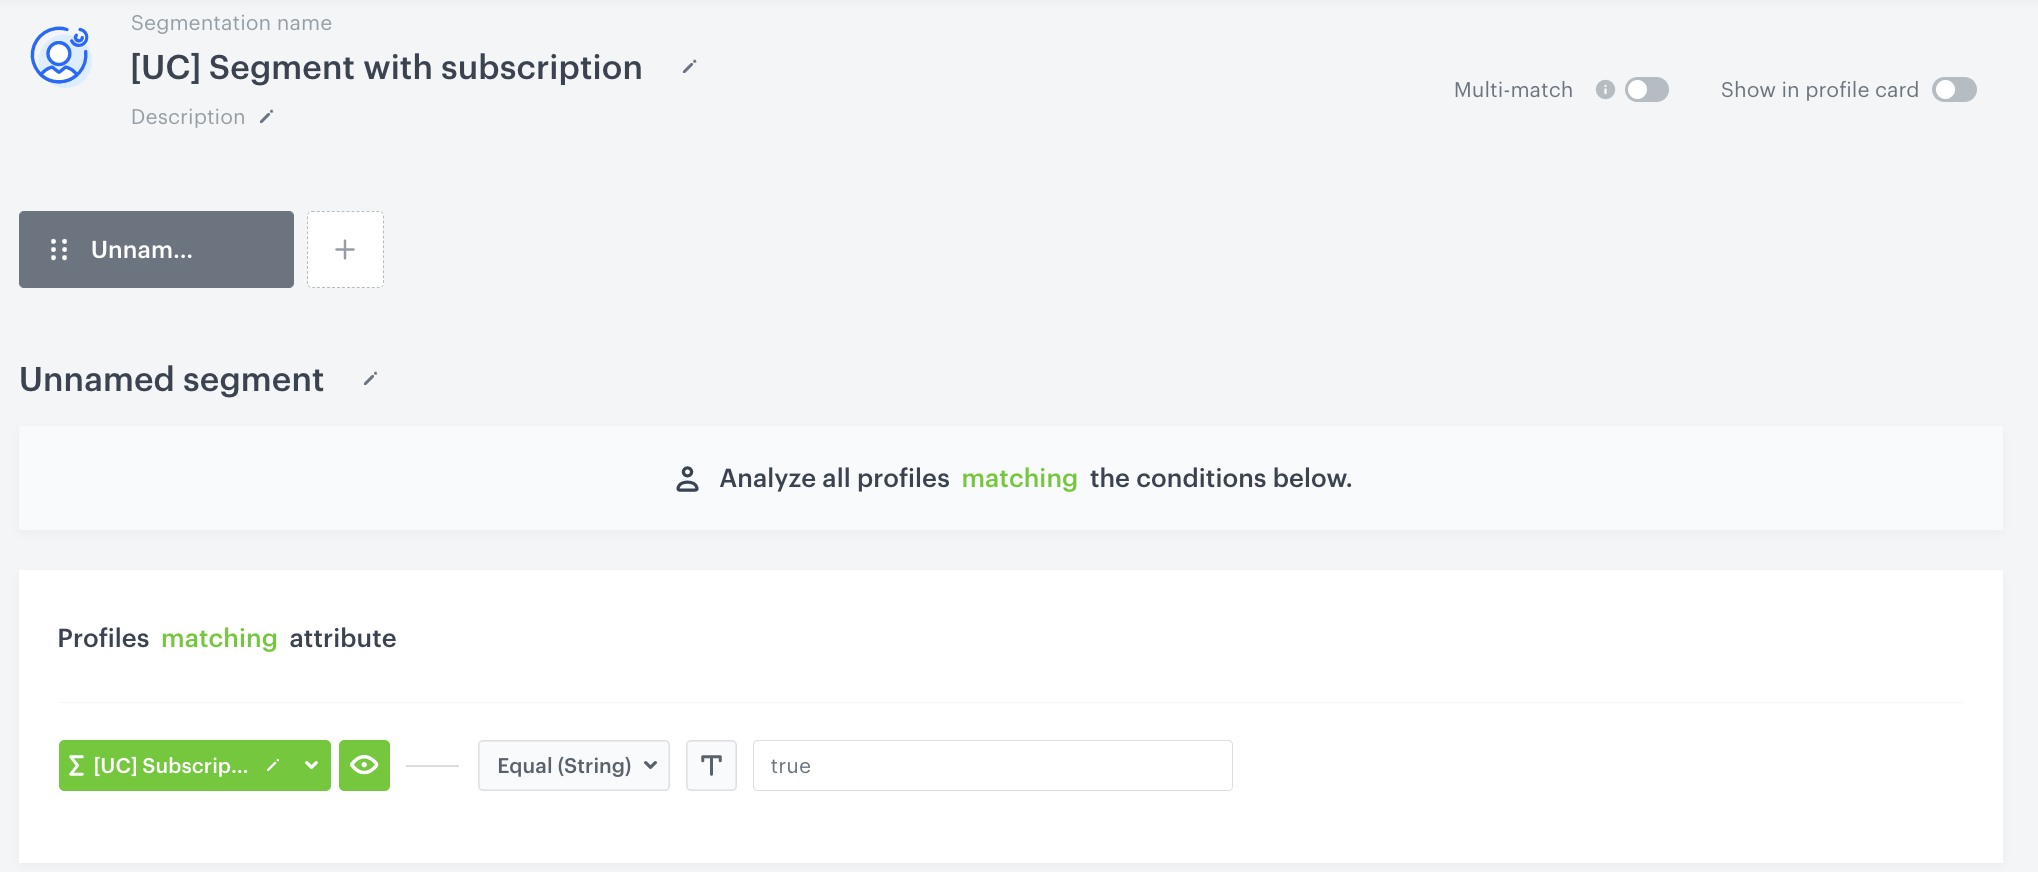
Create a segmentation of customers based on the results of the aggregate you created in the previous part of the process. This segmentation shows the customers who did not redeem a coffee on a particular day.
-
Go to
Analytics > Segmentations > New segmentation. -
Enter the name of the segmentation.
-
Click Choose filter.
-
From the dropdown list, select the aggregate you created before.
-
As the logical operator, select Equal.
-
In the text field, enter
true. -
Save the segmentation.
Create a promotion
In this step, create a promotion that reduces the subscribed product’s price to zero and can be redeemed 30 times.
-
Go to Communication > Promotions > Add promotion.
-
Select the For selected items option.
-
In the Audience section:
-
Choose the segment created previously.
-
Click Apply.
-
In the Content section:
-
Add the name in the Display name.
-
In the Price field, enter
0. -
In the Long description add the names and SKU’s of products which price should be reduced to zero (in this case coffees).
-
Define the name and description of the promotion.
-
Confirm the settings by clicking Apply.
-
In Type & limits section:
-
Choose the Custom type.
-
Choose the Multibuy sub-type.
-
Define the number of usages per activation as
1. -
Define distribution period in the Schedule section and publish the promotion to apply all changes and run the promotion.
-
After buying the subscription the promotion created above should be activated on the client side - for 30 times (because it is the promotion for 30 coffees). Check the first or second option which help you in activation of the promotion in our documentation.
Create a workflow that tracks redemptions
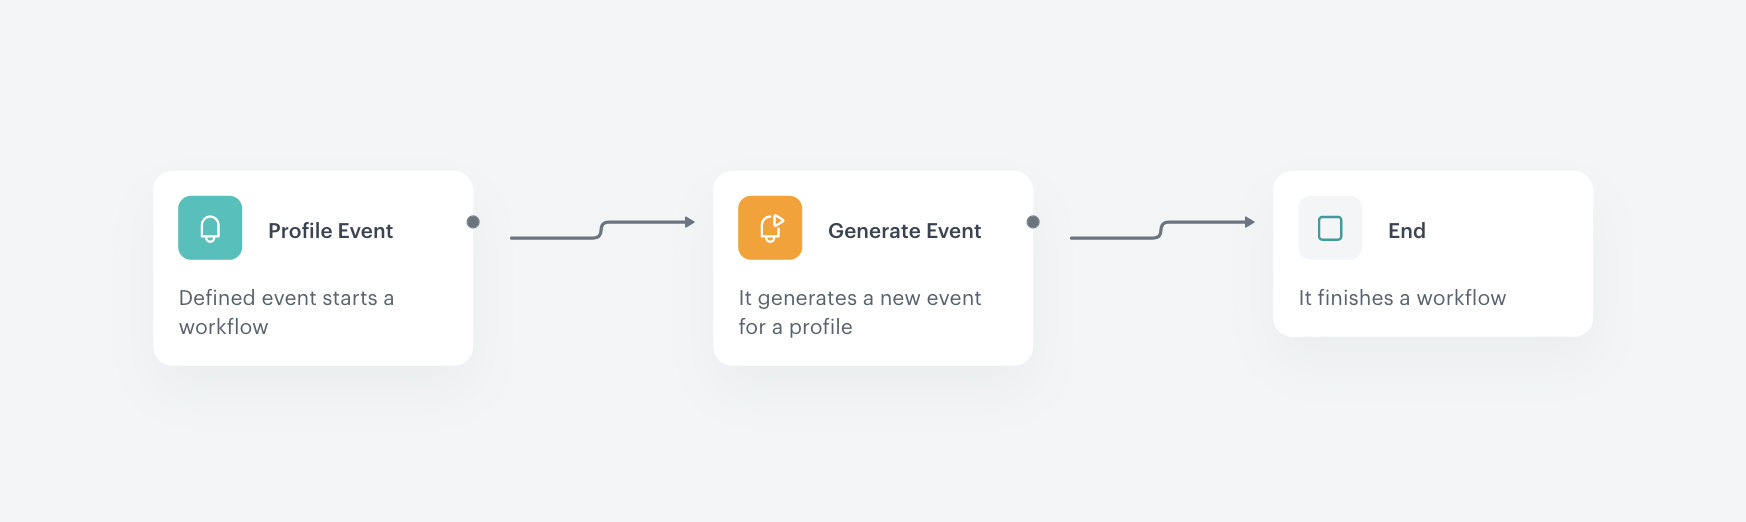
In this step create a workflow that generates the event which informs that user collecting his daily coffee. In this workflow, after the promotion is redeemed by customer who has subscription - client.removePoints event is generated. This event is the trigger of the described workflow, which removes a customer from the segment for one day (they will not be able to use this subscription two times a day).
-
Go to
 Automation > Workflows > New workflow.
 -
Enter the name of the workflow.
Define the Profile Event trigger node
At this stage, you configure the workflow to be triggered by a client.removePoints event.
-
As the first node of the workflow, add Profile Event. In the configuration of the node:
-
From Choose event dropdown menu, choose
client.removePointsevent. -
Click the + where button, from the Choose parameter dropdown menu, choose promotionUuid.
-
From the Choose operator dropdown, choose Equal (String).
-
In the next field, type the UUID of the promotion that you created earlier.
-
Confirm by clicking Apply.
Define the Generate Event node
At this stage, an event is generated which is then used to exclude this profile from the segmentation of customers who did not pick up a coffee on this day.
- As the second node of the workflow, add Generate Event.
- In the Event name, enter
subscription.status. - In the Body section, define the parameters of this event. In this case it is:
{"segment_enabled": "0"}This removes the customer from the segment of customers eligible for a coffee on this day. - Click Apply.
Add the finishing node
-
Add the End node.
-
In the upper right corner, click Save & Run.
Create a workflow which checks the subscription status daily
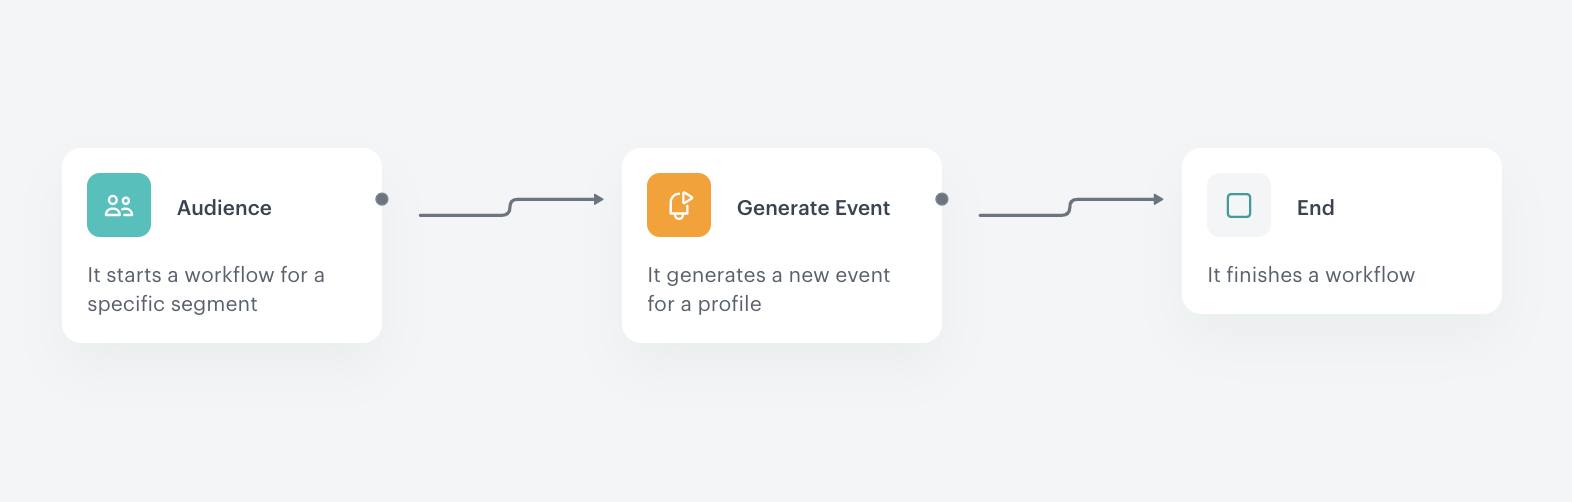
In this step create a workflow that checks the current subscription status. It is triggered by the Audience node, which starts the automation every day at 00:00. This way, customers who picked up their daily coffee and were removed from the segment of eligible customers the day before, are re-added to the segment and can use the promotion during the next day. They must also have an active subscription.
Define the Audience trigger node
At this stage, you configure the conditions that trigger the workflow.
-
As the trigger node, add an Audience node.
-
In the configuration of the node:
-
Set the Run trigger option to repeatable.
-
Set the interval to 1 per day.
-
As the time when the process starts, Choose 0:00 A.M. to make sure that the automation will check the customer status at the beginning of each day.
-
Select the time zone.
-
In Define audience, choose New Audience and click Define conditions.
-
As the first condition, from the Choose filter dropdown menu, choose the
subscription.statusevent. -
Click the + where button, choose segment_enabled, and then select Equal. As the value, enter
0 -
Set the time range to Last 1 day before 1 day.
-
As the second condition, from Choose filter dropdown menu, choose the
subscription.activeattribute and then select Equal. As the value, enter1. -
Click Apply.

Define the Generate Event node
At this stage, an event with information that the customer has an active subscription and should be added to the segment again is generated. Based on that, the customer will be able to redeem another coffee during this day.
-
As the second node of the workflow, add Generate Event.
-
In the Event name, enter
subscription.status. -
In the Body section, define the parameters of this event. In this case, it is:
{"segment_enabled": "1"}
This re-adds the customer to the segment of customers eligible for a coffee on this day.
- Click Apply.
Add the finishing node
-
Add the End node.
-
In the upper right corner, click Save & Run.
Request from cash register
After using one of the methoddescribed in the promotion section - when customer buy a coffee, the cash register sends a request about promotions (read more). If the cash register sees in the answer that customer has an active subscription, after processing the transaction, redeem the one promotion according to one of the methods above.
What’s next
This promotion can be the first step towards a more advanced marketing strategy and possibilities. While collecting your primary subscription (in this case coffee) you can for example receive a gift once in a billing period - (for example free muffin or small coffee).
Check the use case set up on the Synerise Demo workspace
You can check the configuration directly in Synerise Demo workspace:
-
workflow which generates the event informing about collecting the coffee on a specific day
-
workflow which adds customers with active subscription to the segment again
If you don’t have access to the Synerise Demo workspace, please leave your contact details in this form, and our representative will contact you shortly.