

Anniversary of the transaction
Happy customers are loyal customers. Satisfied customers are those who become advocates for your business and help you grow it by sharing their positive experiences with others. To perpetuate positive customer experiences, you need to make them feel appreciated and noticed. For example, you can use transaction history to identify individuals with a transaction anniversary on the current day and reward them with a discount code delivered in the form of a mobile push message.
This use case describes the process of creating a workflow that will send a mobile push with a promo code to a segment of customers who have a transaction anniversary on the current day.
Prerequisites
- Implement transaction events using SDK or API.
- Implement mobile push notifications in your mobile application: iOS, Android.
- Create a voucher pool.
Process
- Create an aggregate that returns the timestamp of the customer’s first transaction.
- Create a mobile push template
- Create a workflow that sends a mobile push with a discount code for the customers who made their first transaction exactly one year ago.
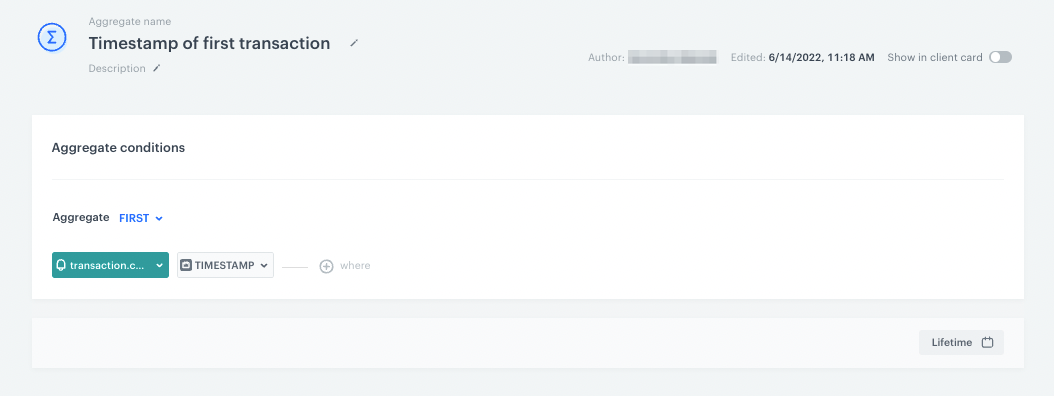
Prepare an aggregate
Build an aggregate that returns the timestamp of the customer’s first transaction.
- Go to
 Analytics > Aggregates > New aggregate.
 - Enter the name of the aggregate.
- As the type of the aggregate, select First.
- Select the transaction.charge event.
- As the event parameter, select TIMESTAMP.
- Set the period from which the aggregate will analyze the event to Lifetime.
- Save the aggregate.
Create mobile push template
- Go to Communication > Mobile Push > Templates.
- You can use the template from the folder or create your own one using the mobile push code editor.
To use the template, click New Template. - Choose what type of message you want to create. In our case it’s Simple Push.
- Choose how you want to create a mobile push message. In this use case, we will use Visual Builder.
- Create your mobile push message according to your business needs. For more information on creating a simple mobile push, visit our User Guide.
To add a voucher code in the form of the barcode, add the following insert:
{% vouchervar id=uuid_of_voucher_pool  %}
{% barcode code= {{voucher_result}}, gray=true, type=barcode_type, hrp=BOTTOM %}
{% endvouchervar %}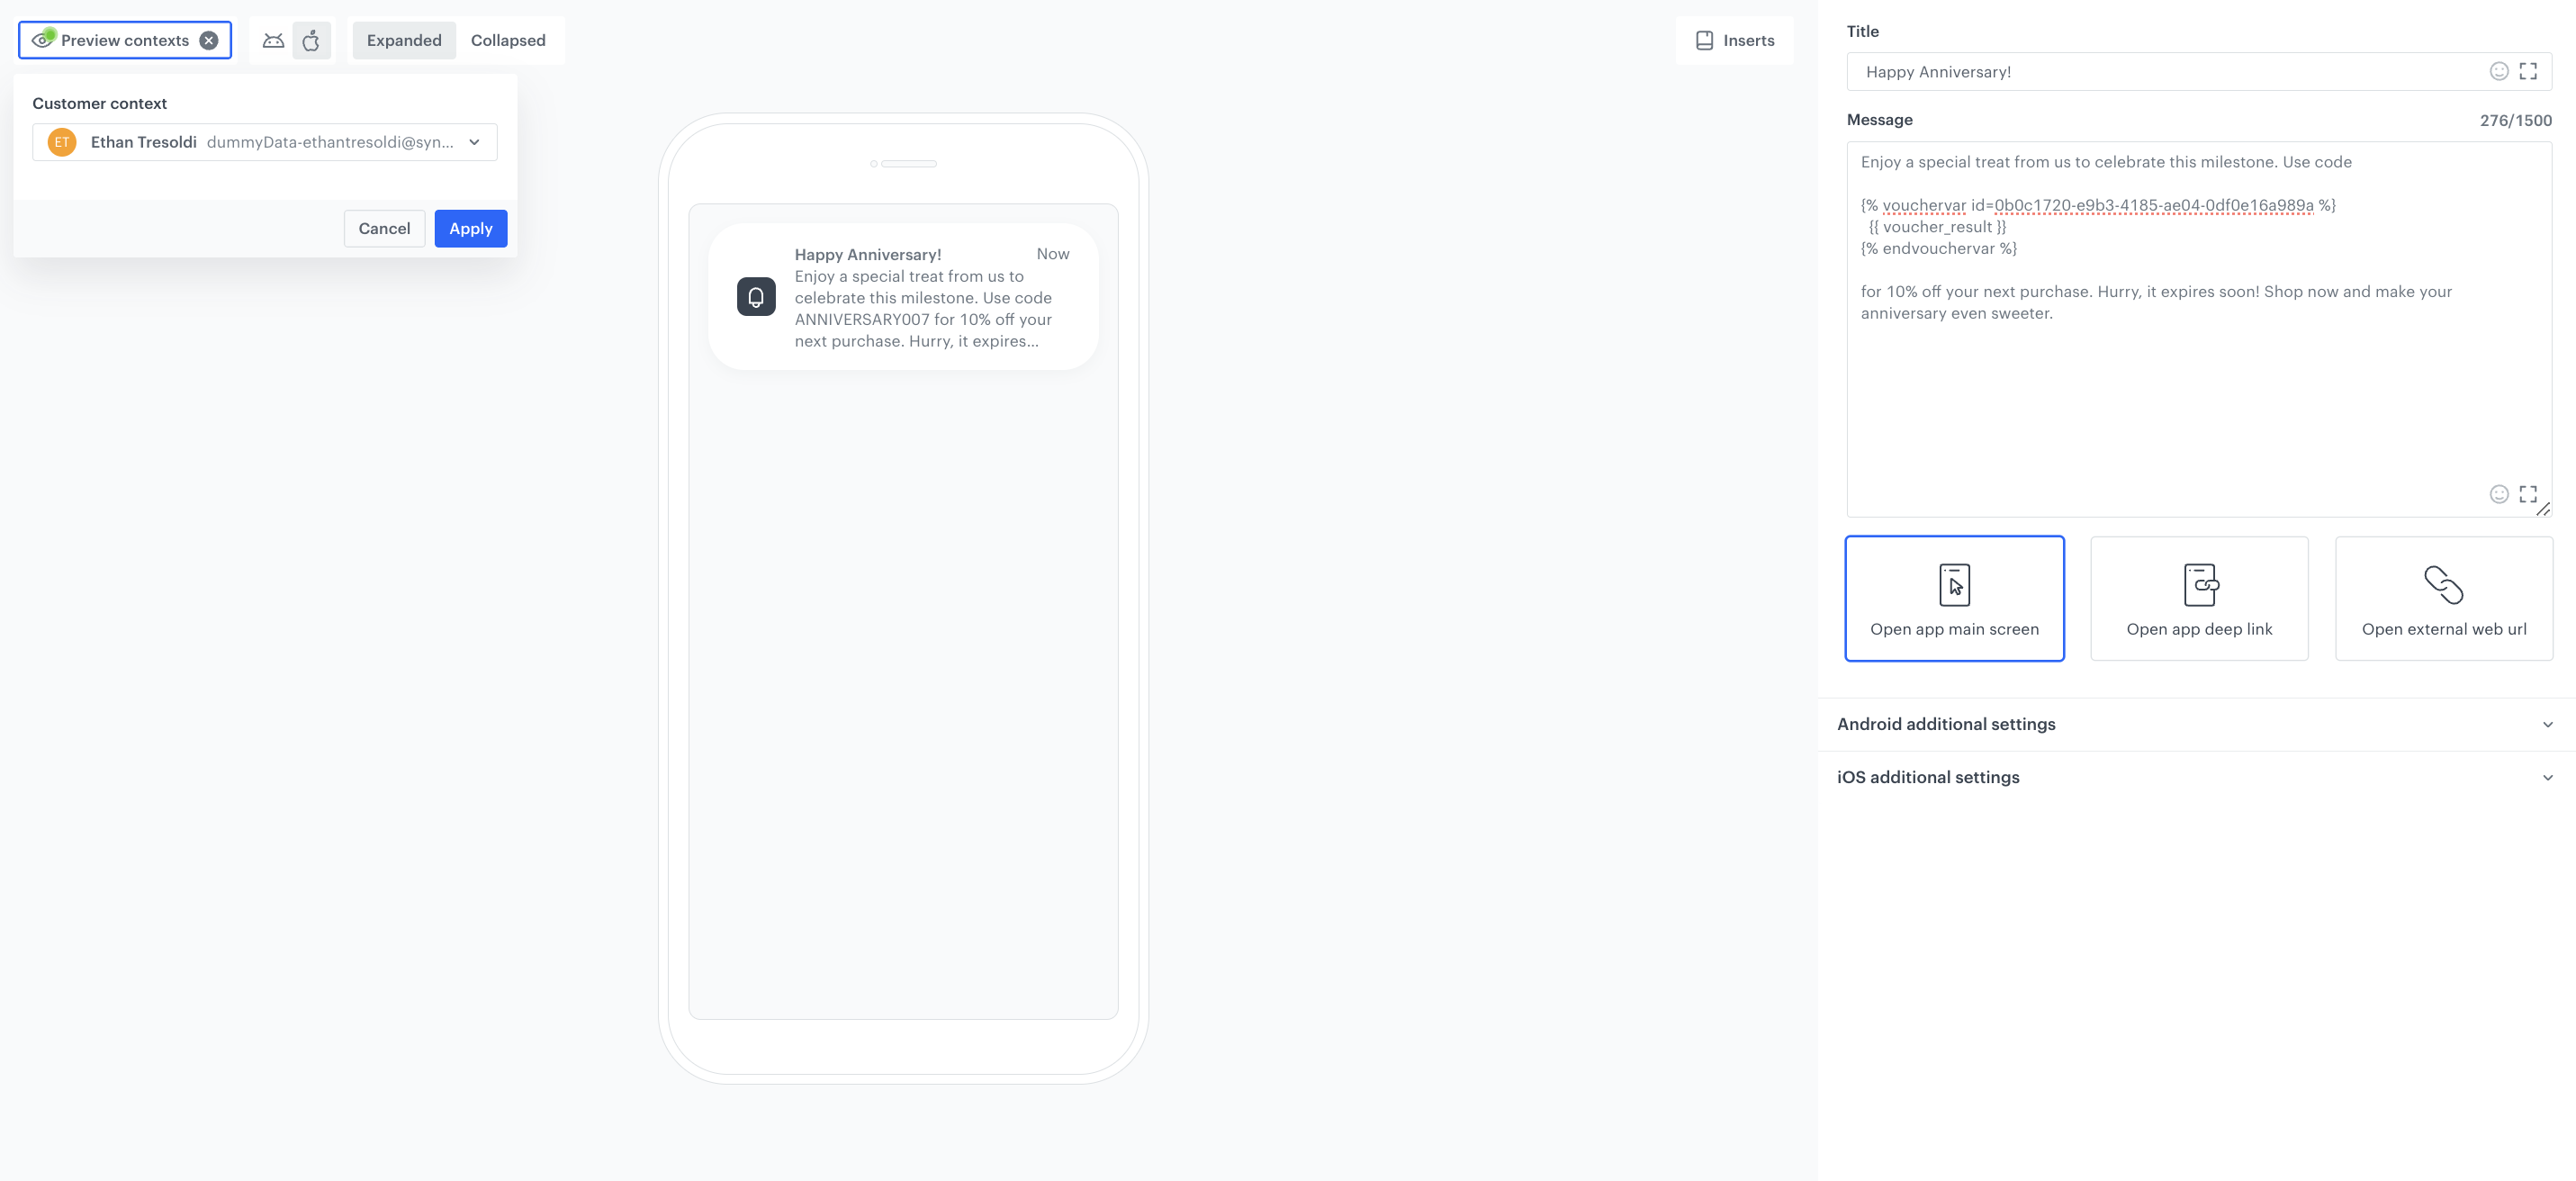
Create a workflow
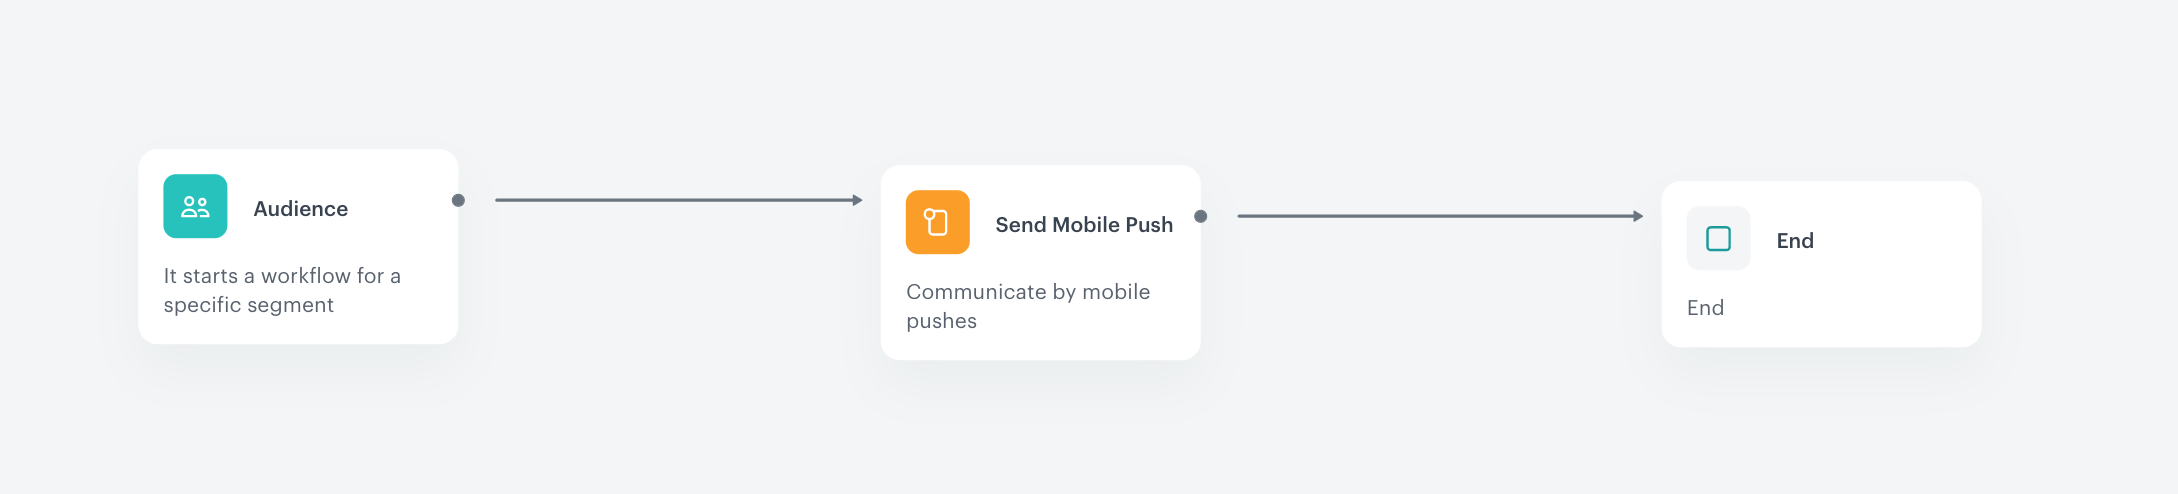
In this part of the process, create a workflow that will manage mobile push notifications with a promo code for customers with an anniversary of transaction. The mobile notifications will be sent once a day to the segment of customers whose transaction anniversary falls on the current day.
- Go to Automation > Workflows > New workflow.
- Enter the name of the workflow.
- As the first node of the workflow, add Audience. In the configuration of the node:
- Select New audience and Define conditions.
- From Choose event dropdown menu, select the aggregate created in the previous step.
- From the Choose operator dropdown menu, select Date > Current date > Matches current day.
- From Choose filter dropdown menu, select the aggreagate.
- From the Choose operator dropdown menu, select Date > Current date > Matches current month.
- From Choose filter dropdown menu, select the aggreagate.
- From the Choose operator dropdown menu, select Date > Current date > Matches current year.
- In the condition Matches current year define the attribute Contacts not matching.
- Confirm your audience settings by clicking Apply.
- Confirm by clicking Apply.
- As the next node, add Send Mobile Push. In the configuration of the node:
- Define the Template type.
- Select the Push template you have created.
- Confirm by clicking Apply.
- Add the End node to finish the workflow.
- Set a workflow capping where each customer can run a workflow once every 12 months. In the configuration of the Capping:
- Define Limit as
1. - Define the Time to
12 month. - Confirm by clicking Apply.
- Define Limit as
- To run the workflow, click Save & Run.
Check the use case set up on the Synerise Demo workspace
You can check the configuration of each step from this use case in our Synerise Demo workspace:
If you don’t have access to the Synerise Demo workspace, please leave your contact details in this form, and our representative will contact you shortly.