
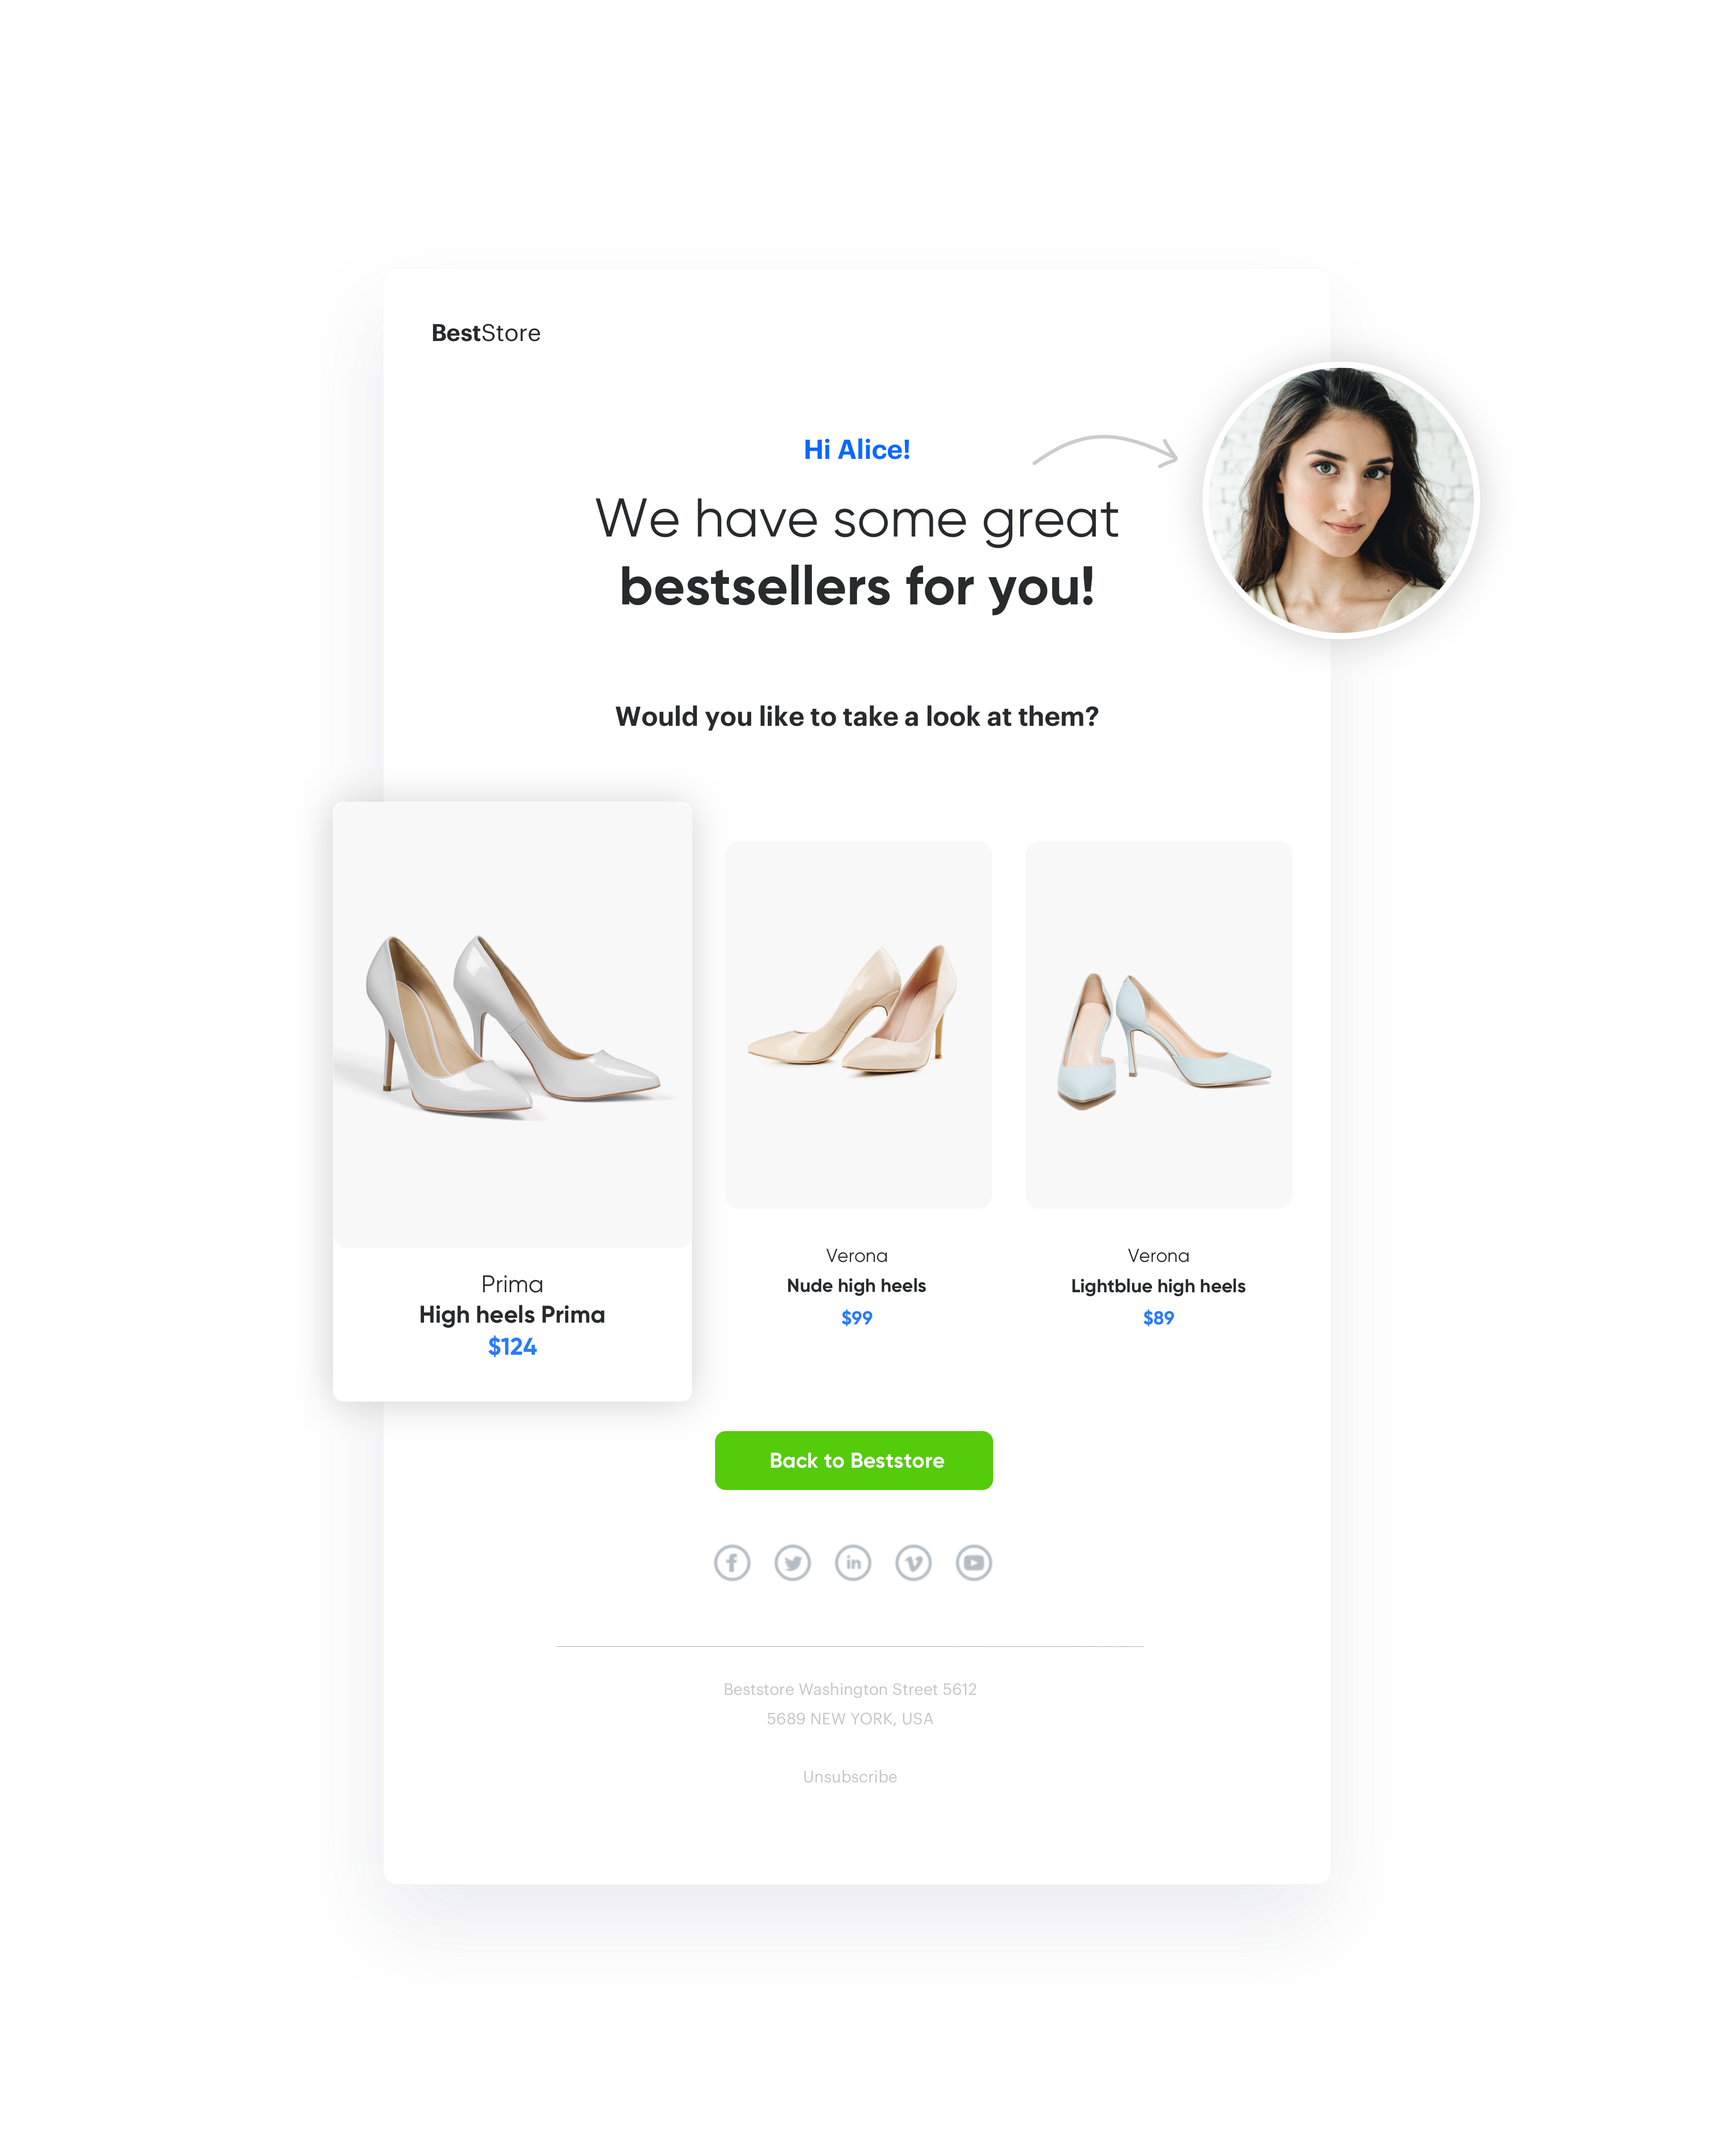
Email with top products
Sometimes your customers are not sure what they are looking for. Help them to decide by sending the best-selling items - promote them further in your communication. When people see the bestseller label on your product, they’ll feel more inclined to buy it over another items offering in the same category. It is called “purchase pressure.” Some buyers go straight to the bestseller list to see what is popular now.
You can promote your bestsellers among your customers. You can dynamically add to this email all bestsellers from all categories or just from specific category, often visited by customers.
Examples of use - Retail industry
Challenge
A client from the retail industry prepared a -20% summer sale for the entire collection. This client have sent an email with information about the discount to half of the customers. The second half received an email with a discount and several best-selling items. The email with bestsellers had better results.
Results
- 2,3% CTR for email with bestsellers
- 1,8% CTR for email only with discount
Prerequisites
To be able to implement this use case, you must:
- Implement a tracking code.
- Upload a product feed.
- Configure AI recommendations.
- Create transaction events.
- Configure email account.
- Upload subscriber’s database.
Process
To create an email with top products, perform the steps in the following order:
- Configure AI recommendations with top products.
- Create email template with previously created recommendations.
- Create a workflow.
Create AI recommendations with top products
To be able to recommend items from the top category in various communication types, first you need to initiate the model training for the item feed from which you want to recommend your items.
- Go to Settings > AI Engine Configuration > Add feed.
- Select the type of the feed.
Tip: We recommend using Google Merchant feed due to the size limits for XML files imported to catalogs.
- After you add the feed, it’s added to the list.
- Double-click the feed on the list of feeds.
- In the Recommendation models section, select top products.
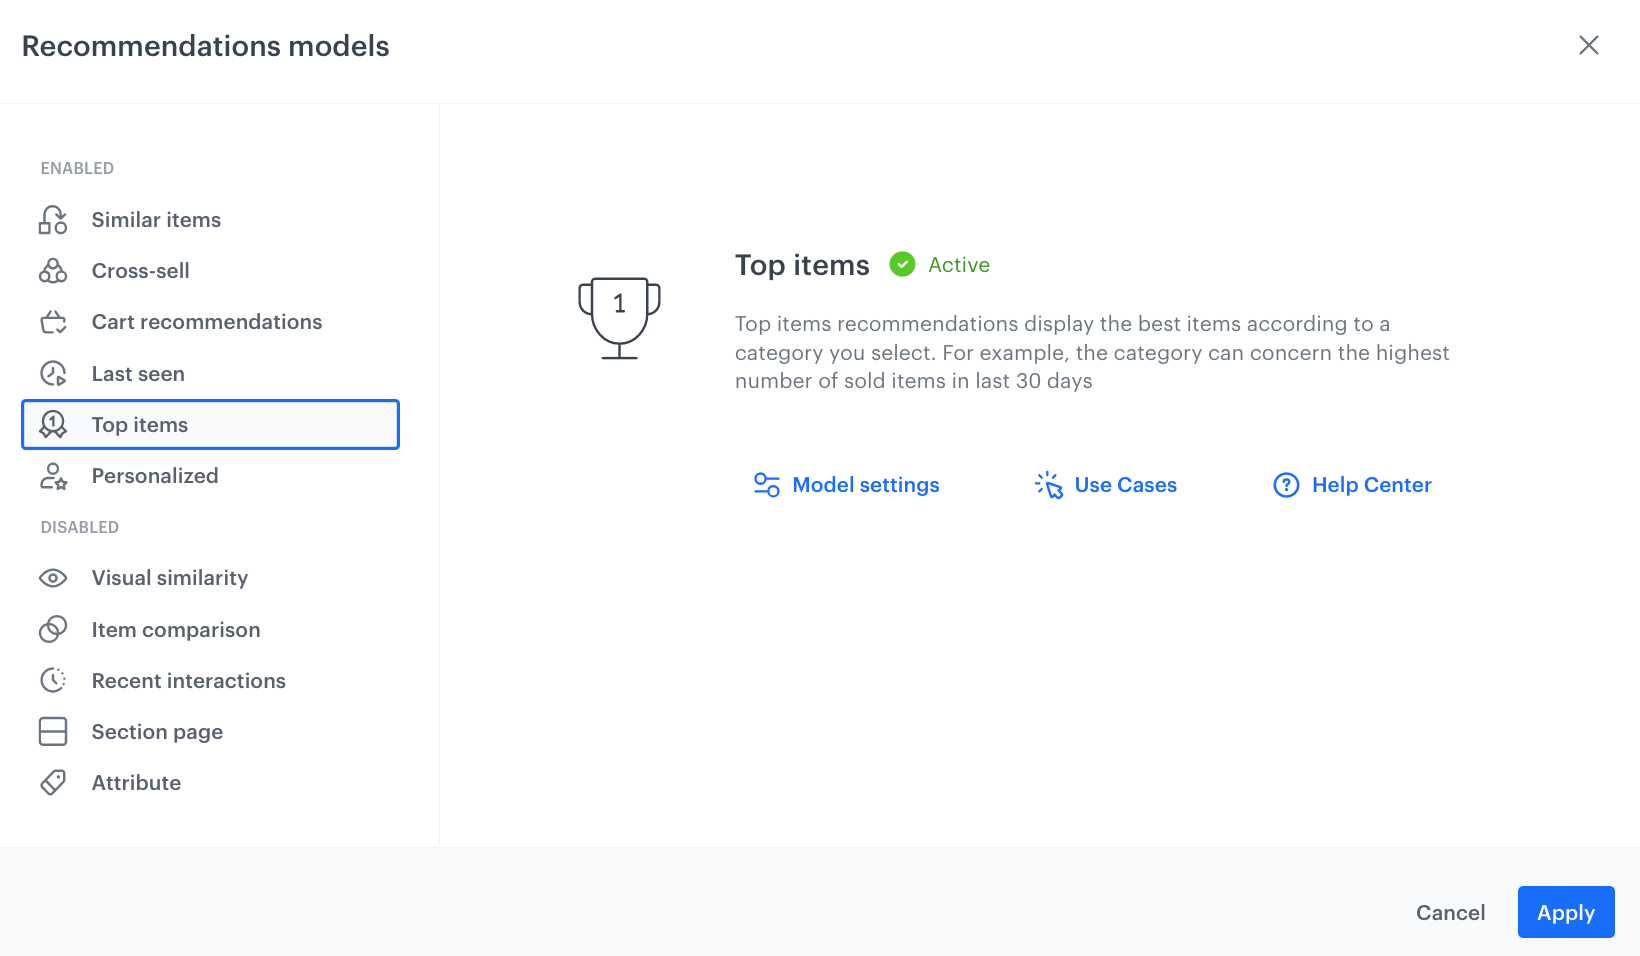
Top products in recommendation module - In the Items section, define the type of items to be included in the recommendation by using filters.
- You must choose Minimum and Maximum number of items which the recommendation frame includes.`
- Use elastic and static filters to select items to your recommendation frame.
- In the Additional settings section, you have to influence the arrangement of items in the recommendation. More information is available here.
Important:
Items section requires you to define more details about your recommendation. Obligatory choose **Min.** and **Max.** number of products which user has to get, and in **Sorting** define metric which has to be used to find products to the message.
- After saving the recommendation, get the ID of the message.
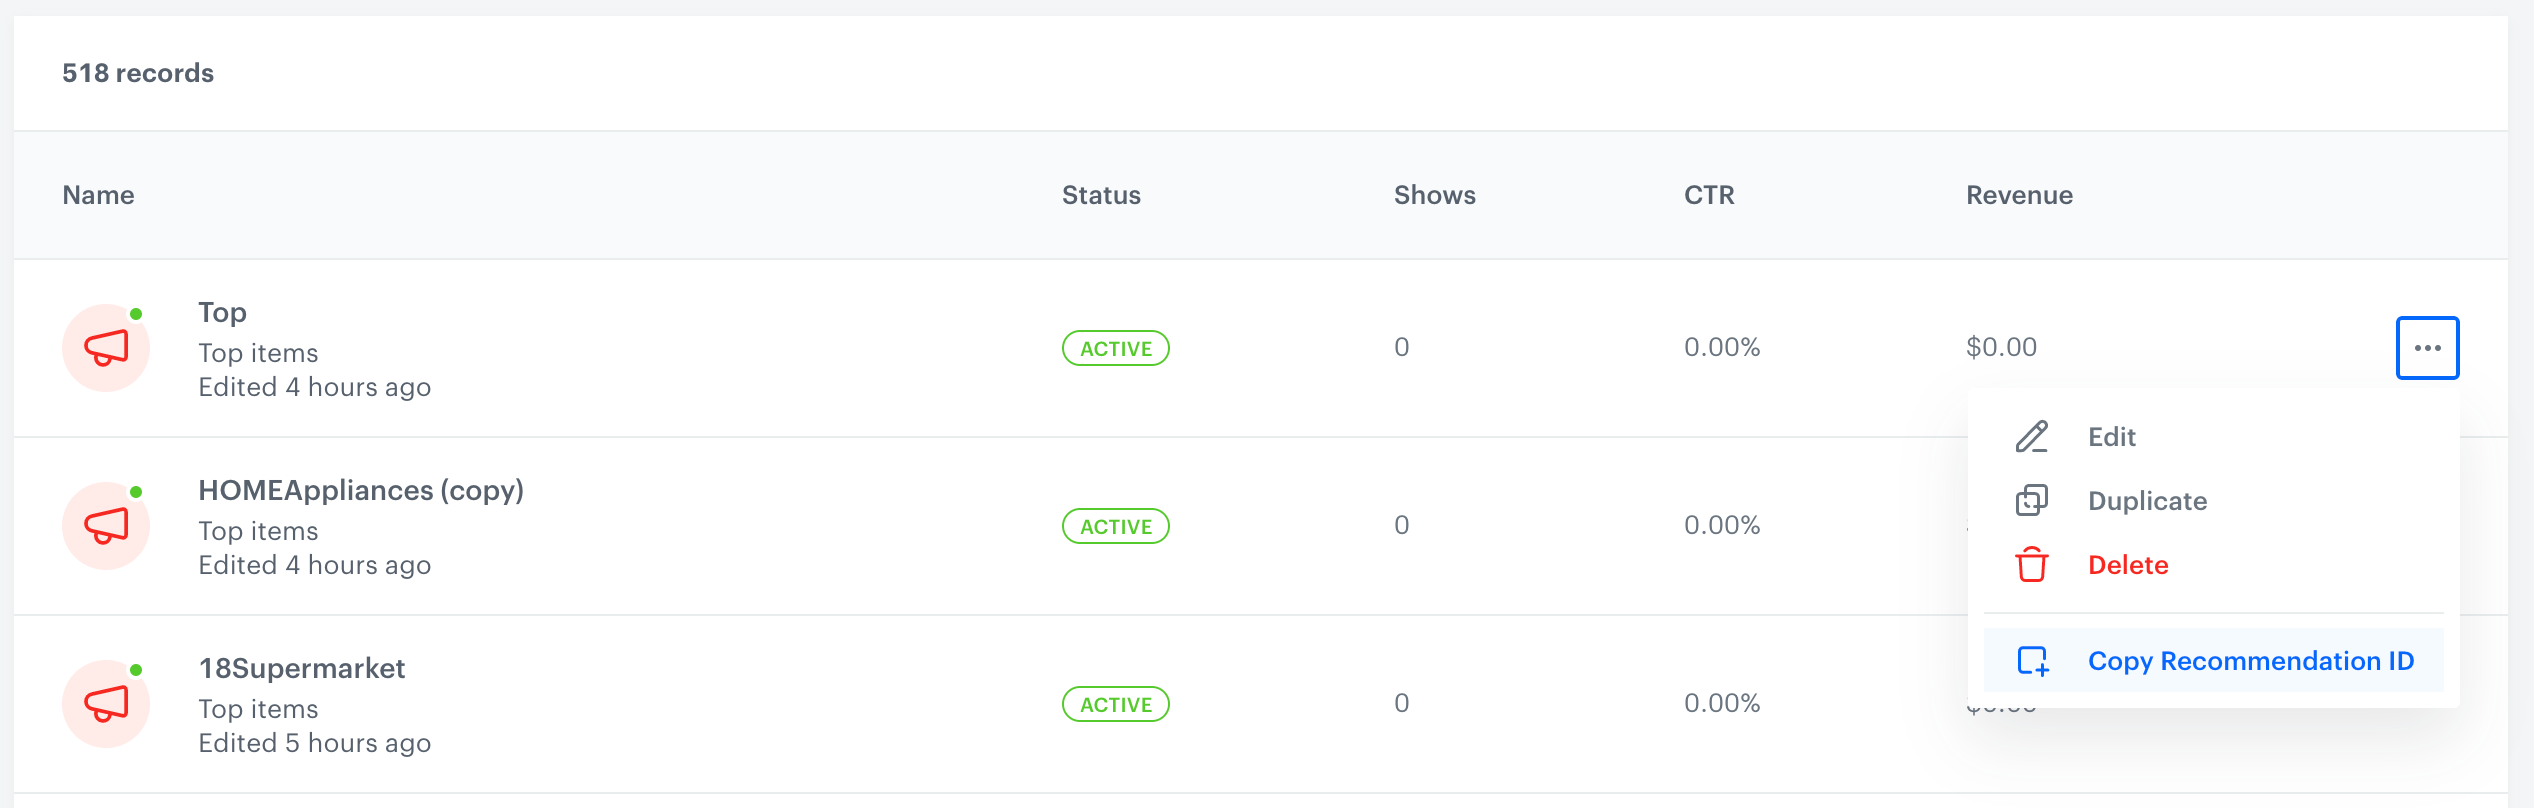
List of email recommendation - Save your recommendations.
Create email template
- Go to Communication > Email > Templates and add new template.
- Prepare your email message, according to your business needs.
- Using Inserts choose previously created recommendations from the list and add them to your template as special code with ID of your recommendations.
- Save your template.
Create a workflow
In this use case, configure an email communication that will reuse the content of the recommendation you created in the previous step. While configuring the email, you must select a group of customers, create the content of the email and set up the final setting.
Select the audience of the email message
Select the customers who will get the email with the top selling items.
- Choose the customers in segmentation or create a new segment directly in the email message.
- Choose users who will get email.
Create content
After selecting the email recipients, create content.
-
Select the email account from which the email will be sent.
-
Prepare the subject of the email.
-
Click Create message and built the template of your email. To include the top item recommendations, use the following Jinjava code and your own CSS. Let’s look at how to prepare the appropriate jijnava code.
Check the Jinjava code<!-- Opening the tag that retrieves the value from one recommendation prepared in point 1--> {% recommendations3 campaignId=xxx %} for loop below: <!-- In the section {% for r in recommended_products3 %} a {% endfor %} there is access to all variables from a given object (products here) - which parameters you add to the template depends on you. --> {% for r in recommended_products3 %} <!-- {{ r.itemId }} {{ r.title }} {{ r.imageLink }}{{r.price.value}}{{r.salePrice.value}} - parameters taken from the recommendation. The itemId is a standard name, but others (like category, price, salePrice, title, imageLink) only depend on names defined in the feed--> {{r.itemId}} {{r.title}} {{r.imageLink}} {{r.price.value}} {{r.salePrice.value}} {% endfor %} <!-- Closing of the tag that gets the value from the recommendation prepared in point 1 --> {% endrecommendations3 %} -
Optionally, add the B variant of the template which will not contain the top product.
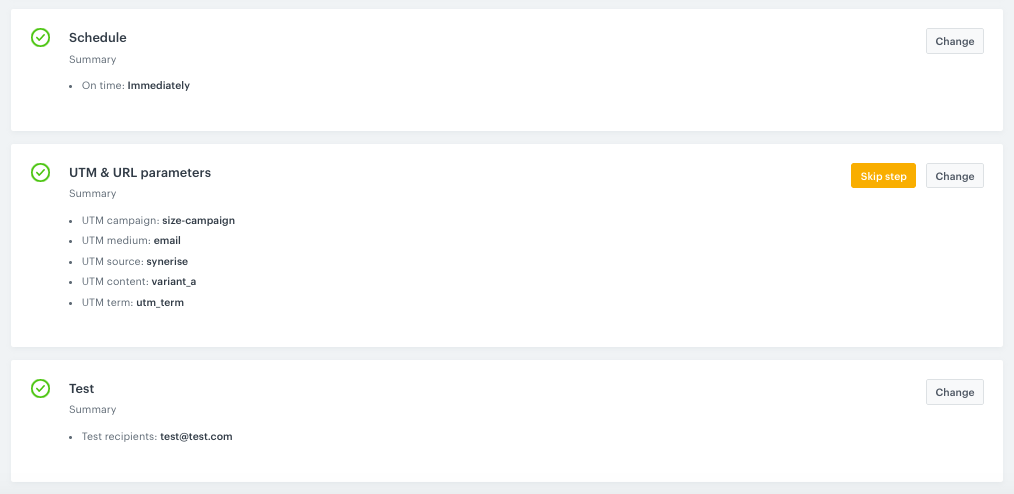
Prepare the final settings
- Add the title of the email.
- In the Schedule tab, decide when your email is sent.
- In the UTM & URL parameters section, add the parameters to track the email performance.
- Send tests of your message to verify if the content of the email is displayed correctly.
Check the use case set up on the Synerise Demo workspace
Check the AI recommendations settings and email campaign directly in Synerise Demo workspace.
If you don’t have access to the Synerise Demo workspace, please leave your contact details in this form, and our representative will contact you shortly.