
Content personalization in an external tool on the example of e-point CMS
Personalization refers to the process of tailoring experiences, products, and services to the unique needs and preferences of individual customers. By using large amounts of data and technology to analyze it accurately, we can gain an understanding of each cusotomer’s behavior, preferences, and characteristics. Such knowledge allows companies to deliver an engaging and valuable personalized experience to each customer.
Implementing personalization on a website can bring many benefits. First, it can improve the customer experience by providing personalized content and recommendations that are tailored to each customer’s interests and preferences. This can lead to increased engagement and loyalty as customers feel more valued and understood by the business.
Second, personalization can also lead to increased revenue by driving more sales and higher customer lifetime value. By providing personalized product recommendations and offers, companies can encourage customers to make repeat purchases and continue to engage with the brand over time.
Third, personalization can also lead to cost savings by reducing the need for broad, one-size-fits-all marketing campaigns. By targeting specific customer segments with personalized messages and offers, companies can achieve higher conversion rates and lower customer acquisition costs.
This use case describes the process of sending customers segmentations using tracking code and API to an external tool - CMS. Based on the acquired customer segmentations created in Synerise, we can tailor content and offers to each customer group to meet their needs and expectations.
Prerequisites
- Implement a tracking code into your website.
- Generate a Workspace API key with the following permission:
ANALYTICS_BACKEND_SEGMENTATIONS_LIST_READ
Process
In this use case, you will go through the following steps:
Create a segmentation
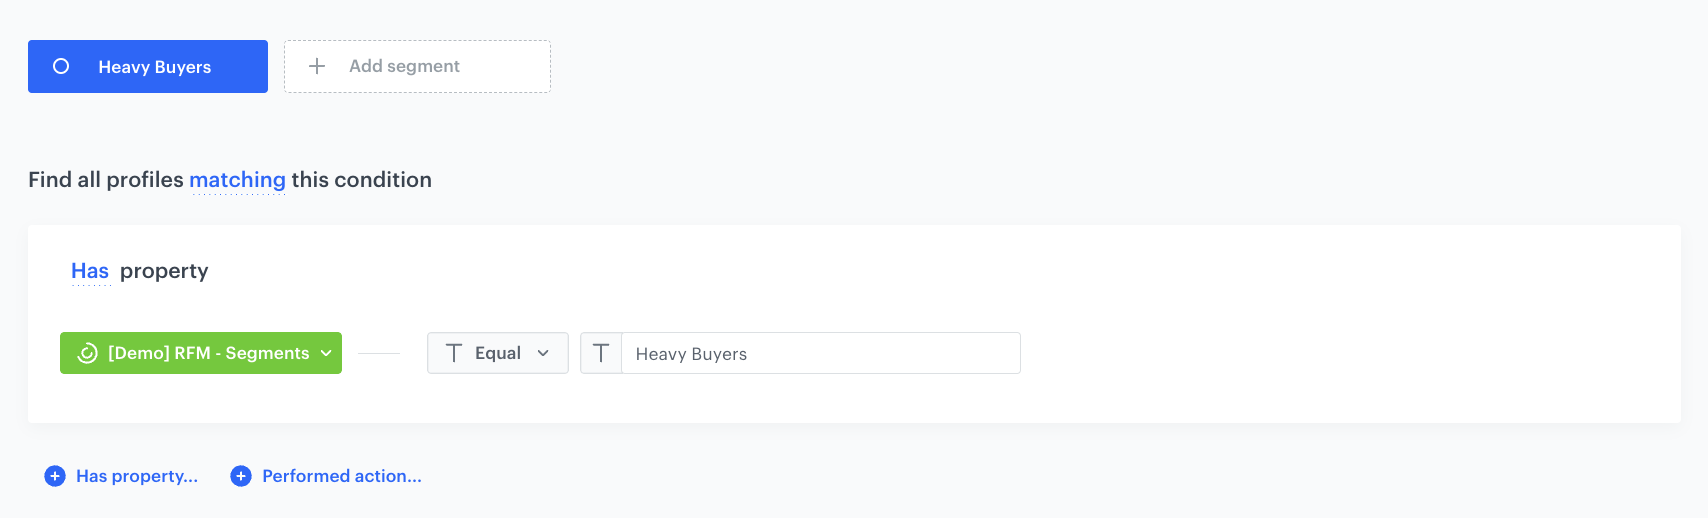
In this step, you can create any customer segmentation for which you will personalize content/offers on your site. In our case, we will create a segmentation of heavy buyers based on the RFM analysis. You’ll find a detailed process for creating the RFM analysis in this use case.
- Go to Analytics > Segmentations V2 > New segmentation.
- Enter the name of the segment.
- Choose Has property and find the RFM segmentation. For detailed steps on how to create an RFM segmentation, refer to this section of the process of creating RFM analysis.
- Select the Equal operator and in the right field enter the name of the segment that defines the heavy buyers. In our case, we type -
Heavy Buyers - Save the segmentation.
Get all segmentations for client
In this part of the process, you will get all the customer segmentations from Synerise to use them for content personalization from within your external tool - CMS in our case.
We will also provide a code sample, the task of which is to replace the title content on the page if the customer belongs to a certain segmentation. However, before implementing the code, there are a series of requests you need to perform. These requests will help determine whether the customer belongs to the segmentation that we have chosen as the condition for displaying the personalized header.
- Acquire API authorization token by using Log in as Workspace endpoint. Use it to authorize later calls to the API.
See an example of a cURL request
curl --request POST --url https://api.synerise.com/uauth/v2/auth/login/profile --header 'content-type: application/json' --data '{"apiKey":"64c09614-1b2a-42f7-804d-f647243eb1ab"}' - Get all defined segmentations by list, using List segmentations endpoint.
See an example of a cURL request
curl --request GET --url 'https://api.synerise.com/analytics/%7Bnamespace%7D/segmentations?page=SOME_NUMBER_VALUE&limit=SOME_NUMBER_VALUE&search=SOME_STRING_VALUE&sortBy=SOME_STRING_VALUE' --header 'Authorization: Bearer _YOUR_JWT_TOKEN_' - Pick which segmentations from above call response are relevant and see if the client is in them by using Check if profile in segmentations endpoint.
See an example of a cURL request
curl --request POST --url https://api.synerise.com/analytics/%7Bnamespace%7D/segmentations/check/by/%7BidentifierType%7D --header 'Authorization: Bearer _YOUR_JWT_TOKEN_' --header 'content-type: application/json' --data '{"identifierValue":"string","segmentationIds":["a8b2ed5c-c342-436f-a98e-eca642767926"]}' - Show part of your web frontend based on your segmentations.
Below we present an exemplary React code that renders component that displays a secondary title if a specific profile ID is present in an array of segmentations. Remember to communicate with the Synerise API in your backend and pass segmentations to the frontend.
function renderPersonalizedMessage(props) {
const segmentations = props.segmentations;
return (
<div>
<h1>Hello!</h1>
{segmentations.includes("a8b2ed5c-c342-436f-a98e-eca642767926") &&
<h2>Discover our new offer!.</h2>}
</div>
);
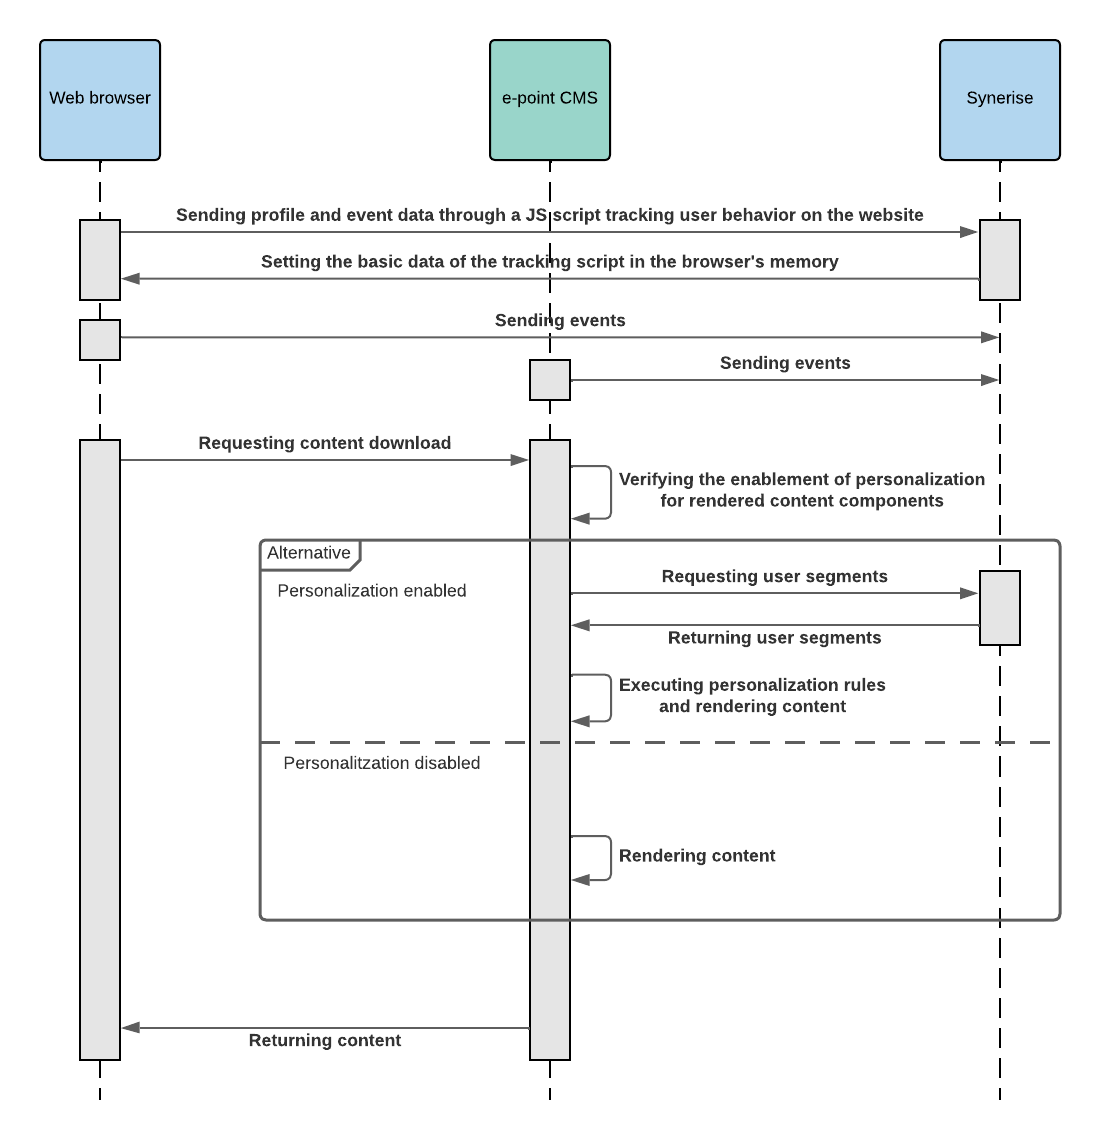
}Below you will find a sequence diagram to help you better understand the communication flow between e-point CMS and Synerise.
Explore the content configuration process in e-point CMS
Below, you’ll find screenshots from e-point CMS that demonstrate the configuration of various platform elements.
-
Below are screenshots showcasing the e-point visual builder. In the first screenshot, you can see a component created specifically for a specified customer segment.
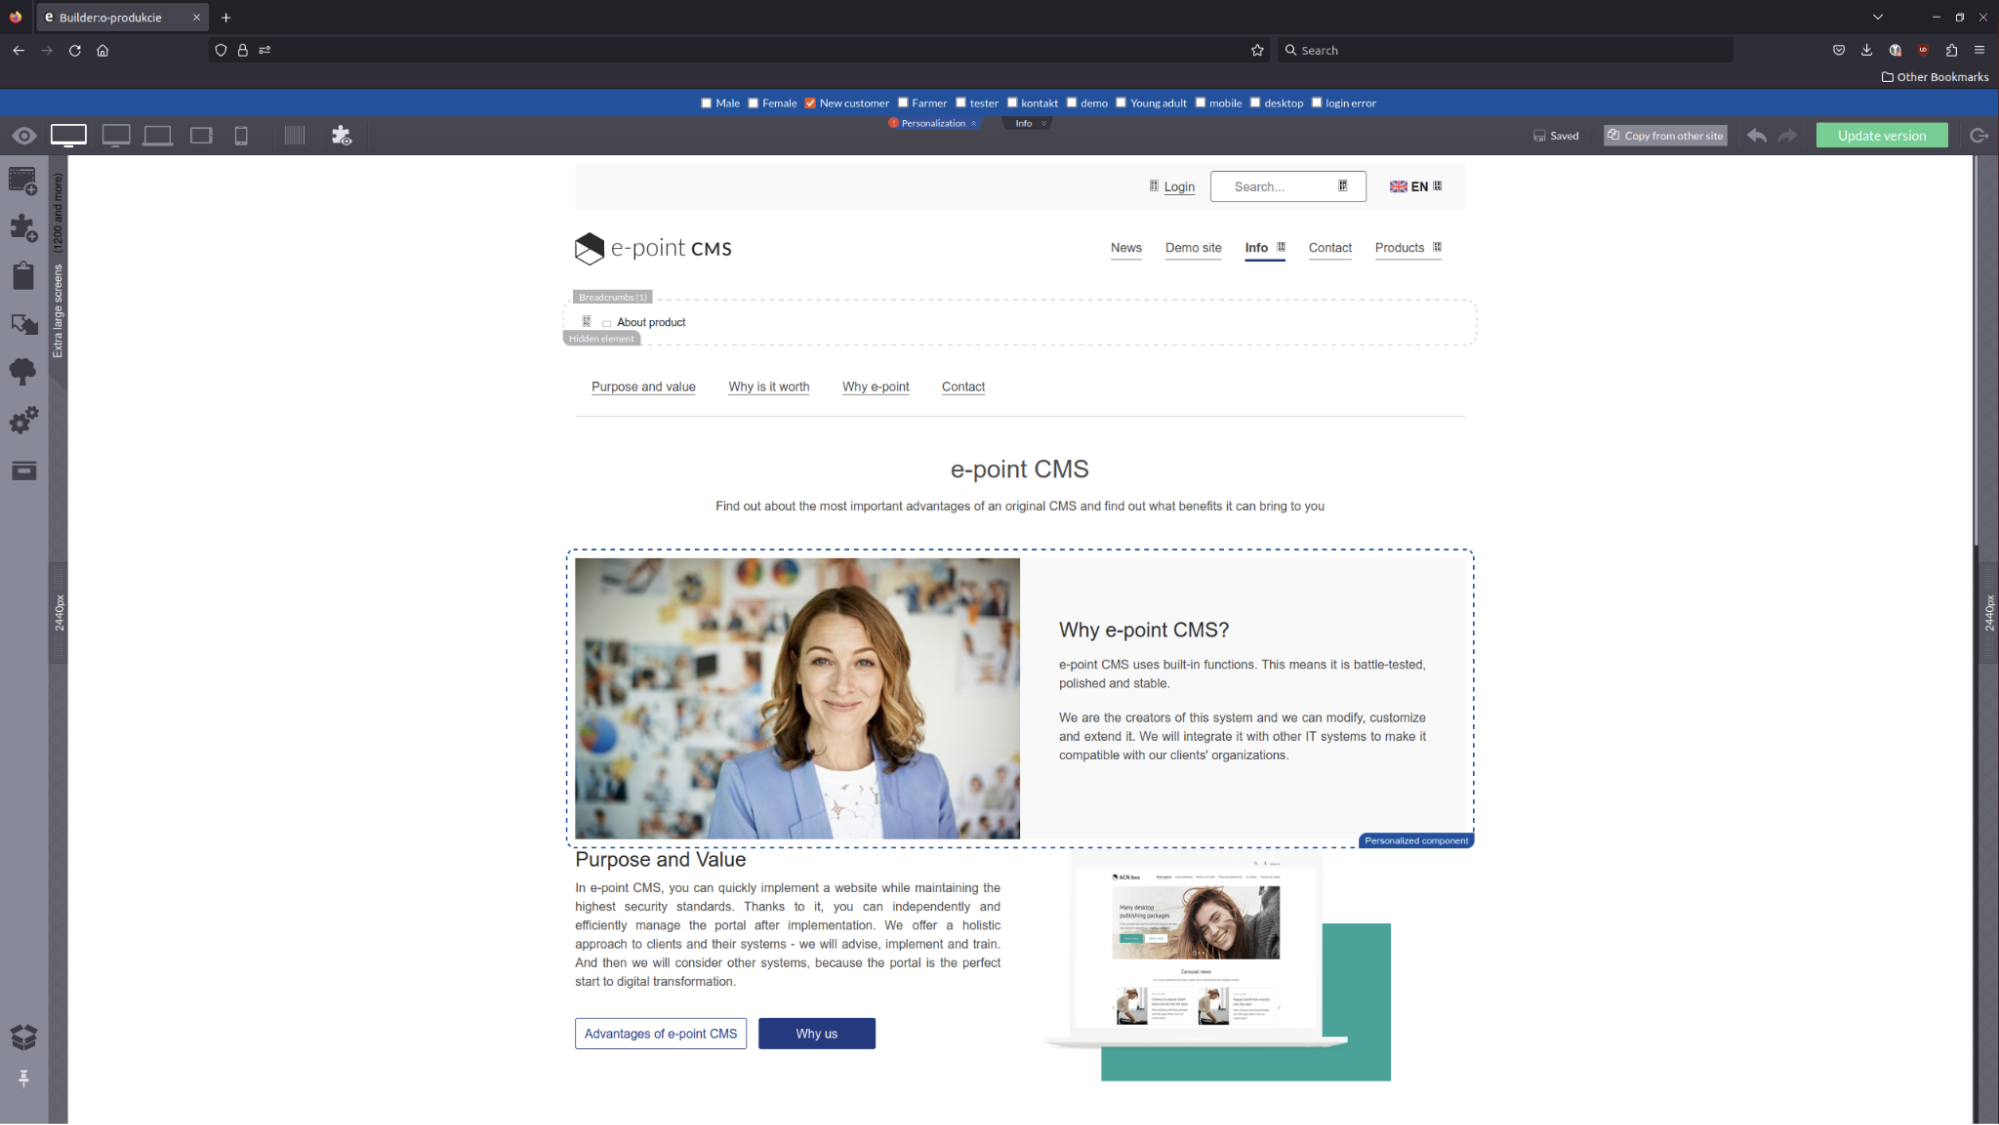
e-point CMS Visual Builder with defined component -
In the following screenshot, the same page is displayed, but the component is hidden and will only be shown to customers outside of the predefined segment.
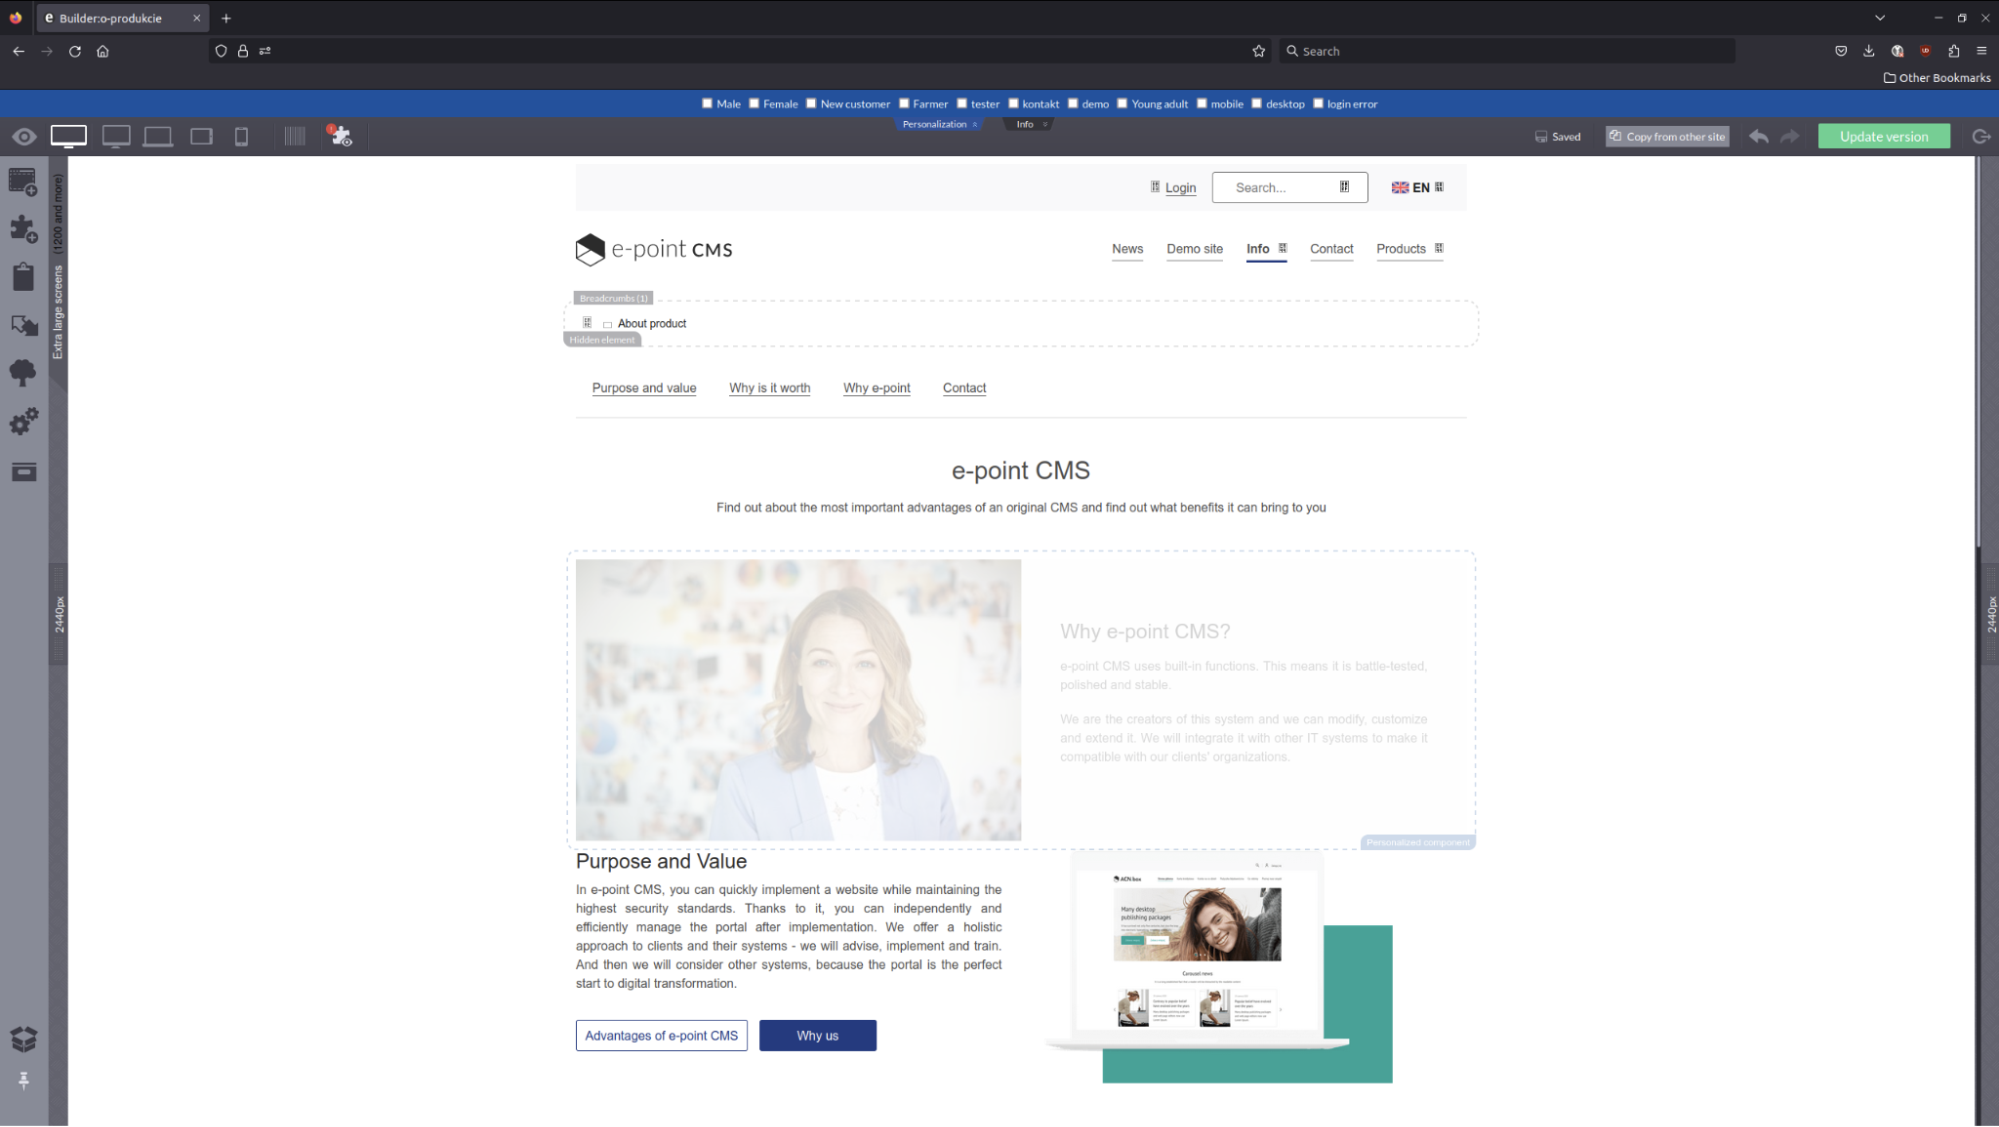
e-point CMS Visual Builder with hidden component -
The screenshot displayed below presents the configuration panel for the component.
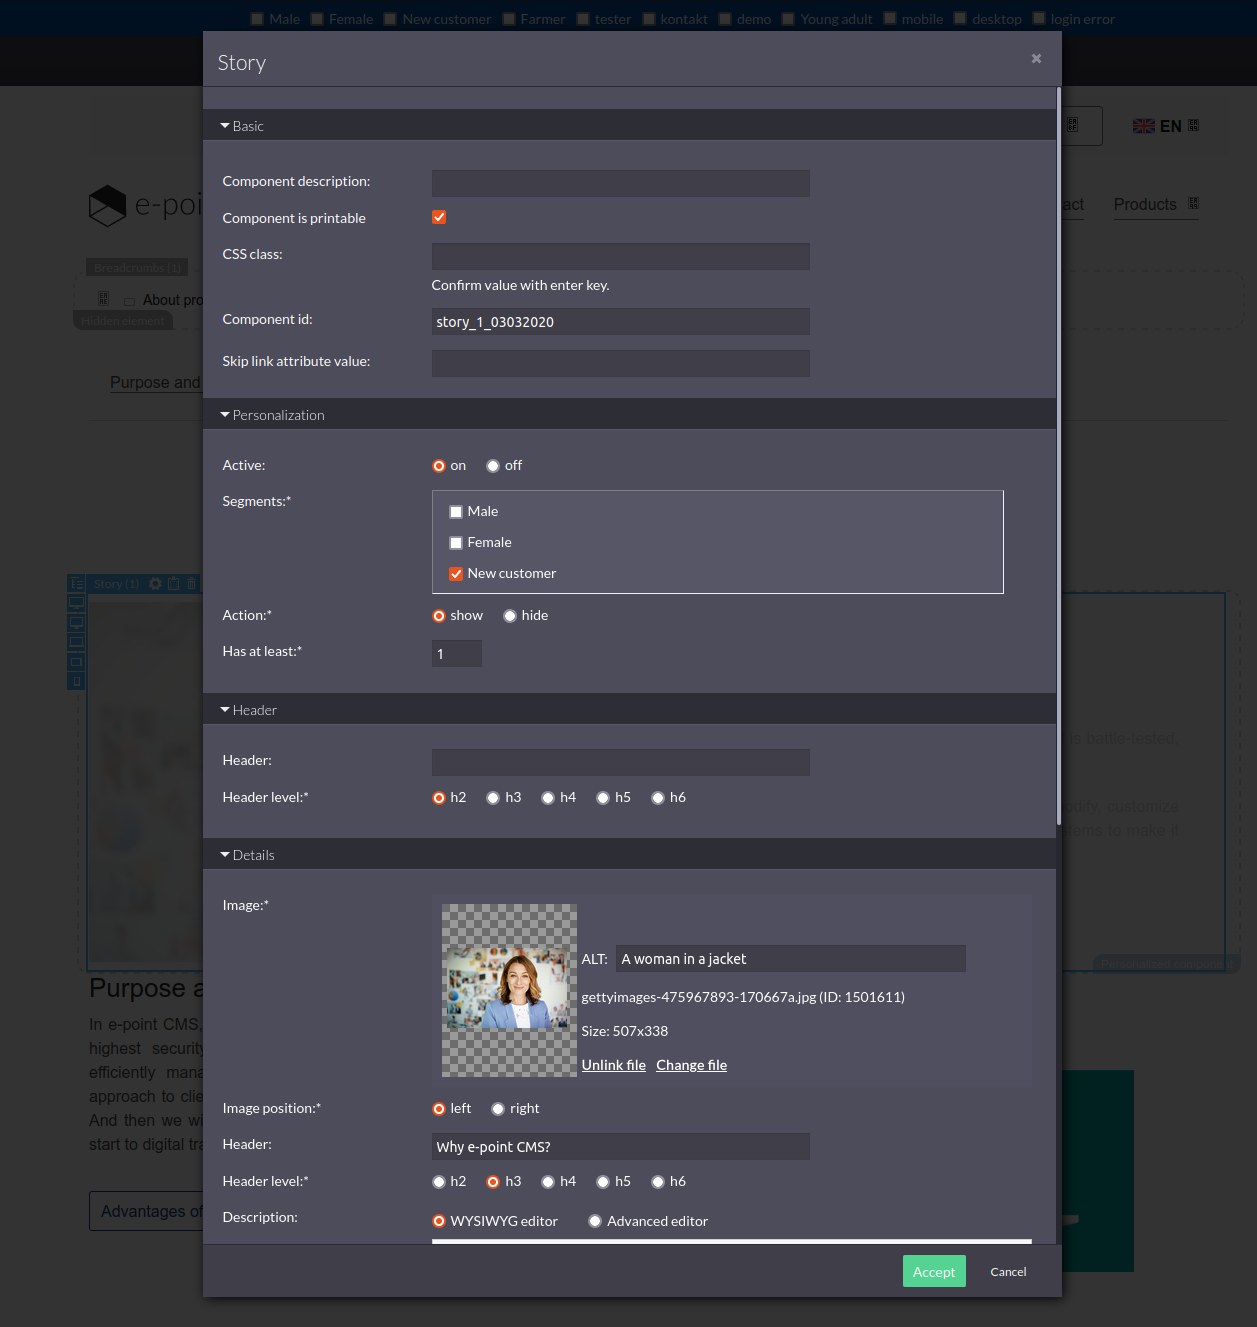
e-point CMS component configuration panel -
The screenshot below provides a view of the list of e-point CMS segmentations that were obtained from Synerise.
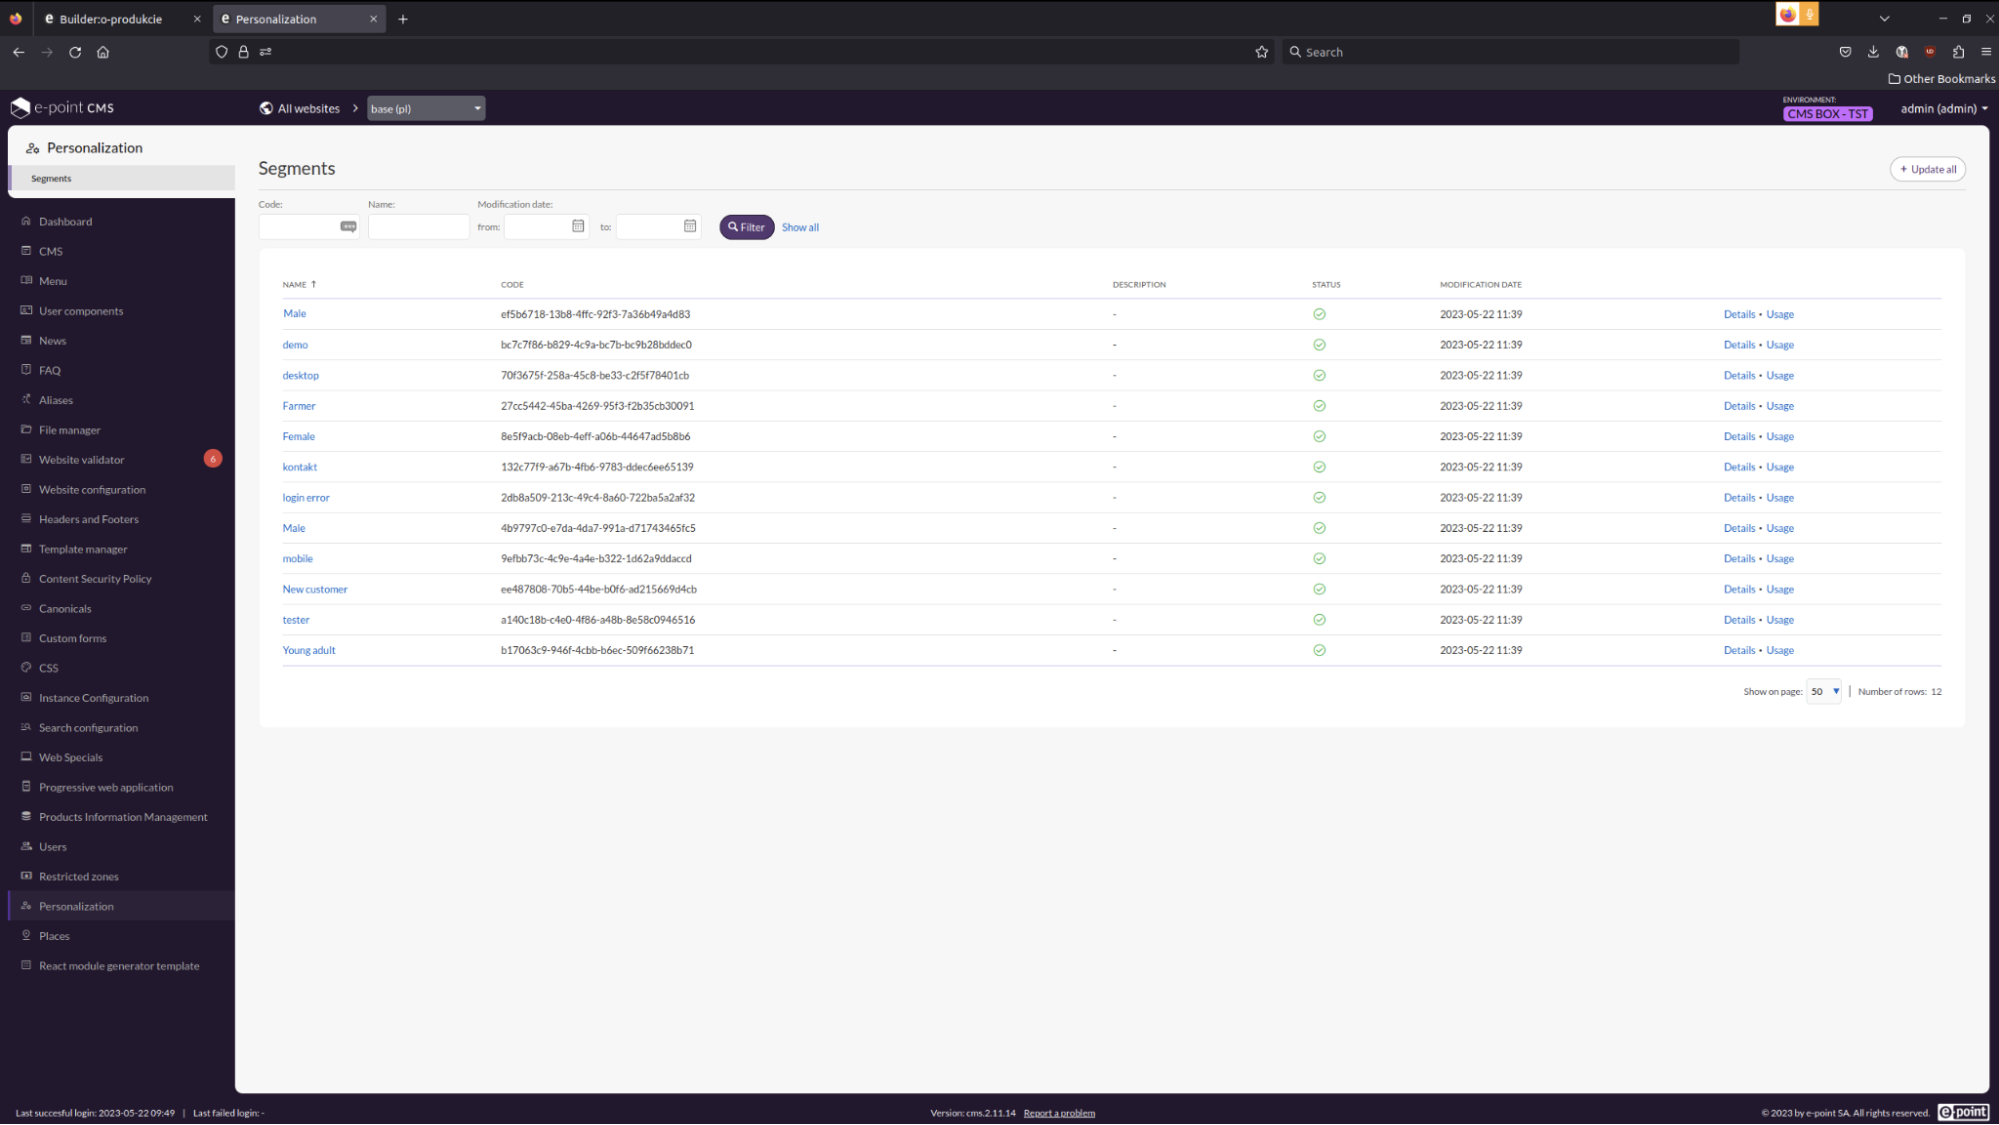
e-point CMS segmentation list
Check the use case set up on the Synerise Demo workspace
You can check the configuration of segmentation directly in Synerise Demo workspace.
If you don’t have access to the Synerise Demo workspace, please leave your contact details in this form, and our representative will contact you shortly.