
Transfer loyalty points between customers
This section introduces the concept of using rewards and loyalty points to foster customer loyalty and attract new clients to your product or service. By allowing customers to transfer loyalty points, your mobile application becomes more user-friendly and can also serve as a tool for customer acquisition.
The provided use case will help you integrate a loyalty point transfer mechanism into your mobile app. This will enrich the user experience by adding mobile push notifications for the recipients of these points. The goal is to enhance customer engagement and satisfaction, ultimately contributing to the growth of your business.
Prerequisites
- Integrate mechanism for awarding loyalty points.
For example, you can award loyalty points after transaction. In such case, create an expression that counts how many loyalty points are assigned to a customer for a transaction. Once you prepare the expression, please contact Support Team to configure materialization of loyalty points. After such configuration, every time loyalty points are assigned to a customer, thepoints.loyaltyevent will be generated in a customer’s profile with information about the number of loyalty points they received after a transaction (thepointsparameter).
Tip: Learn more about events here. - Implement mobile pushes in your mobile application: iOS, Android.
Security configuration
Before you start working with this module, if you are a Synerise customer or partner, consider reading the section about denylisting events. This natively accessible configuration will allow you to manage the restrictions in points management that may help you prevent fraud.
Process
In this use case, you will go through the following steps:
- Configure loyalty points transfer.
- Define segmentations of senders to group customers who are allowed to make a transfer.
- Define segmentations of recipients to group customers who are allowed to receive a transfer.
- Define an expression with points balance to calculate how many loyalty points the customer currently owns.
- Complete configuration.
- Implement loyalty points transfer module in the mobile app.
- Create a mobile push template.
- Create a workflow.
Configure loyalty points transfer
Define segmentations of senders
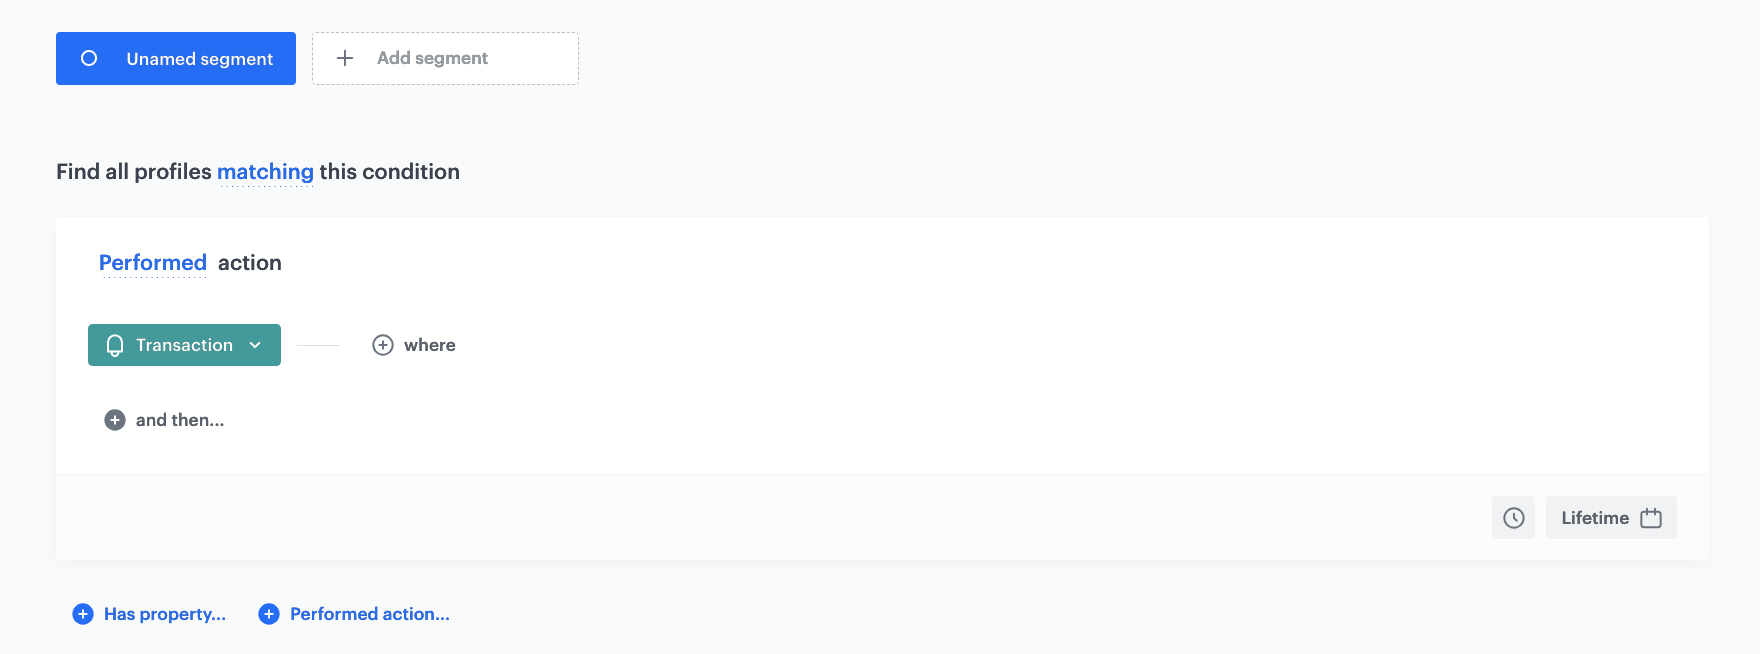
In this part of the process, create a segmentation or segmentations of people who can transfer loyalty points. In our case, we select people who made at least one transaction.
- Go to
 Analytics > Segmentations > New segmentation.
 - Enter the name of segmentation.
- From the Performed action dropdown list, select the transaction.charge event.
- Using the date picker in the lower-right corner, set the time range to Lifetime.
- Confirm the settings by clicking Save.
Important: The conditions used in the segmentation may vary depending on your business needs and loyalty program assumptions.
Define segmentations of recipients
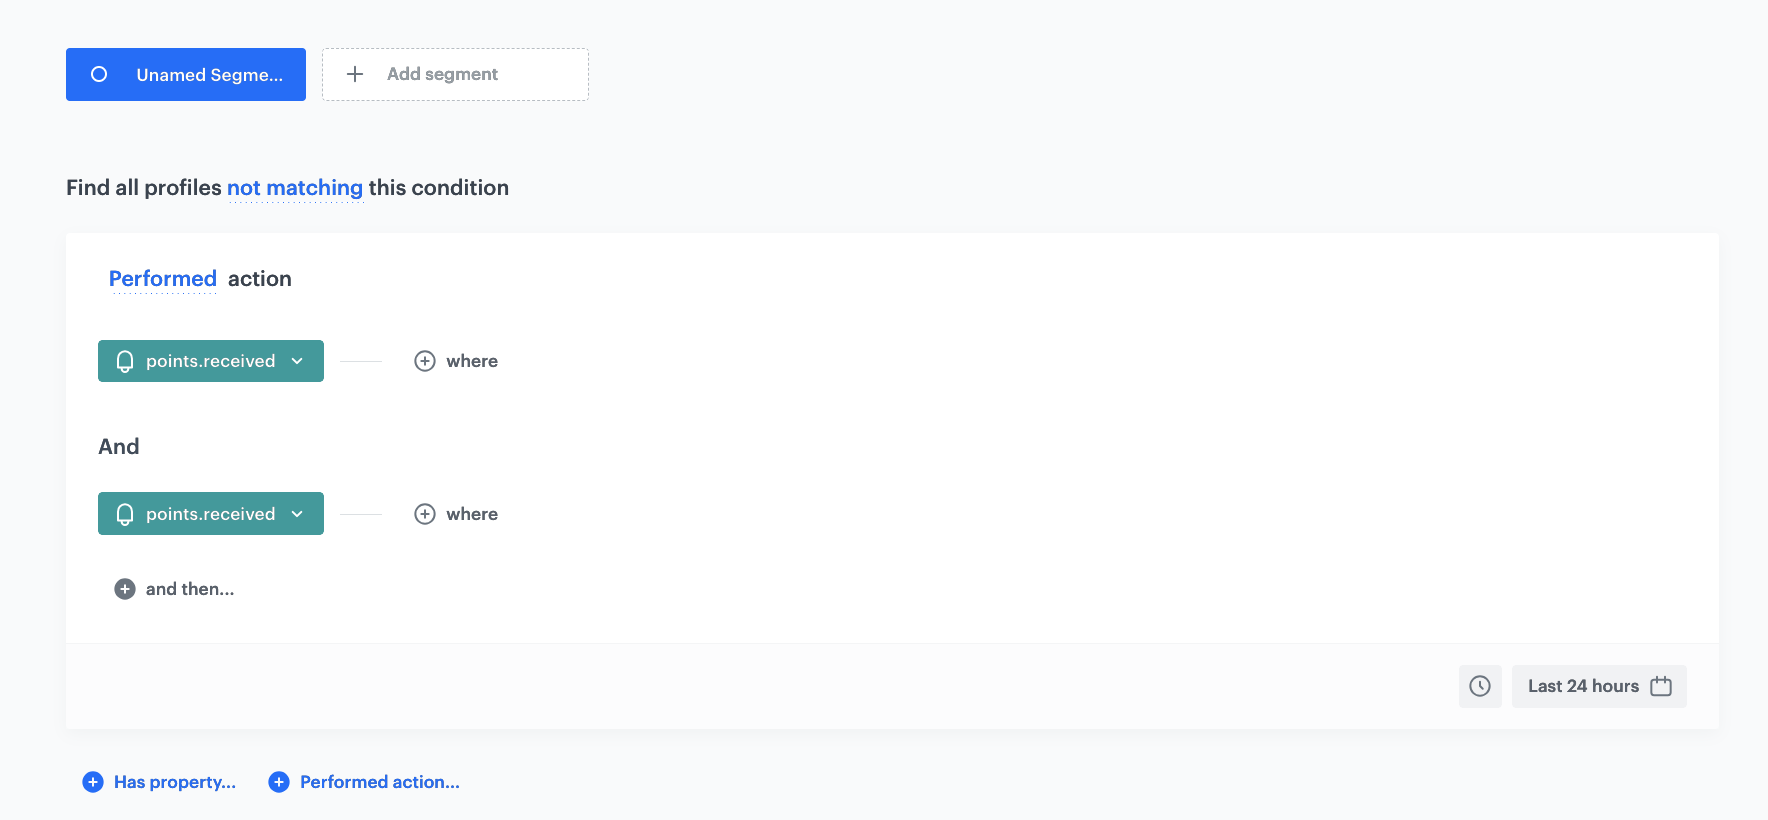
In this process, create a segmentation or segmentations of people who can receive loyalty points from other customers. In our case, we select people who received less than 2 transfers during last 24 hours.
-
Go to
Analytics > Segmentations > New segmentation. -
Enter the name of segmentation.
-
From the Performed action dropdown list, select the points.received event.
-
Click Add funnel step.
-
From the Has property dropdown list, select the points.received event once again.
-
Using the date picker in the lower-right corner, set the time range to Last 24 hours.
-
Change the Contacts matching funnel expression to Contacts not matching funnel by clicking the matching word.
Important: The conditions used in the segmentation may vary depending on your business needs and loyalty program assumptions.
Define an expression with points balance
In this part of the process, create an expression which will be used to calculate points balance for the customer. First, we will create the aggregates based on the following events:
points.loyalty(event that is sent every time the customer is awarded with loyalty points),points.received(it is sent when a customer receives points from someone),points.sent(it is sent when the customer sends points to someone).
Based on the aggregates, we will create the expression that calculates the loyalty points for every customer.
-
Define 3 aggregates that sum points from the events mentioned above.
- Go to Analytics > Aggregates > New aggregate.
- Enter a meaningful name of the aggregate.
- Set the Aggregate option to Sum.
- Click the Choose event dropdown list.
- From the dropdown list, select the
points.loyaltyevent. - From the second dropdown list, select
pointsparameter. - Using the date picker in the lower-right corner, set the time range to Lifetime.
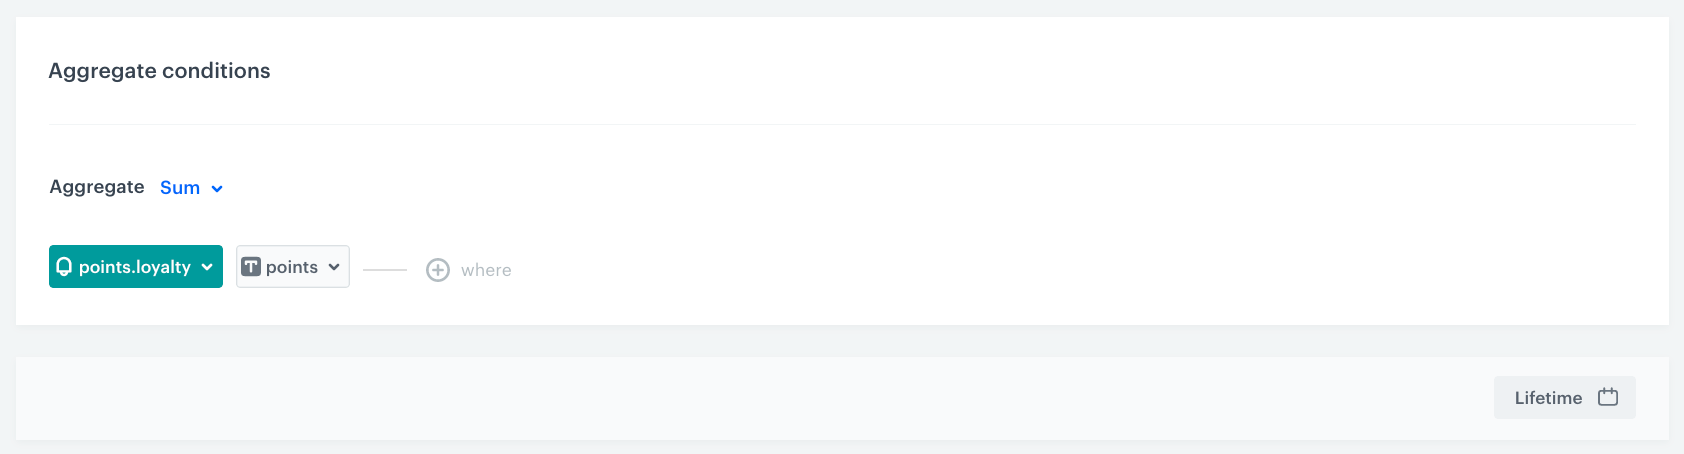
The aggregate that sums points from event points.loyalty - Save the aggregate.
- Repeat steps 1-8 for
points.receivedandpoints.sentevent.
- Go to
-
Create an expression using the aggregates created in step 1.
- Go to Analytics > Expressions > New expression.
- Enter a meaningful name of the expression.
- Leave the expression type at default (Attribute).
- Build the formula of the expression.
- Click the Select node.
- From the dropdown list, select Customer.
- Click the unnamed node that appeared on the canvas.
- Scroll down the page and click Choose attribute.
- On the dropdown list select the aggegate for
points.loyaltythat you created in step 1. - Next to the aggregate added to the canvas, click the plus button.
- Repeat steps from 1 to 6 for the aggregates with
points.receivedandpoints.sent. - Click the mathematical operator between points.loyalty and points.received node and select the brackets icon.
- Click the mathematical operator between points.received and points.sent node and select the subtraction icon.
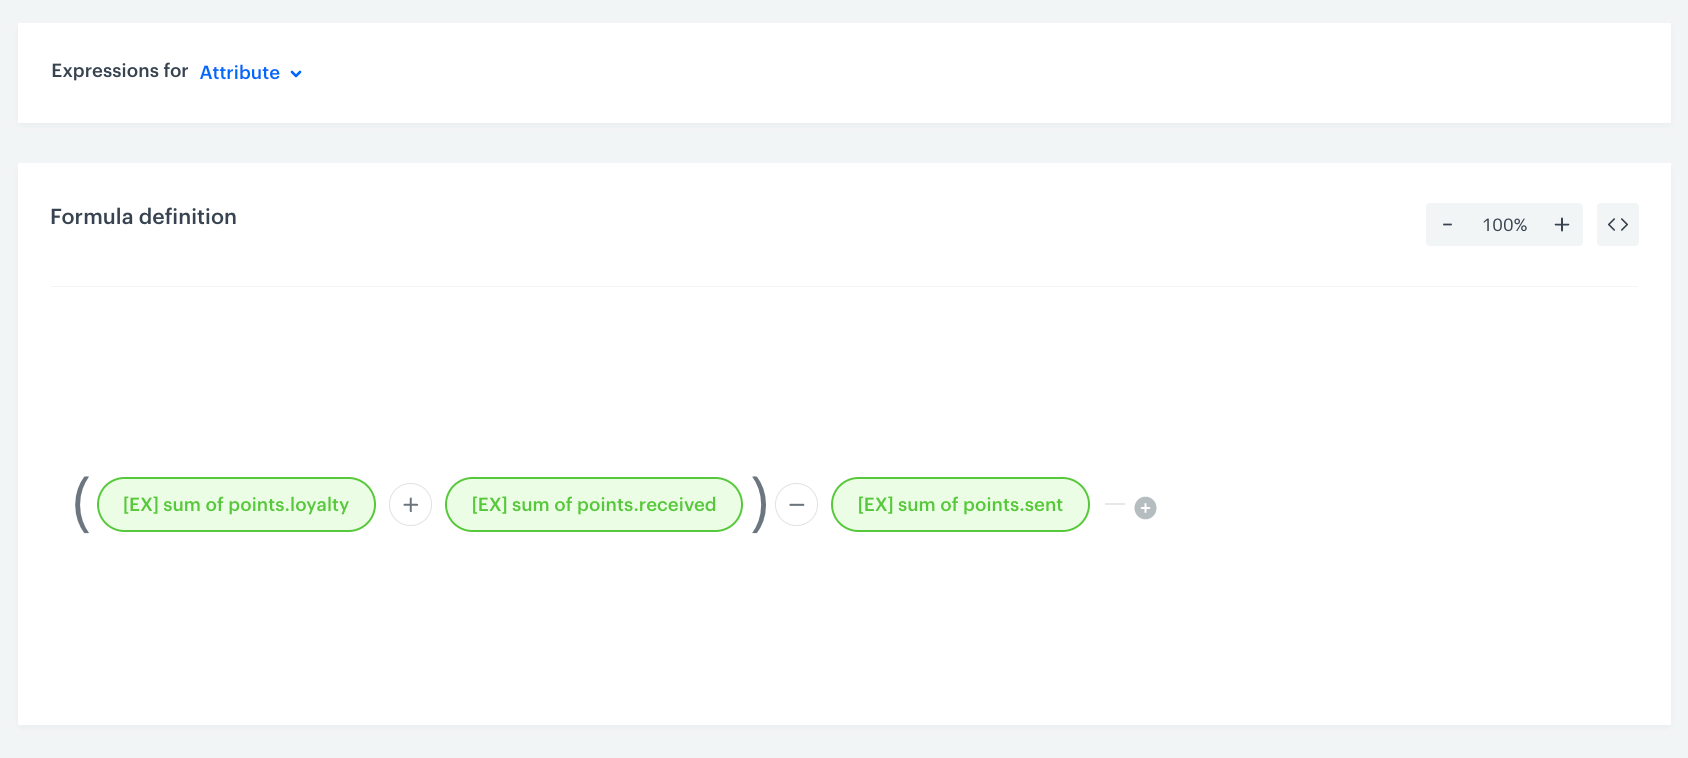
The configuration of the expression - Save the expression.
- Go to
Complete configuration
In this part of the process, you must complete the points transfer settings by executing configuration method. To define transferSettings, use analysis created in the following steps:
- Define segmentations of senders,
- Define segmentations of recipients and
- Create an expression that calculates loyalty points.
In order to execute request, you can use Postman or similar tool.
Implement loyalty points transfer module in the mobile app
In this part of the process, implement the loyalty points module in your mobile app that enables a user to transfer their points. Use the points transfer method when the transfer is sent. This method automatically generates the points.received event on the profile of customer who received points and the points.sent event on the profile of customer who sent points.
Create a mobile push template
In this part of the process, create a mobile push template that will be used later in a workflow. It should inform a mobile app user that they just received points transfer from someone.
- Go to Communication > Mobile Push > Templates.
- You can use the template from the folder or create your own one using the mobile push code editor. Click New Template > Simple Push.
- Create your mobile push in the code editor.
For more information on creating a simple mobile push, visit our User Guide.

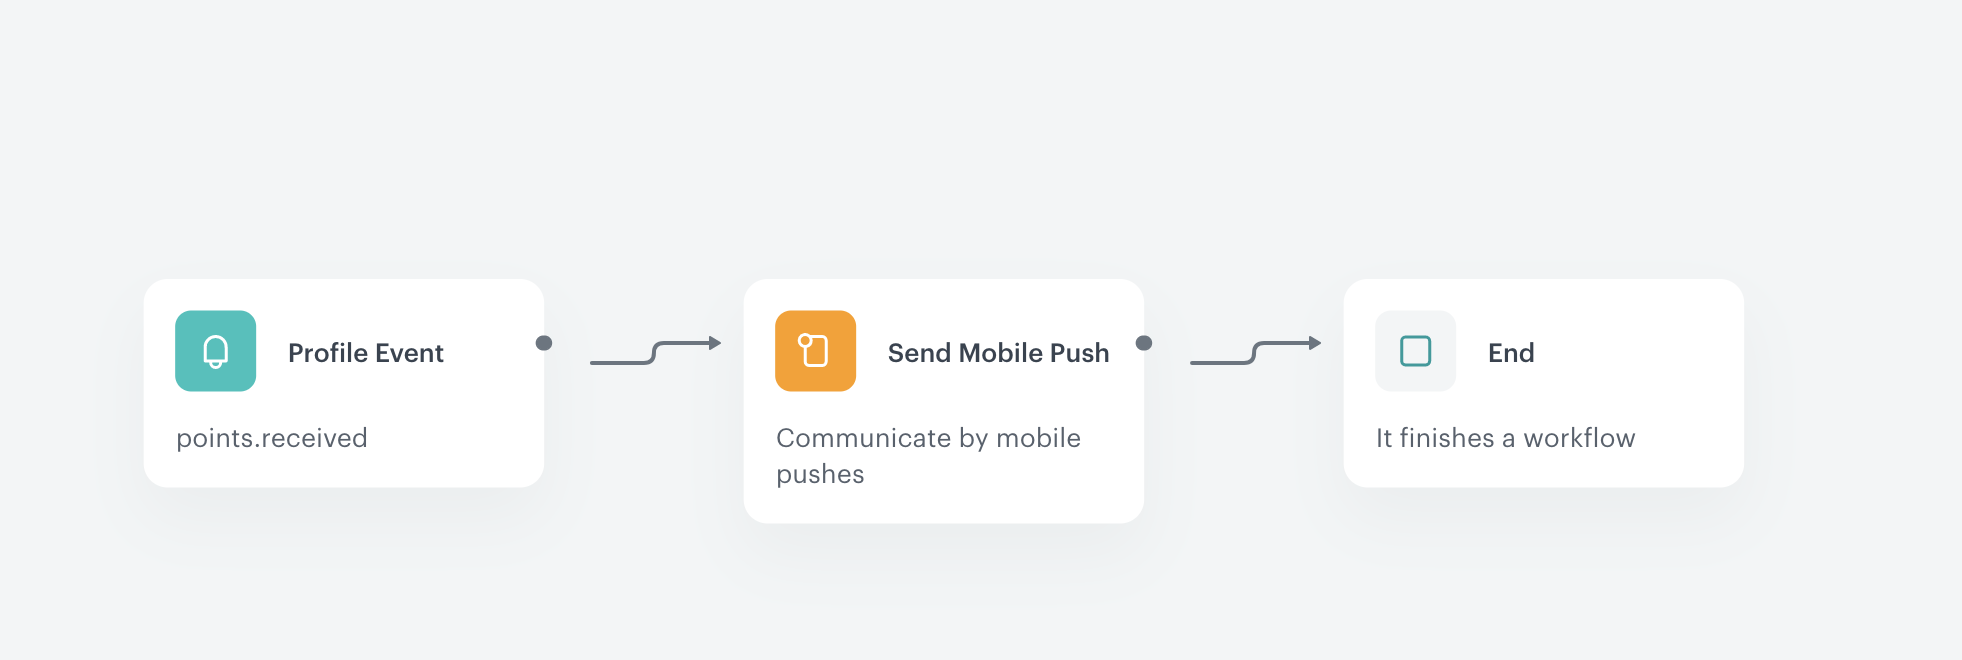
Create a workflow
In this part of the process, prepare a workflow that will be triggered by receiving points transfer from someone and will send push notification for the customer who received them.
- Go to Automation > Workflows > New workflow.
- Enter the name of the workflow.
- As the first node of the workflow, add Profile Event. In the node settings:
- From the Choose event dropdown menu, select
points.receivedevent. - Confirm by clicking Apply.
- From the Choose event dropdown menu, select
- As the next node, add Send Mobile Push. In the configuration of the node:
- From the Template type dropdown list, select Simple Push.
- Select the Push template created in this step of the process.
- Confirm by clicking Apply.
- Add the End node to finish the workflow.
- Click Save & Run.
Read more
- Inserts
- Mobile campaigns
- [Workflow]](/docs/automation/)