
Send propensity results to DataLayer
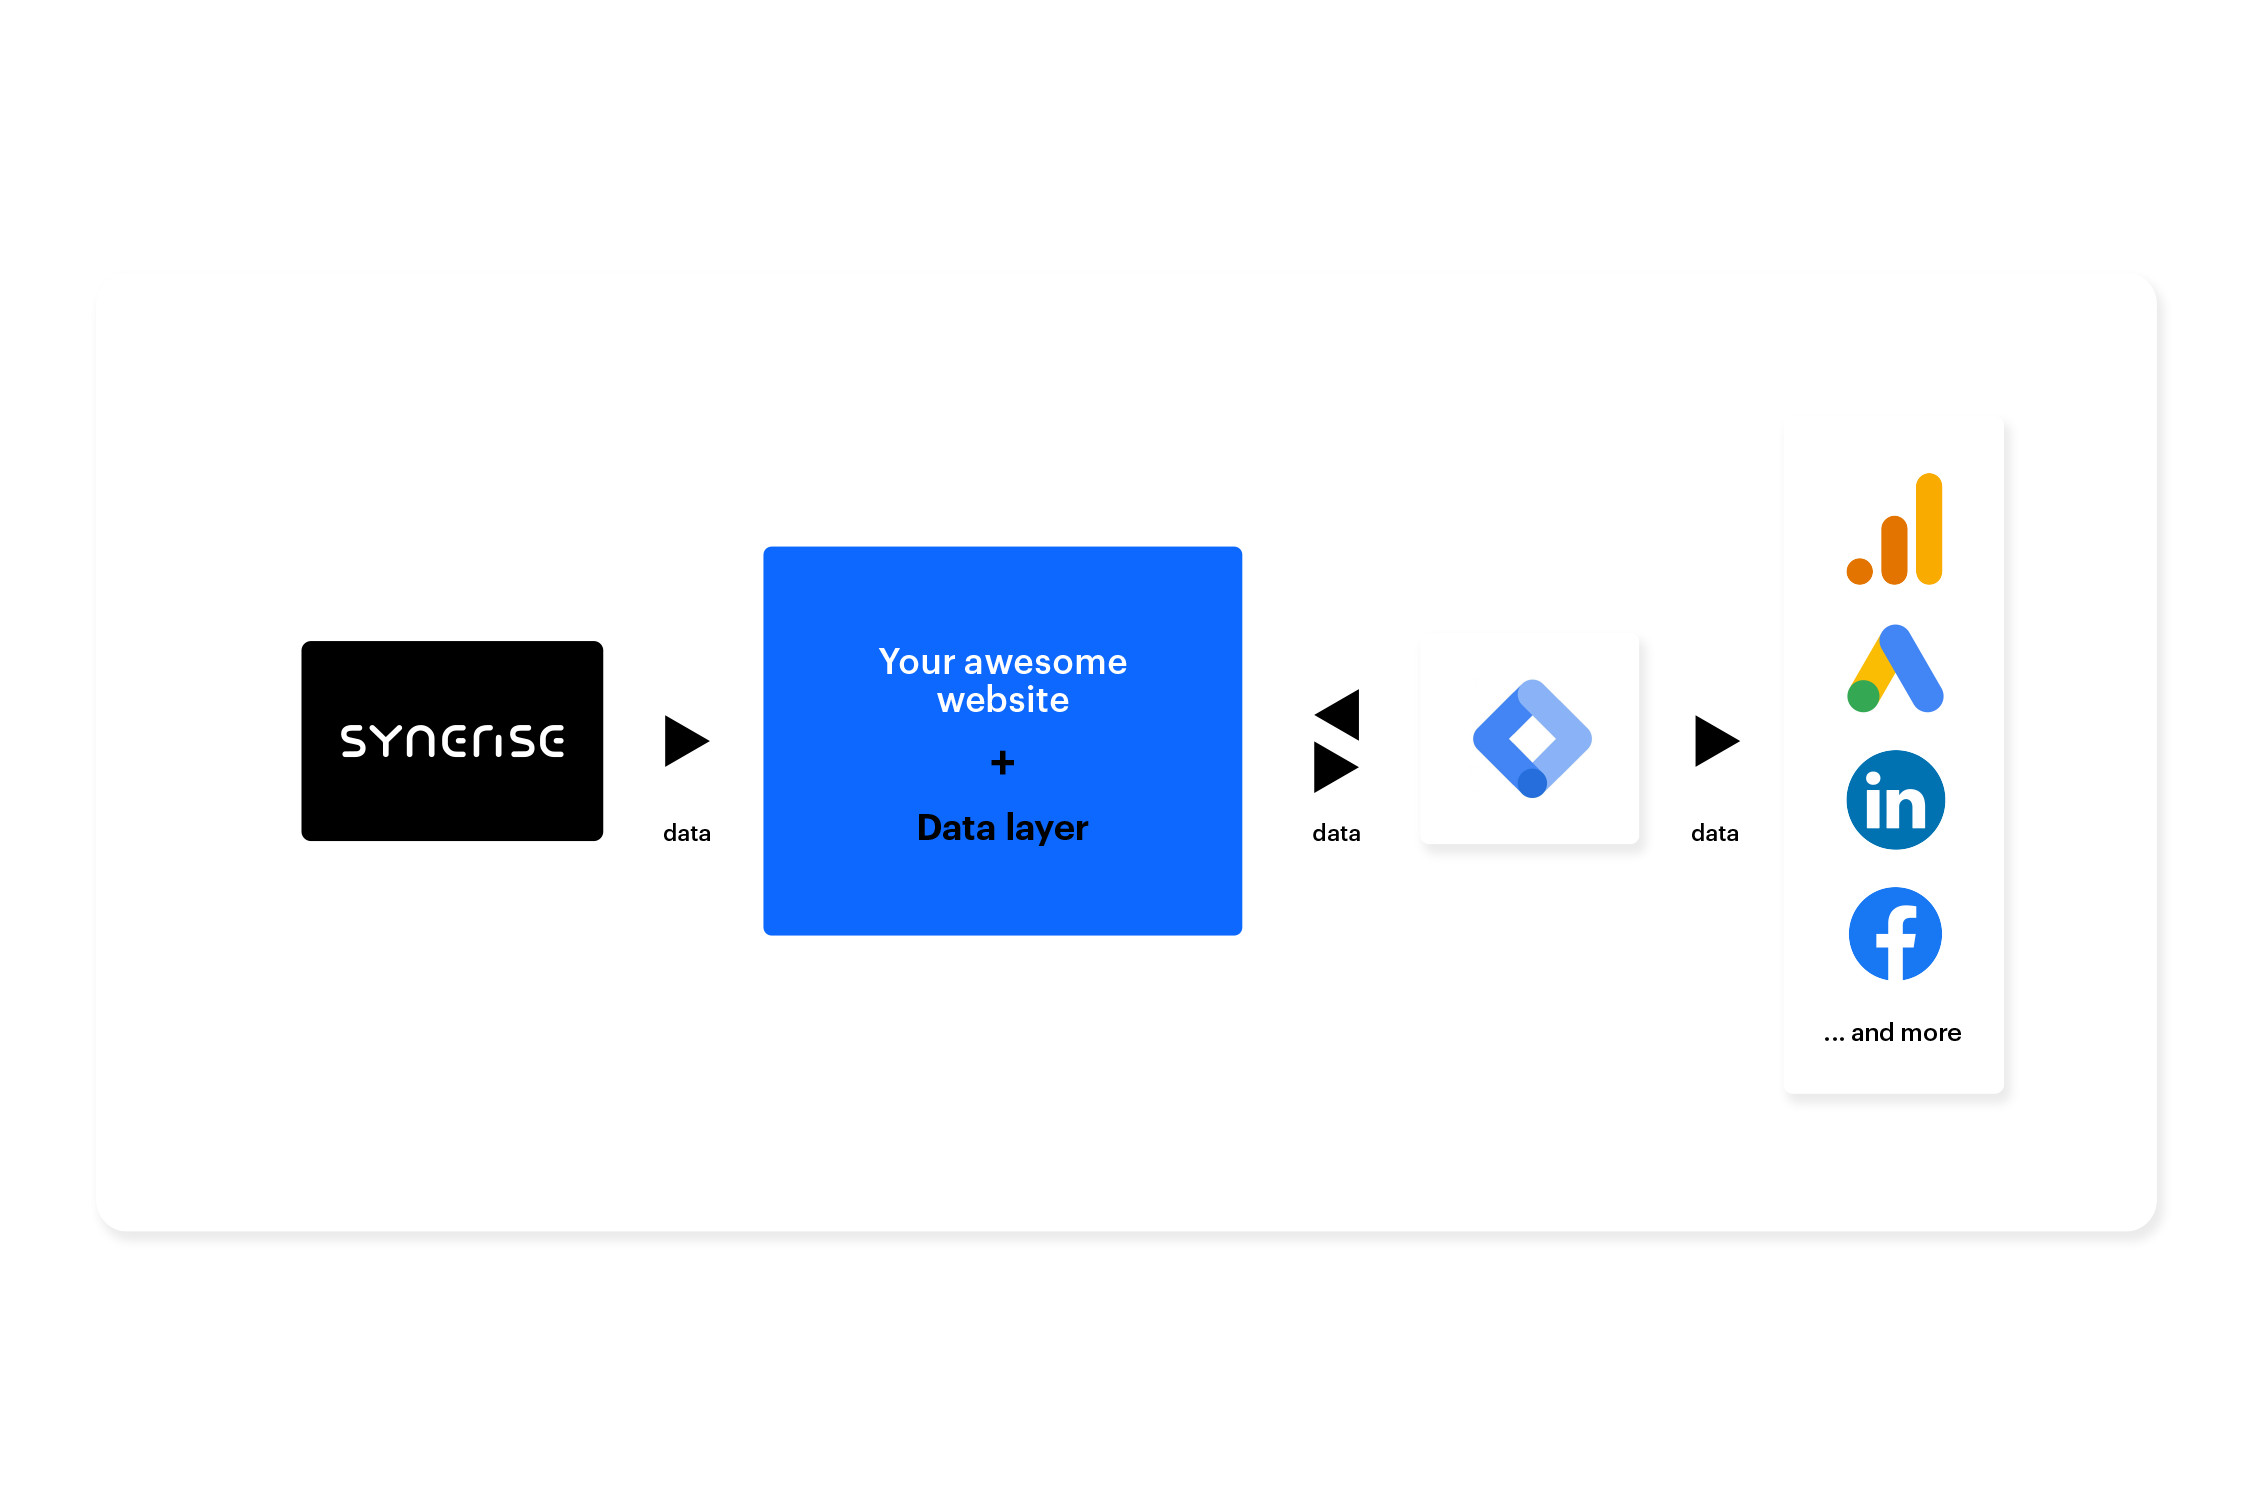
Transferring data to DataLayer is a common practice for companies to collect and store customer data in a centralized location. DataLayer is a powerful tool that allows companies to integrate customer data with other business applications, analytics tools, and third-party platforms. By storing data in a centralized location, businesses can gain valuable insights into their customers’ behaviors and preferences, which they can use to create targeted marketing campaigns.
With the new predefined Dynamic Content templates, you can easily send aggregates and expression results to DataLayer. In this use case, the propensity to buy prediction results for a specific brand are sent to the DataLayer (along with the propensity to buy score for individual customers).
Prerequisites
- Implement a tracking code into your website.
- Create an item feed.
- Enable the Propensity prediction type.
- Implement Google Data Layer on your website.
Process
In this use case, you will go through the following steps:
- Create a prediction.
- Create an aggregate that returns the last propensity score received by each customer.
- Create dynamic content that send the results of aggregate to DataLayer.
Create a prediction
Create a prediction of the propensity to buy a specific brand. The results of this prediction will be sent to DataLayer.
- Go to
 > New prediction and select Propensity as the prediction type.
 - Select the audience for the prediction. In our case, we will use segmentation of customers who have visited the website in the last 90 days. You can find the configuration of this segmentation in this part of the use case.
For more information, see the Predictions quick start article.
Define the item
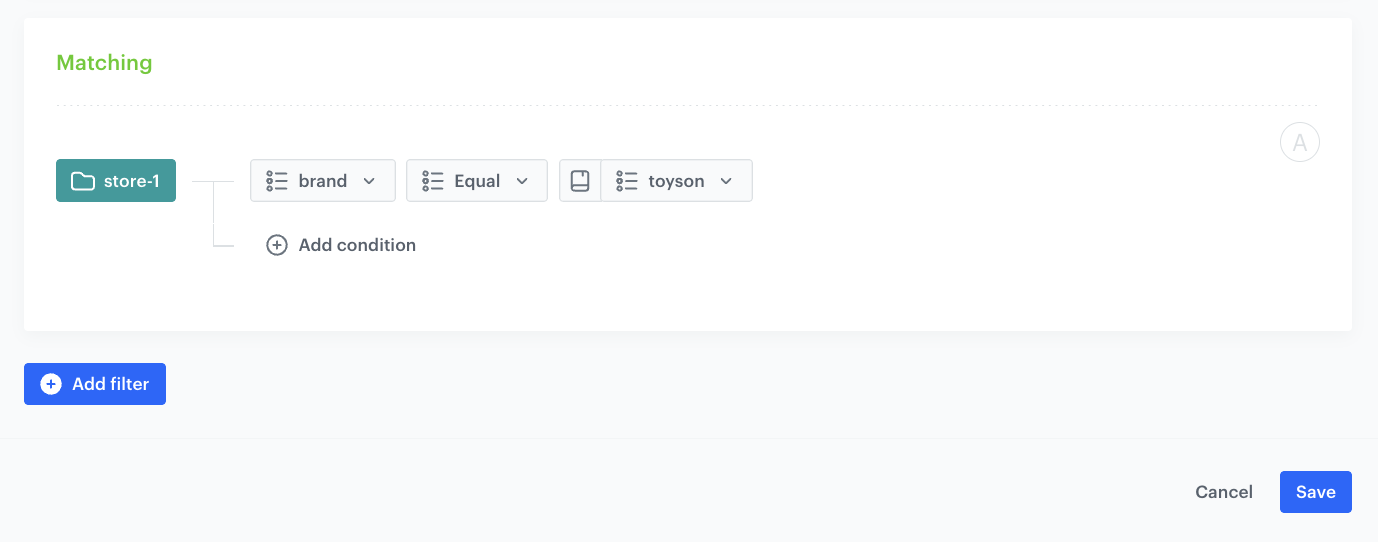
In this part of the process, define the brand(s) for which you want to calculate the prediction by defining the item filter conditions.
- In the Item selection section, click Define.
- Click Choose item feed.
- Select the catalog that contains the items you want to make the prediction for.
Result: The Item filter section appears. - Click Define item filter.
- From the Select attribute dropdown list, select the
brandattribute. You can use the search field. - From the dropdown list that appears, select the Equal operator.
- Select the desired brand(s).
- Click Save.
- Save the item feed configuration by clicking Apply.
Additional settings and saving
Configure the additional settings (or leave them at default) and click Save & Calculate.
snr.propensity.score event is saved in the profiles of each customer in the audience. The event data includes detailed results of the prediction.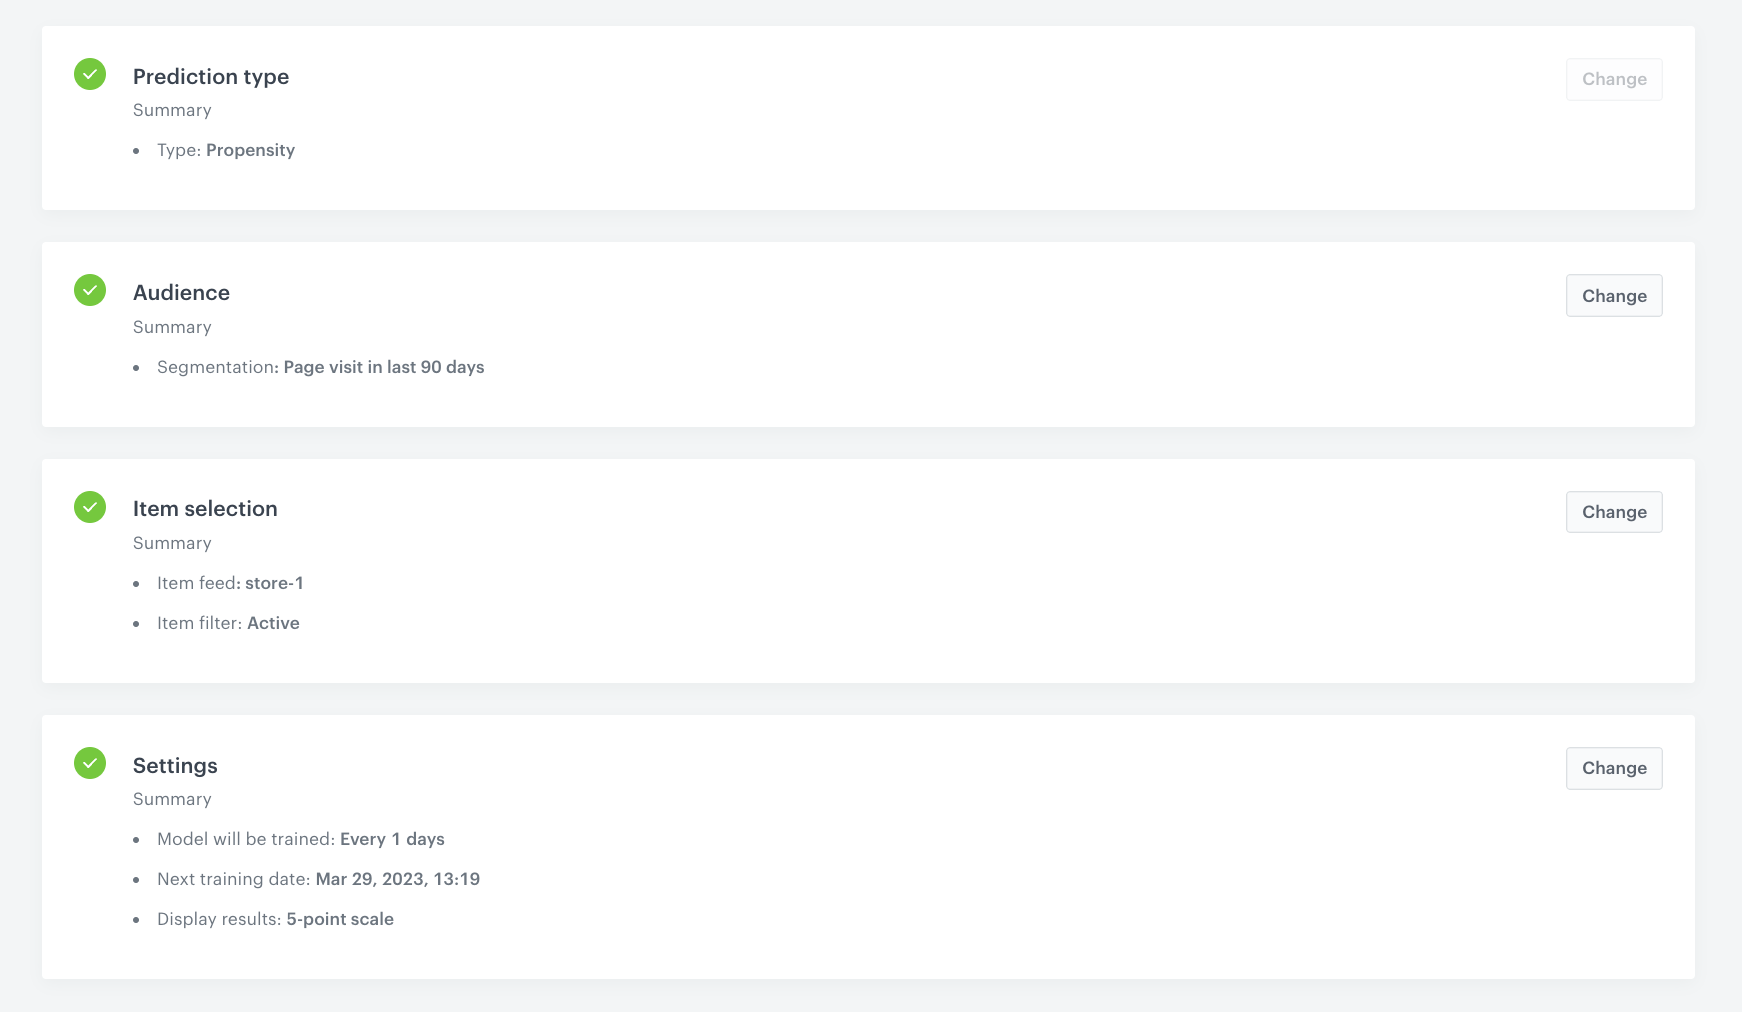
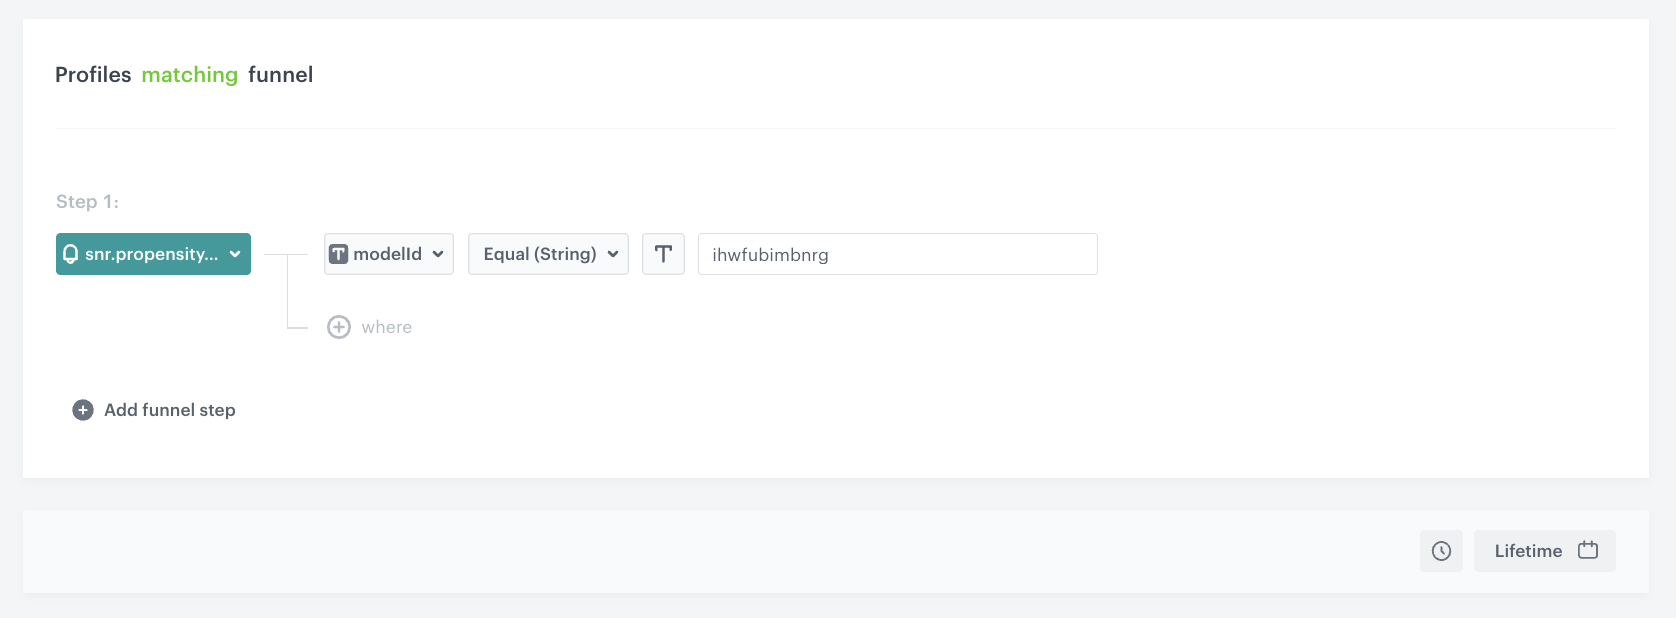
Create an aggregate
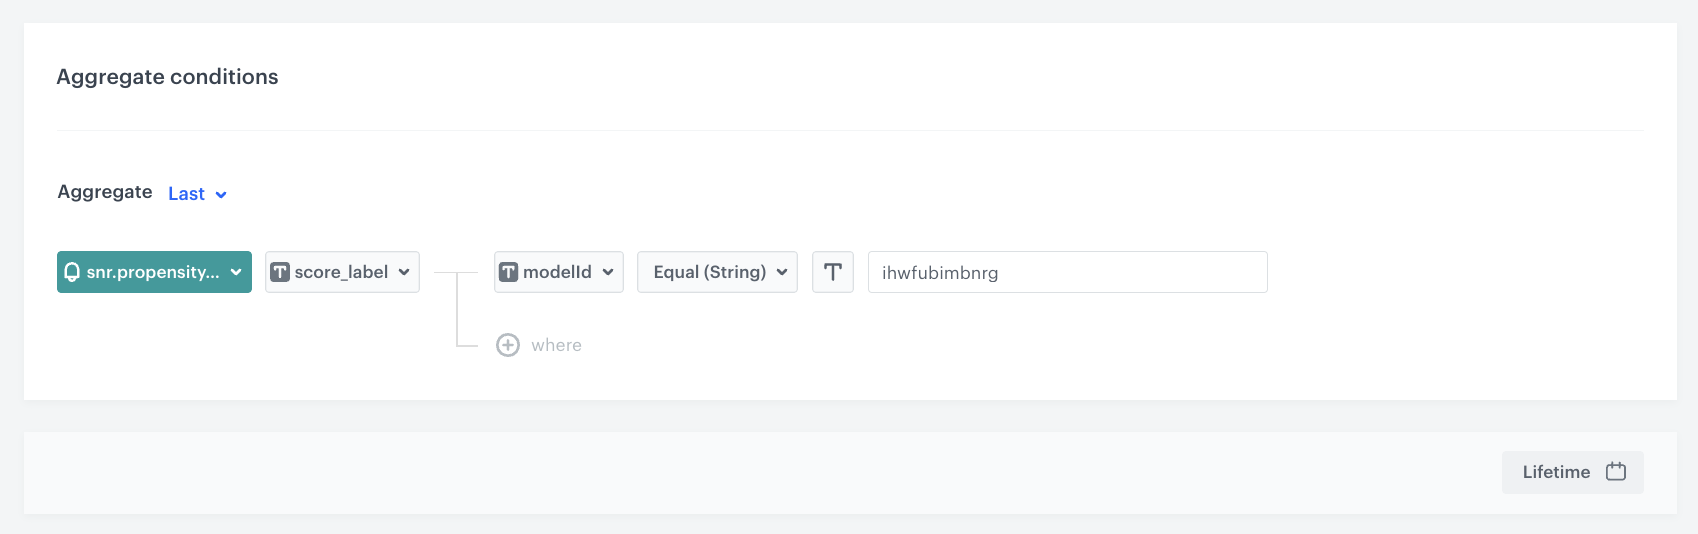
In this part of the process, create an aggregate that returns the last propensity score obtained by each customer.
- Go to
 Analytics > Aggregates > New aggregate.
 - Enter the name of the aggregate.
- As the type of the aggregate, select Last.
- From the Choose event dropdown list, select the snr.propensity.score event.
- As the event parameter, select score_label.
- Click + where button.
- From the Choose parameter dropdown list, select the modelId parameter.
- From the Choose operator dropdown list, select Equal.
- Enter the ID of the propensity model created earlier in the process. In our case, it’s
ihwfubimbnrg. - Set the period from which the aggregate will analyze the results to the Lifetime.
- Save the aggregate.
Create dynamic content
- Go to Communication > Dynamic content > Create new.
- Enter the name of the dynamic content.
- Choose Insert Object type.
Define Audience
- As the Audience select New Audience and click Define conditions.
- From the Choose filter dropdown list, select the snr.propensity.score event.
- Click + where button.
- From the Choose parameter dropdown list, select the modelId parameter.
- From the Choose operator dropdown list, select Equal.
- Enter the ID of the propensity model created earlier in the process. In our case, it’s
ihwfubimbnrg. - Set the period from which the aggregate will analyze the results to the Lifetime.
- Apply all conditions.
- Click Apply to save the audience.
Define content
- In the Content section, select Simple message, and specify the CSS selector where you want to insert your search. In our case, we use the following selector:
.srns-modal-wrapper - In the Content tab, click Create Message.
- From the list of template folders, select a folder with the predefined script templates.
Result: You are redirected to the list of predefined templates.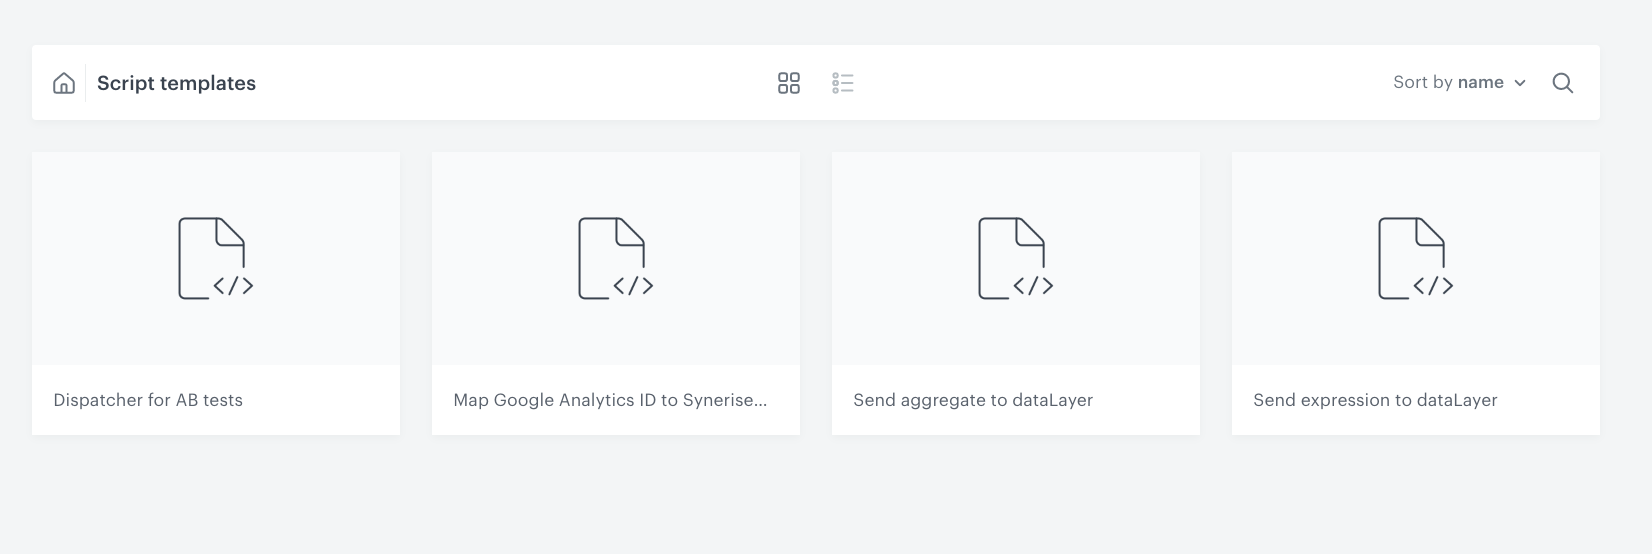
Script templates folder - Select the Send aggregate to dataLayer template.
Result: You are redirected to the template builder.
Note: You can edit the template in two ways, by editing the code of the template (add inserts, add variables) and/or by filling out the form in the Config tab. In this use case, we will use the capabilities of the predefined Config tab.
Edit the form in the Config tab
The form in the Config tab is already filled in with default values. You can keep them or change them to fit your business needs.
- From the Aggregate ID dropdown list, select the aggregate you created in the previous step. You can find it by typing its name or ID in the search box.
- In the Event parameter name field, define the name of event parameter that stores the aggregate value pushed in event to DataLayer. You can leave the default name of the event parameter defined in the template or change its name to a different one you want to see in the DataLayer.
- In the Event name field, define the name of event pushed to DataLayer.
- If the template is ready, in the upper right corner, click Save this template > Save as.
- On the pop-up:
- In the Template name field, enter the name of the template.
- From the Template folder dropdown list, select the folder where the template will be saved.
- Confirm by clicking Apply.
- To continue the process of configuring the dynamic content campaign, click Next.
- To save your content changes, click Apply.
Define schedule and display settings
- In the Schedule section, click Define and set the time when the message will be active.
- In the Display Settings section, click Define.
- Specify circumstances for dynamic content to be displayed. Optionally, you can also define the Advanced options. In our case, we will define the frequency of dynamic content to be displayed to Once per day.
- Click Apply.
- Optionally, you can define the UTM parameters and additional parameters for your dynamic content campaign.
- Click Activate.
Check the use case set up on the Synerise Demo workspace
You can check the configuration of each step from this use case in our Synerise Demo workspace:
If you don’t have access to the Synerise Demo workspace, please leave your contact details in this form, and our representative will contact you shortly.