
Low-stock abandoned cart campaign
In the constantly evolving e-commerce landscape, optimizing sales and minimizing shopping cart abandonment rates is crucial. There are several ways to prevent the abandoned cart scenarios. While the classic approach to solving this problem is well known, there is an even more effective strategy - low-stock campaigns.
To keep your potential customers from abandoning their shopping carts, consider implementing a low-stock campaign, which is a comprehensive solution that applies not only to abandoned shopping carts, but also to abandoned pages or abandoned favorite lists.
Here’s how a low-stock campaign strategy unfolds, especially for abandoned shopping carts. When users add products to their shopping carts that either already have low-stock levels or are predicted to have limited availability in the near future, and fail to complete the purchase, you can capitalize on the situation by triggering your low-stock abandoned cart communication.
By promptly informing customers that the products they are at risk of selling out due to declining inventory, you provide them with a compelling reason to complete their purchase. This urgency can become a key element in the decision-making process, potentially leading to higher conversion rates.
The beauty of a low inventory campaign is that it is highly customizable. What constitutes “low inventory” is entirely up to your discretion and tailored to your specific business needs. Whether you have 10 units left or even 1000 , the definition of low inventory can fit perfectly with your inventory management strategy. This flexibility ensures that your campaign can be tailored to different product categories and customer preferences, optimizing its effectiveness.
In this use case you will learn how to create a low-stock campaign for customers with an abandoned shopping cart.

Prerequisites
- Implement a tracking code into your website.
- Implement the
cart.statusevent, which stores the current status of the basket in the form of an event on the customer’s card. This event must to be sent to Synerise after every change in the cart status. - Import product feed into the Synerise catalog.
Click to see a sample catalog

Example of a catalog - Prepare an email template for Low stock campaign. This template will be used later in the workflow.
In the template, you can retrieve the event context from the preceding nodes. In this case, you can reuse the context of a product that has been added to the cart, but has not been purchased and is running out of stock. For more information on how to reuse event parameters, check out this article.
Process
In this use case, you will go through the following steps:
- Create a product.LowInStock event
- Create an aggregate that returns products in a cart
- Create a workflow
Create a product.LowInStock event
In this part of the process, add the product.LowInStock event, which will later be generated in the workflow that checks whether the product is low in stock. In addition, this event must include the sku parameter, which contains the SKU of the low-in-stock product which the customer added to the shopping cart.
- Go to
 Data Management > Events > Add event.
 - In the Name field, enter
product.LowInStock
In the API and SDK, the name parameter is usually calledactionoraction name - Optionally, define a human-friendly display name that will be shown in the Data Managament and Analytics modules.
- Optionally, in the Description field, enter the description of the event.
- Enable the Make this event available to anonymous profiles without JWT toggle.
- Click Apply.
- In the list of events, find the event you just created.
- On the right side of the screen, click Add property.
- In the Source parameter field, enter
lowstock_cart. This parameter will be used to save the SKUs of items which are low in stock. - In the Property name field, enter a human-readable label of the property for display in the Synerise platform.
- Optionally, in the Description field, you can add an explanation about the purpose of this parameter.
- To complete the process, click Save.
Create an aggregate that returns the products in a cart
This aggregate will be used later in the product.LowInStock event to get products a customer added to their cart.
- Go to
 Analytics > Aggregates > New aggregate.
 - Enter the name of the aggregate.
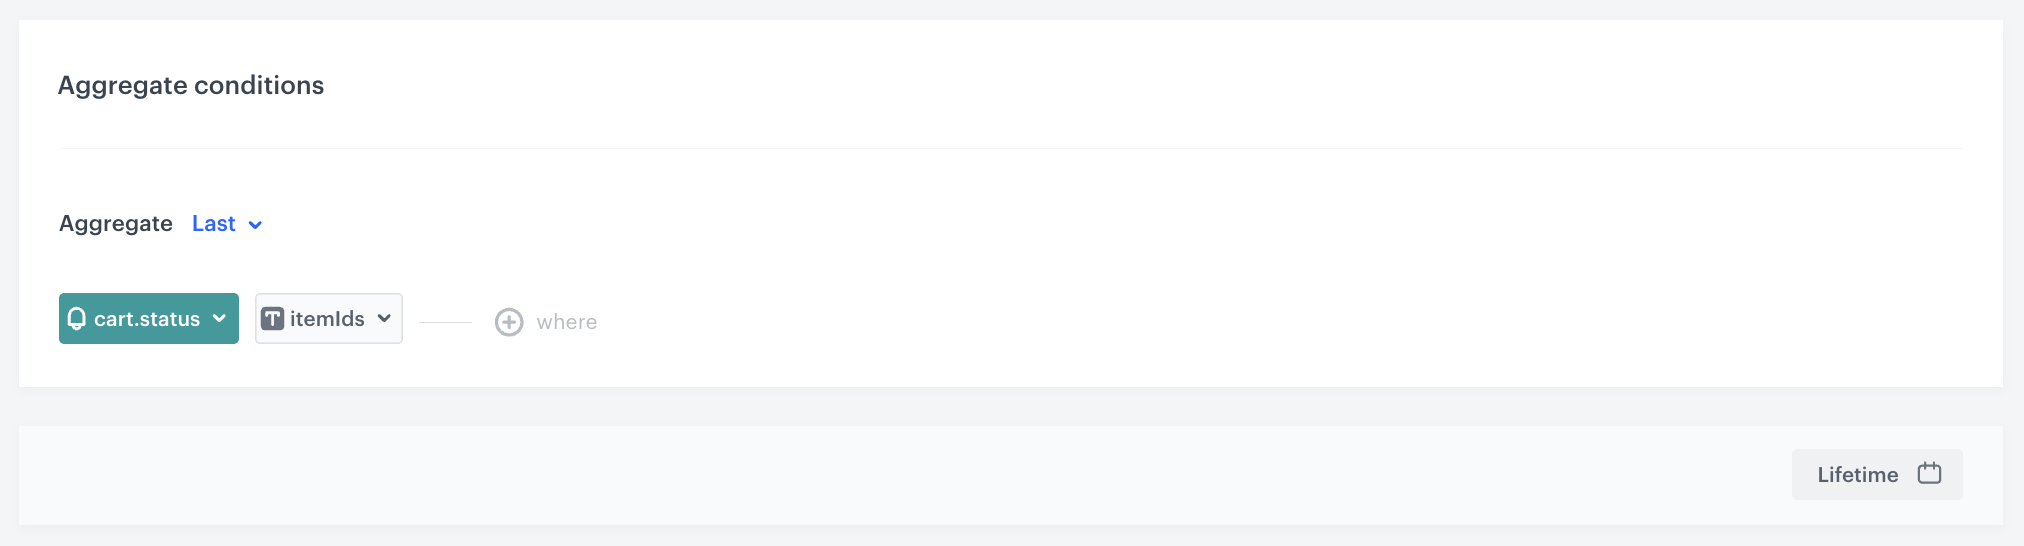
- As the type of the aggregate, select Last.
- From the Choose event dropdown list, select the
cart.statusevent. - As the event parameter, select ItemIds.
- Set the period from which the aggregate will analyze the results. In our case, we set the time period to Lifetime.
- Save the aggregate.
Create an aggregate that returns the number of products in a cart
This aggregate will be used in the first workflow to check if a customer has any products in the shopping cart.
- Go to Analytics > Aggregates > New aggregate.
- Enter the name of the aggregate.
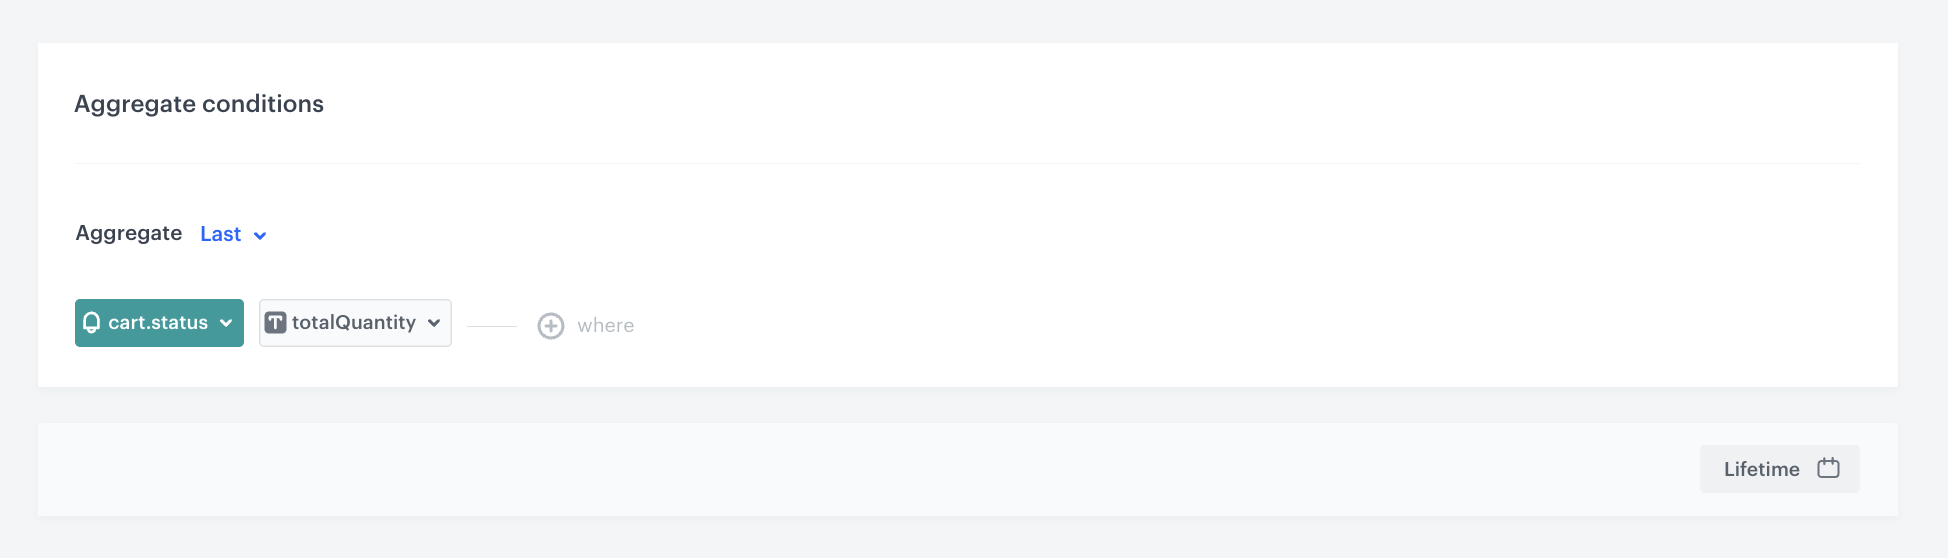
- As the type of the aggregate, select Last.
- From the Choose event dropdown list, select the
cart.statusevent. - As the event parameter, select totalQuantity.
- Set the period from which the aggregate will analyze the results to Lifetime.
- Save the aggregate.
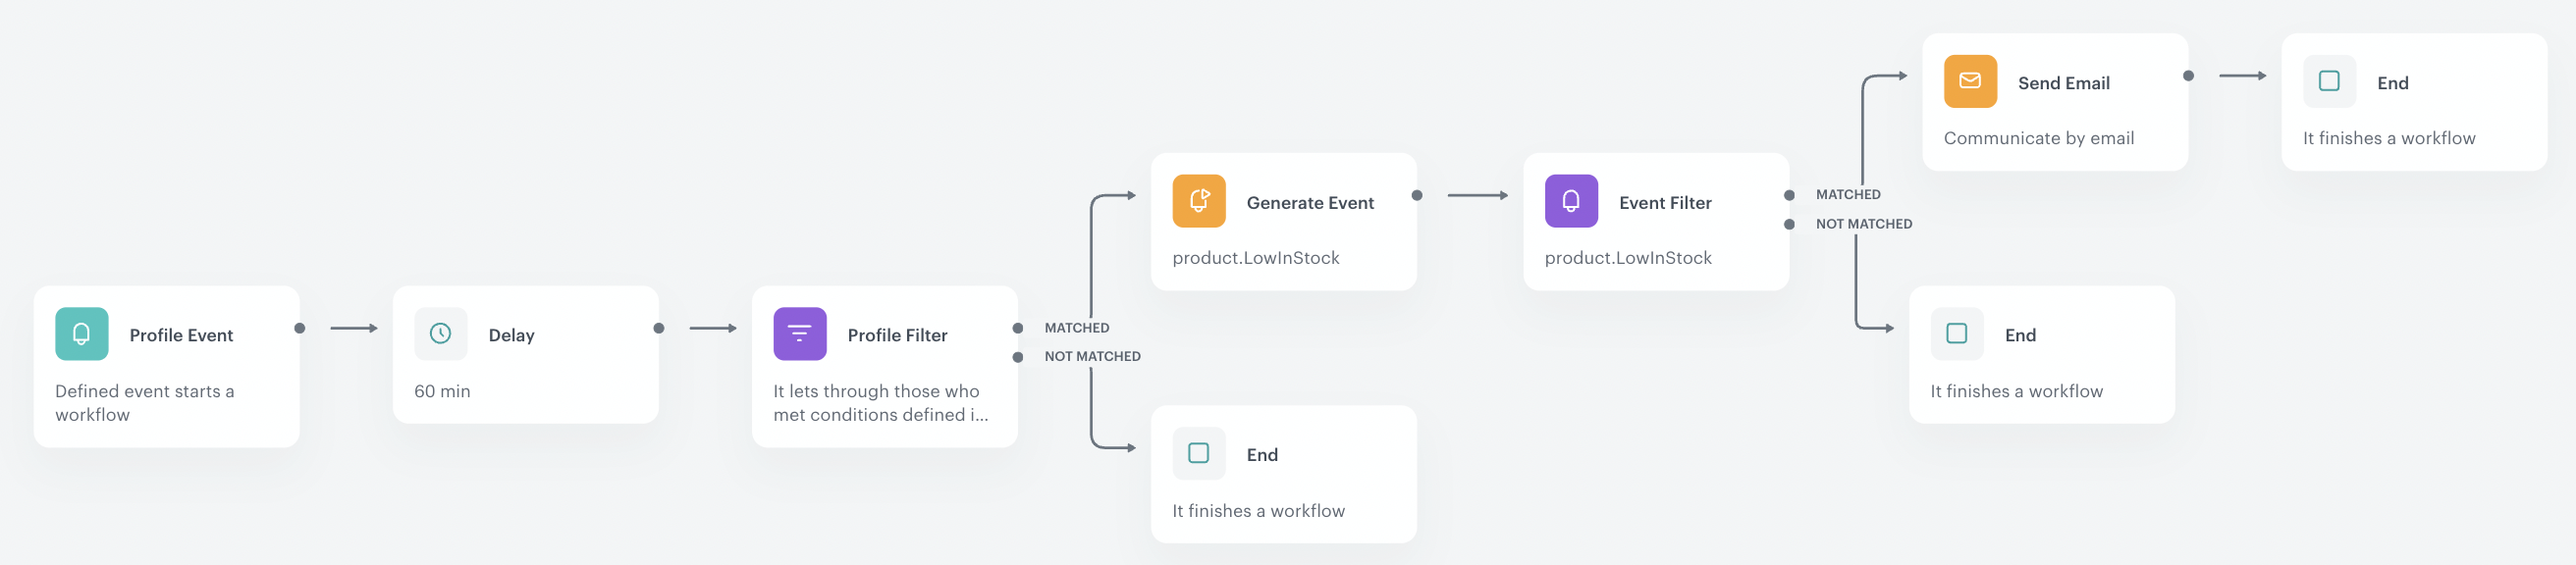
Create a workflow
In this part of the process, we create a workflow to send an email campaign to customers who have added products to their cart but haven’t completed their purchase. The workflow follows this logic:
- Target customers who:
- Have added products to their cart.
- Haven’t made a purchase in the last 60 minutes.
- Have agreed to receive email communications.
- If a customer meets all these conditions, we generate a product.LowInStock event. This event contains information about the items in the customer’s cart that are running low in stock.
- The workflow then waits for 10 minutes for the event to be generated.
- Once the event is generated, the customer receives an email message with details about the products mentioned in the product.LowInStock event.
Configure a trigger
In this part of the process, select the segmentation for which you want to target low-stock campaign.
- As the first node of the workflow, add Profile Event.
- From Choose event dropdown menu, choose the product.addToCart event.
- Confirm by clicking Apply.
Define the Delay node
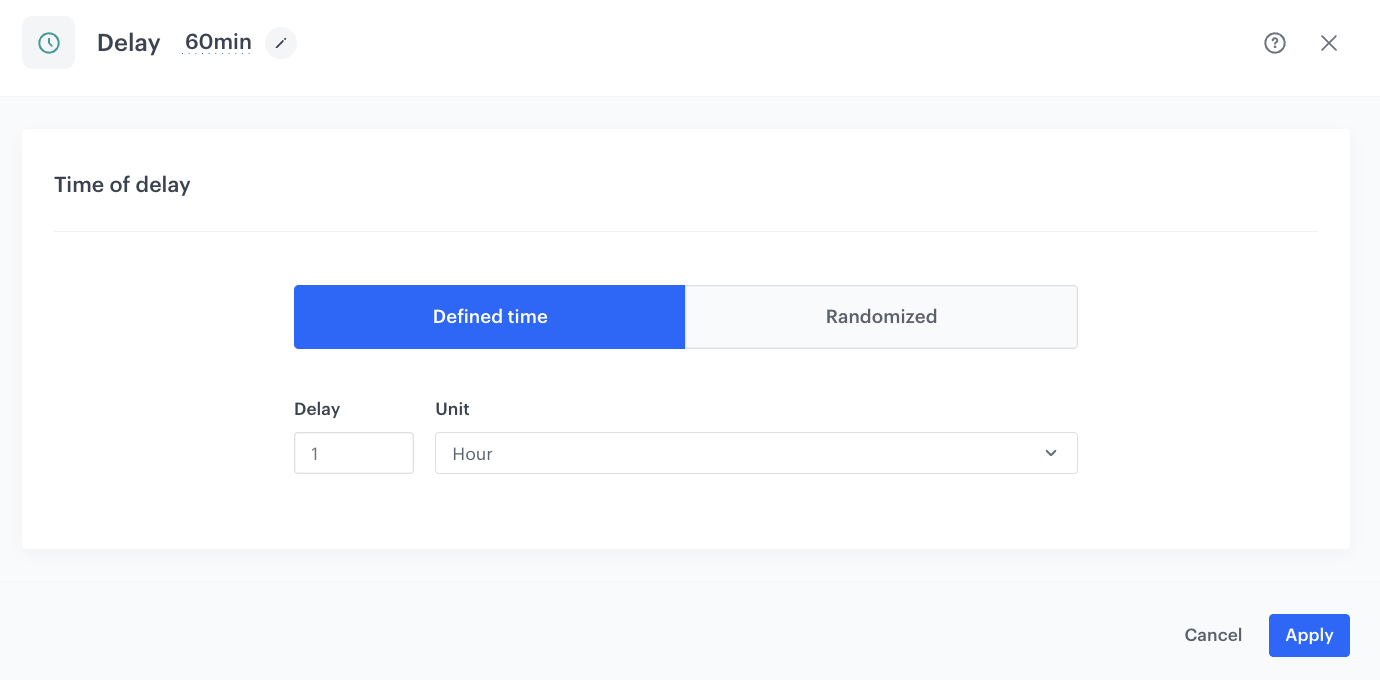
This node creates an hour’s delay before moving to the next condition of the workflow.
- Add the Delay node. In the node settings:
- In the Delay field, type
1. - From the dropdown list, choose Hour.
- In the Delay field, type
- Click Apply.
Configure the Profile Filter node
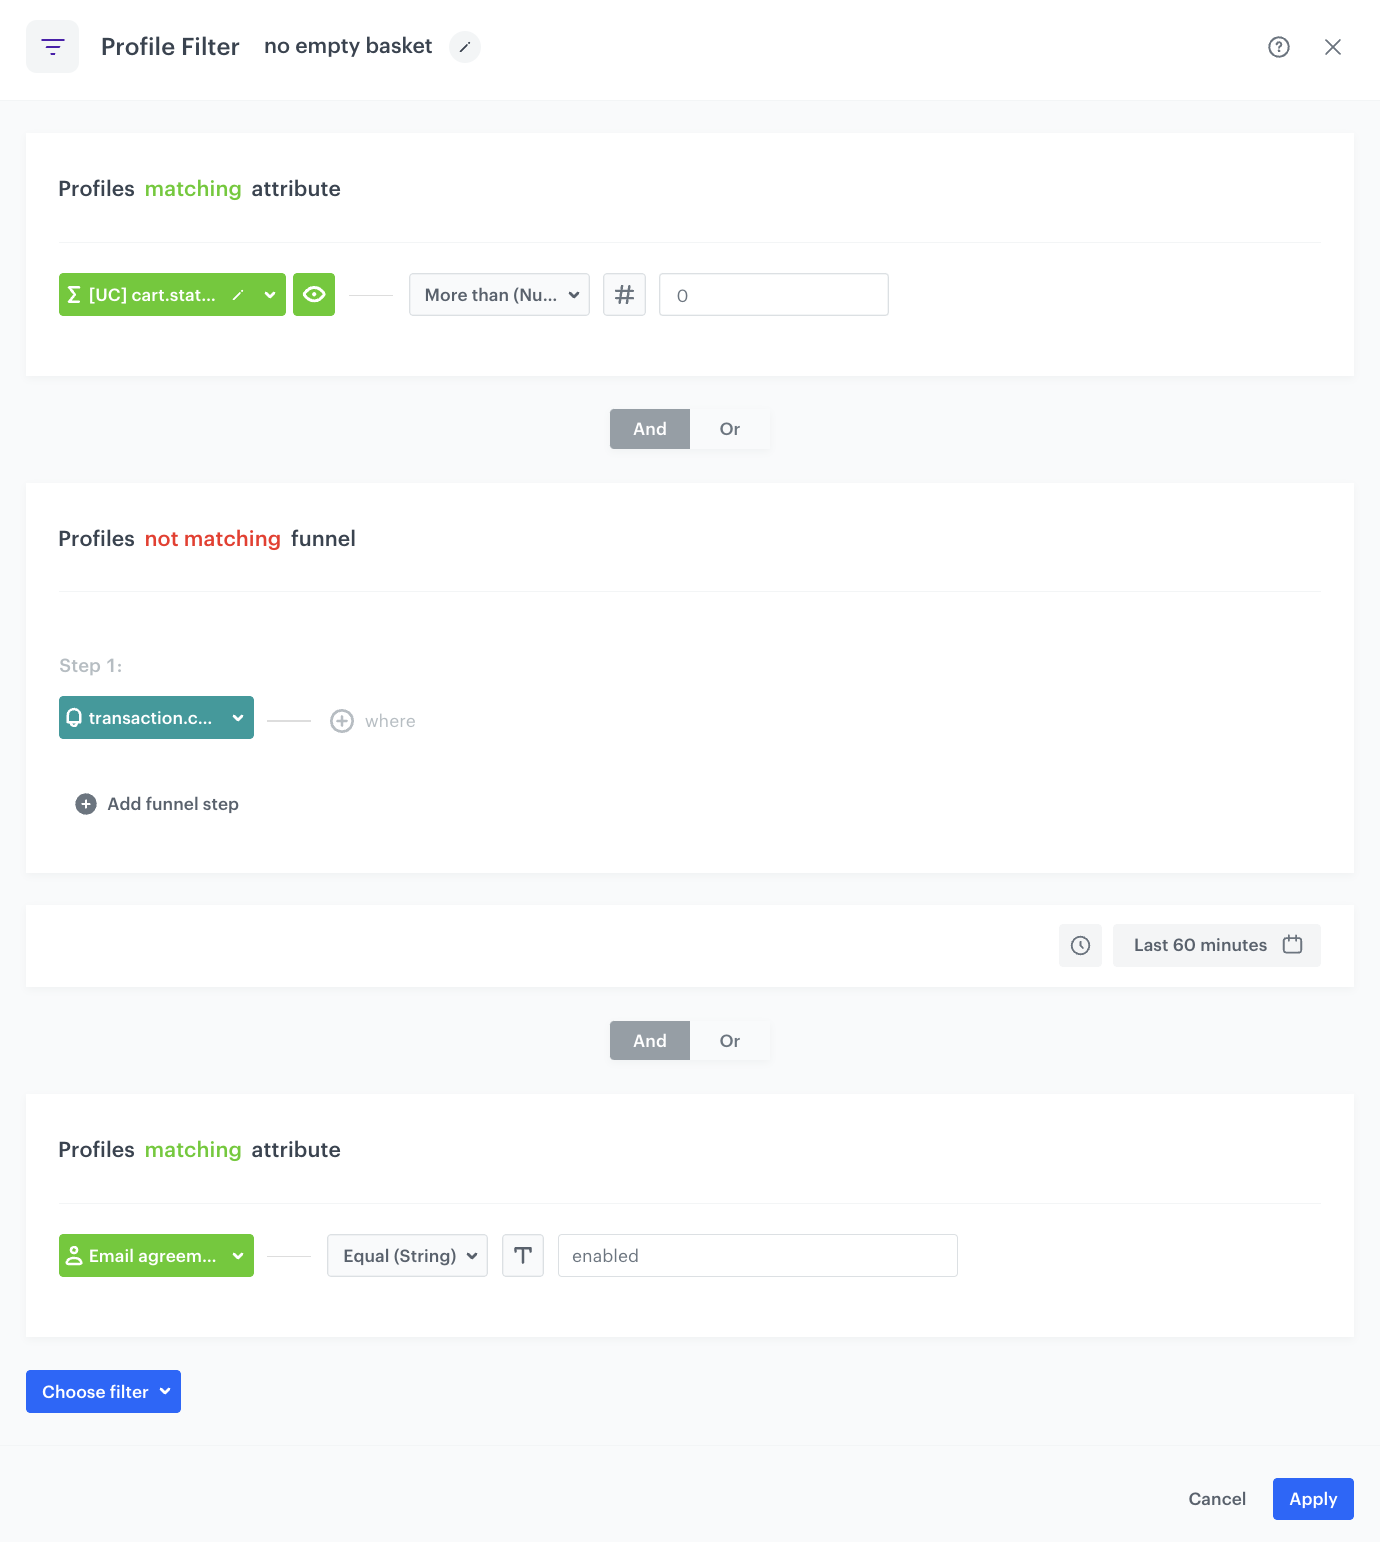
This part of the process defines the conditions that the customer should meet in order to move to the next step of the workflow. If the customer does not meet the defined conditions, the workflow ends for them.
- Add the Profile filter node. In the node settings:
- Click Choose filter and select the aggregate you created earlier in the process.
- From the Choose operator dropdown, choose More than (Number) and type
0in the empty field. - From the Choose filter dropdown list, select the transaction.charge event.
- Change the funnel type from profiles matching to profiles not matching.
- Click the calendar icon and set the date/time filter to Last 60 minutes.
- From the Choose filter dropdown list, select the newsletter_agreement attribute.
- From the Choose operator dropdown, choose Equal (String) and type
enabledin the empty field.
- Click Apply.
Configure the Generate event node for the Matched path
Before sending the email to the customer, an event must be generated on the customer’s profile. The event must contain the IDs of products that are running low in stock (these are the products that will be sent to the customer in the email).
- Add the Generate event node to the Matched path.
In the configuration of the node:
-
In Event name, enter
product.LowInStock
The Label field exists for backwards compatibility. If your integration does not require this parameter, skip it. -
In the Body section, use the following Jinjava and modify it to your needs:
Note: Jinjava inserted in Generate event body must have all empty spaces deleted.{ "lowstock_cart": "{% set skus = [] %} {% aggregate PRODUCTS-IN-CART %} {# replace PRODUCTS-IN-CART with the ID of the aggregate that returns products in the cart #} {% for items in aggregate_result %} {% do skus.append(items) %} {%endfor%} {% endaggregate %} {% set lowstock = []%} {% for sku in skus %} {% catalogitemv2.CATALOG-NAME(sku) %} {# replace CATALOG-NAME with the name of your feed catalog #} {% set object = catalog_result %} {% if object.get('Quantity')|int < NUMBER %} {# NUMBER defines the amount of products you consider as low in stock #} {% set quantity = object.get('Quantity') %} {% do lowstock.append(sku) %} {%else%} {%endif%} {% endcatalogitemv2 %} {%endfor%} {% if lowstock|count==0 %}0{% else %}{{lowstock[0]}}{% endif %}" }
-
Result: a product.LowInStock event is generated. Its lowstock_cart parameter contains the ID of a product that is low in stock.
An example of a generated event:
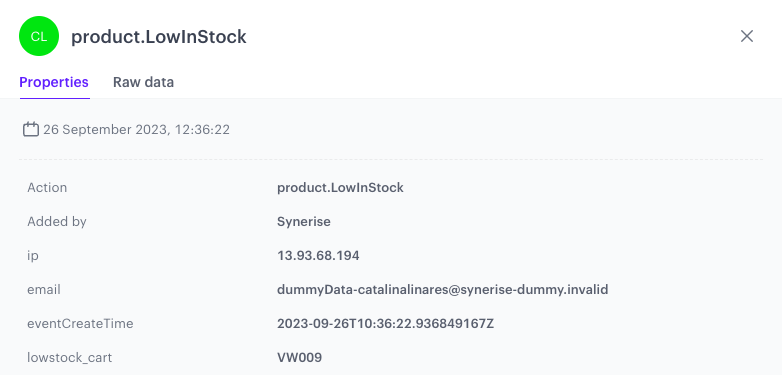
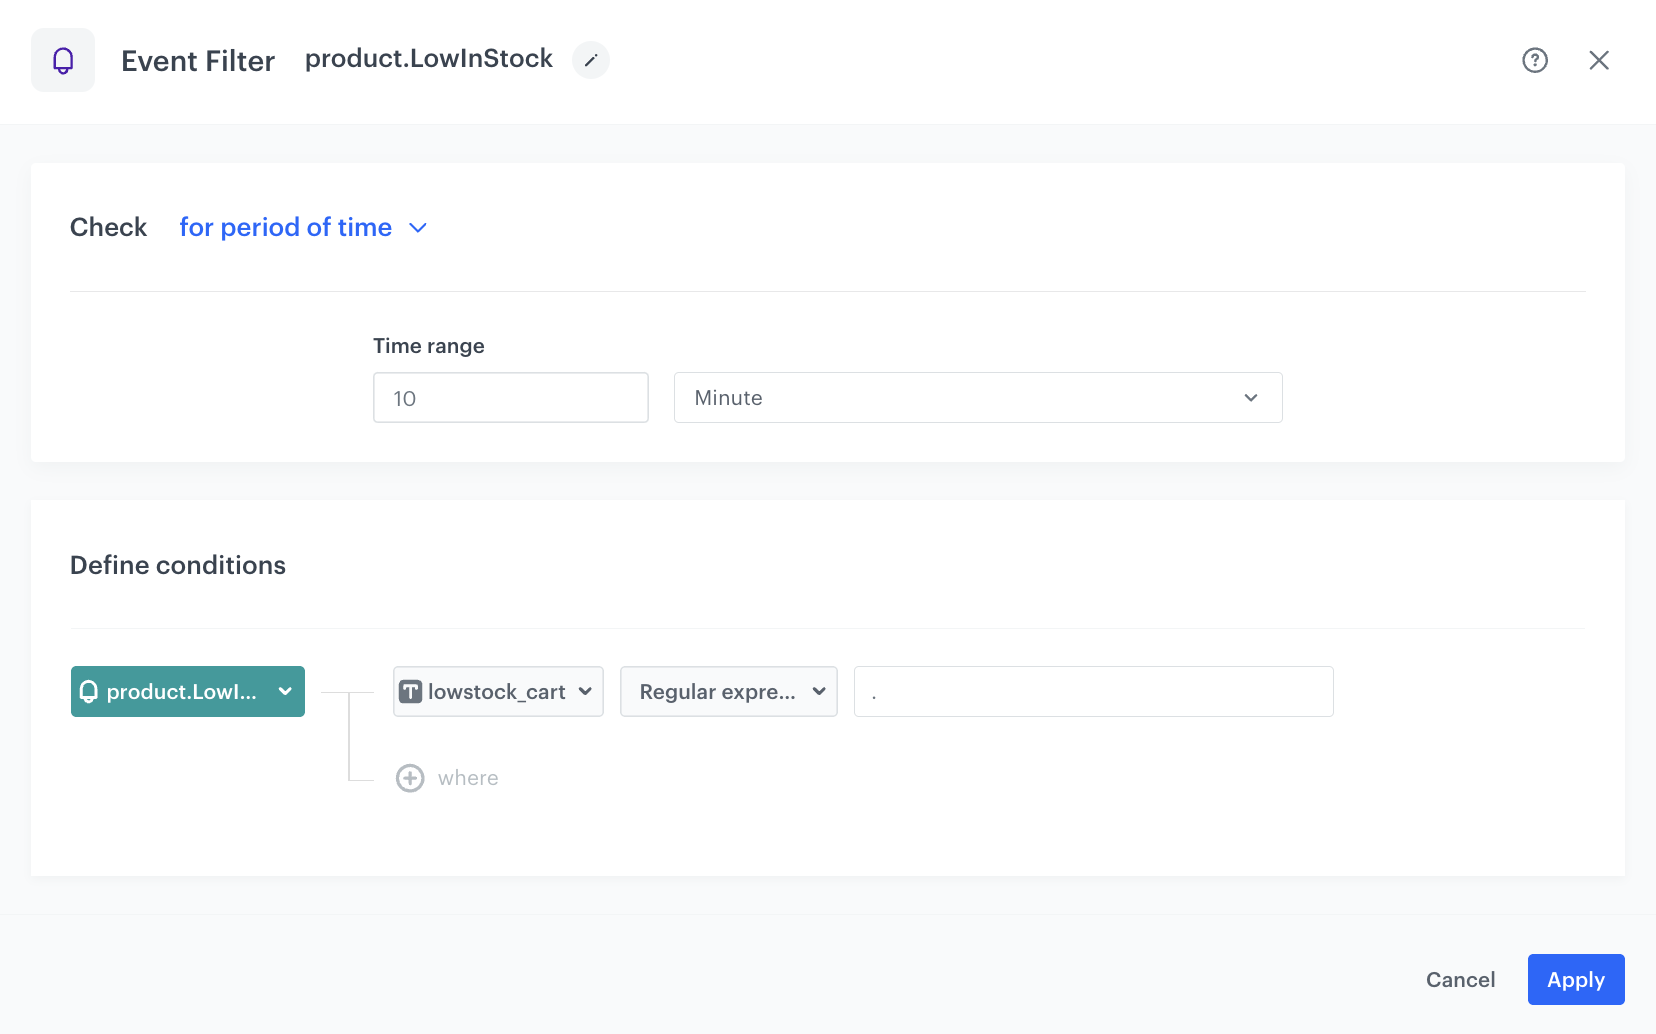
Configure the Event filter node
This filter serves as a security measure to ensure that the product.LowInStock event was generated in the previous step.
- Add the Event filter node. In the configuration of the node:
- Set Check to for period of time.
- Define the time range to 10 minute.
- From the Choose event dropdown list, select the product.LowInStock event.
- As the event parameter, select lowstock_cart.
- From the Choose operator dropdown list, select Regular expression.
- In the text field, type
.Note: This regular expression is necessary to exclude product.LowInStock events with the empty value of the lowstock_cart parameter.
- Confirm by clicking Apply.
If an event was not generated for a customer, then the workflow ends for this customer. If the event is generated, then the next step is sending an email to the customer.
Configure the Send email node
In this part of the process, send email communication to customers for whom the product.LowInStock event was generated. The email should contain the products returned in the event.
- Add the Send Email node and open its settings.
- In the Sender details section, choose the email account from which the email is sent.
- In the Content section, select the template that you prepared as a part of the prerequisites.
- Optional: In the UTM & URL parameters section, define the UTM parameters added to the links included in the email.
- Optional: In the Additional parameters section, describe the campaign with additional parameters.
- Click Apply.
Add final settings to your workflow
- Add the End nodes.
- Launch the workflow by clicking Save&Run.
Check the use case set up on the Synerise Demo workspace
You can check the configuration of each step from this use case in our Synerise Demo workspace:
- Aggregate that returns the itemIds of products in the shopping cart for each customer.
- Aggregate that returns the total quantity of products in the shopping cart for each customer.
- Workflow
- Catalog