
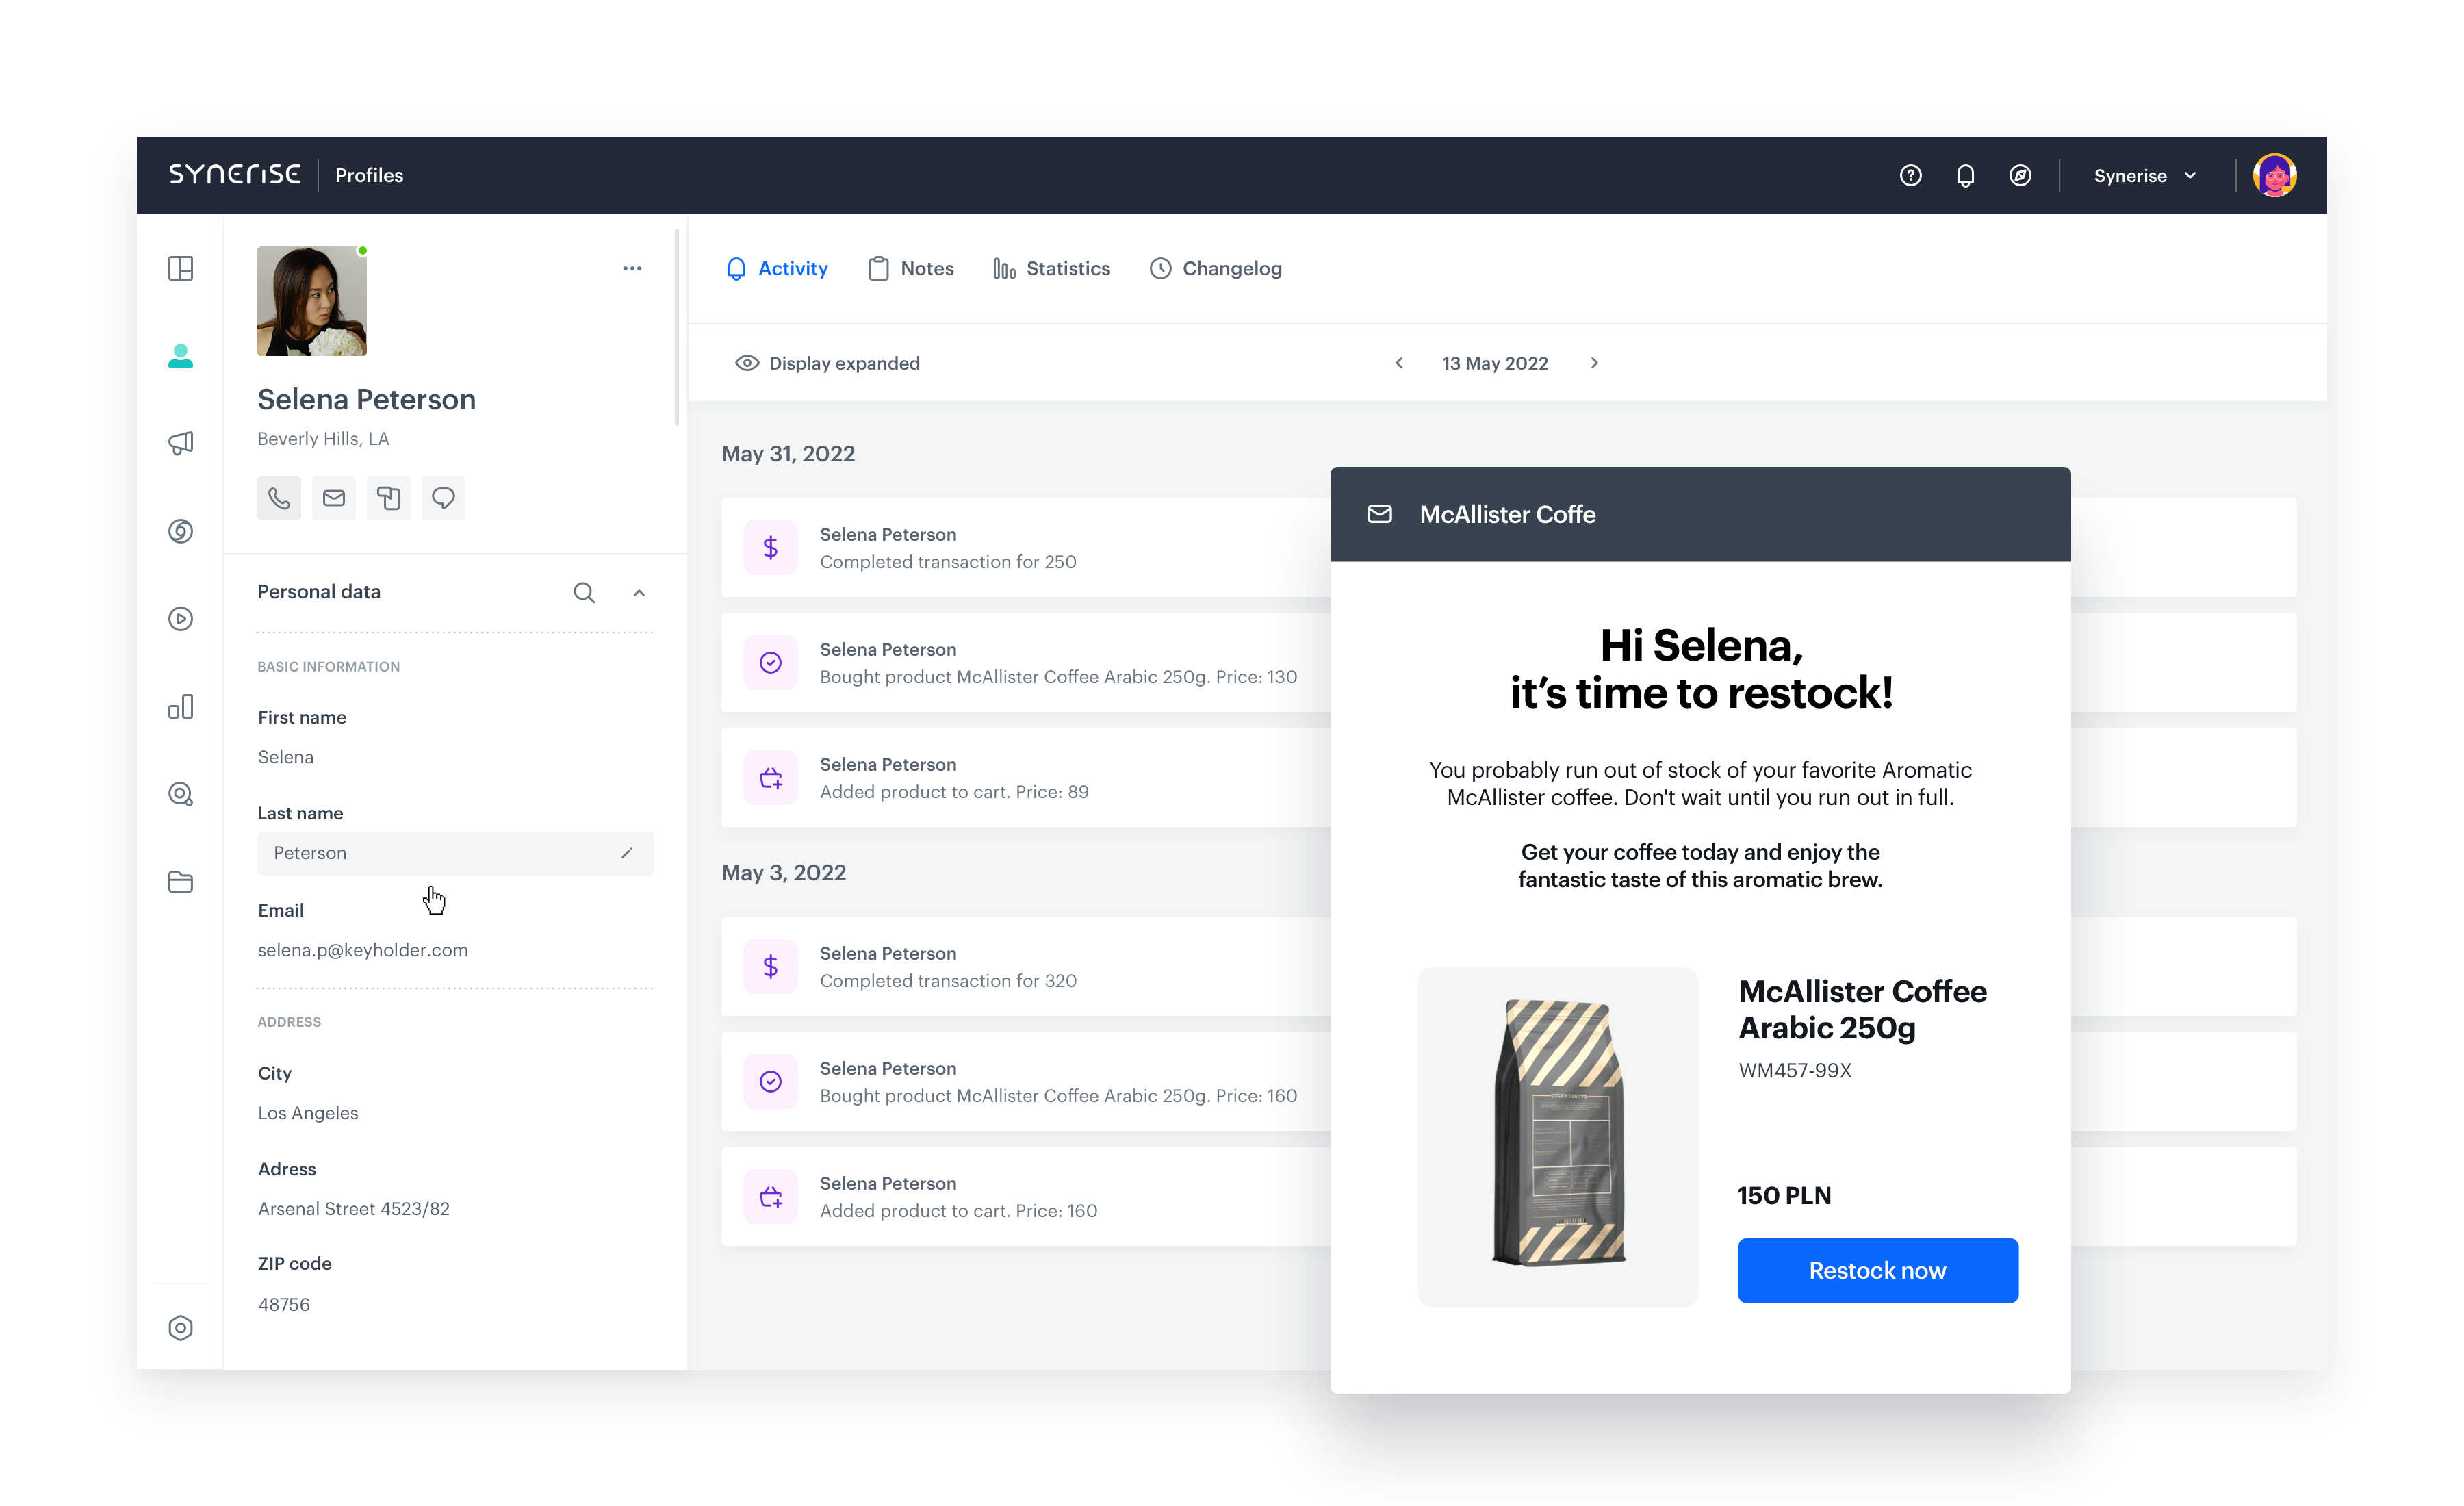
Predict the timing of repeat purchases
Recurring purchases are those purchases that are usually made with some frequency and regularity, such as the purchase of coffee, printer paper, hygiene products, etc. Products purchased on a regular basis fill the greater part of most customers’ shopping baskets. That’s why it’s so important to provide customers with the best experience when making such purchases, reminding them of an upcoming purchase and encouraging them to return more often for these products in your store.
The prediction created in this case is based entirely on analytics and calculates the average time between purchases for customers who have made at least three transactions in a given category, so we can calculate when a customer may make the next purchase, anticipating their intention by sending them an email reminder of the upcoming purchase. The described process consists of two automations, where one calculates the average interval between purchases and the other sends an email to the customer at the appropriate time.
Prerequisites
- Implement transaction events using SDK or API.
- Create an email account.
- Create an email template to be used in the email campaign.
Process
- Create an event expression that converts the time of transaction to a number.
- Create an aggregate that returns the timestamps of the purchased products from the specific category.
- Create a workflow that calculates the average number of days between a customer’s purchases of a product in a specific category and calculates the date of the next purchase based on that number.
- Create a workflow that is responsible for sending a reminder to a customer about the next recurring purchase.
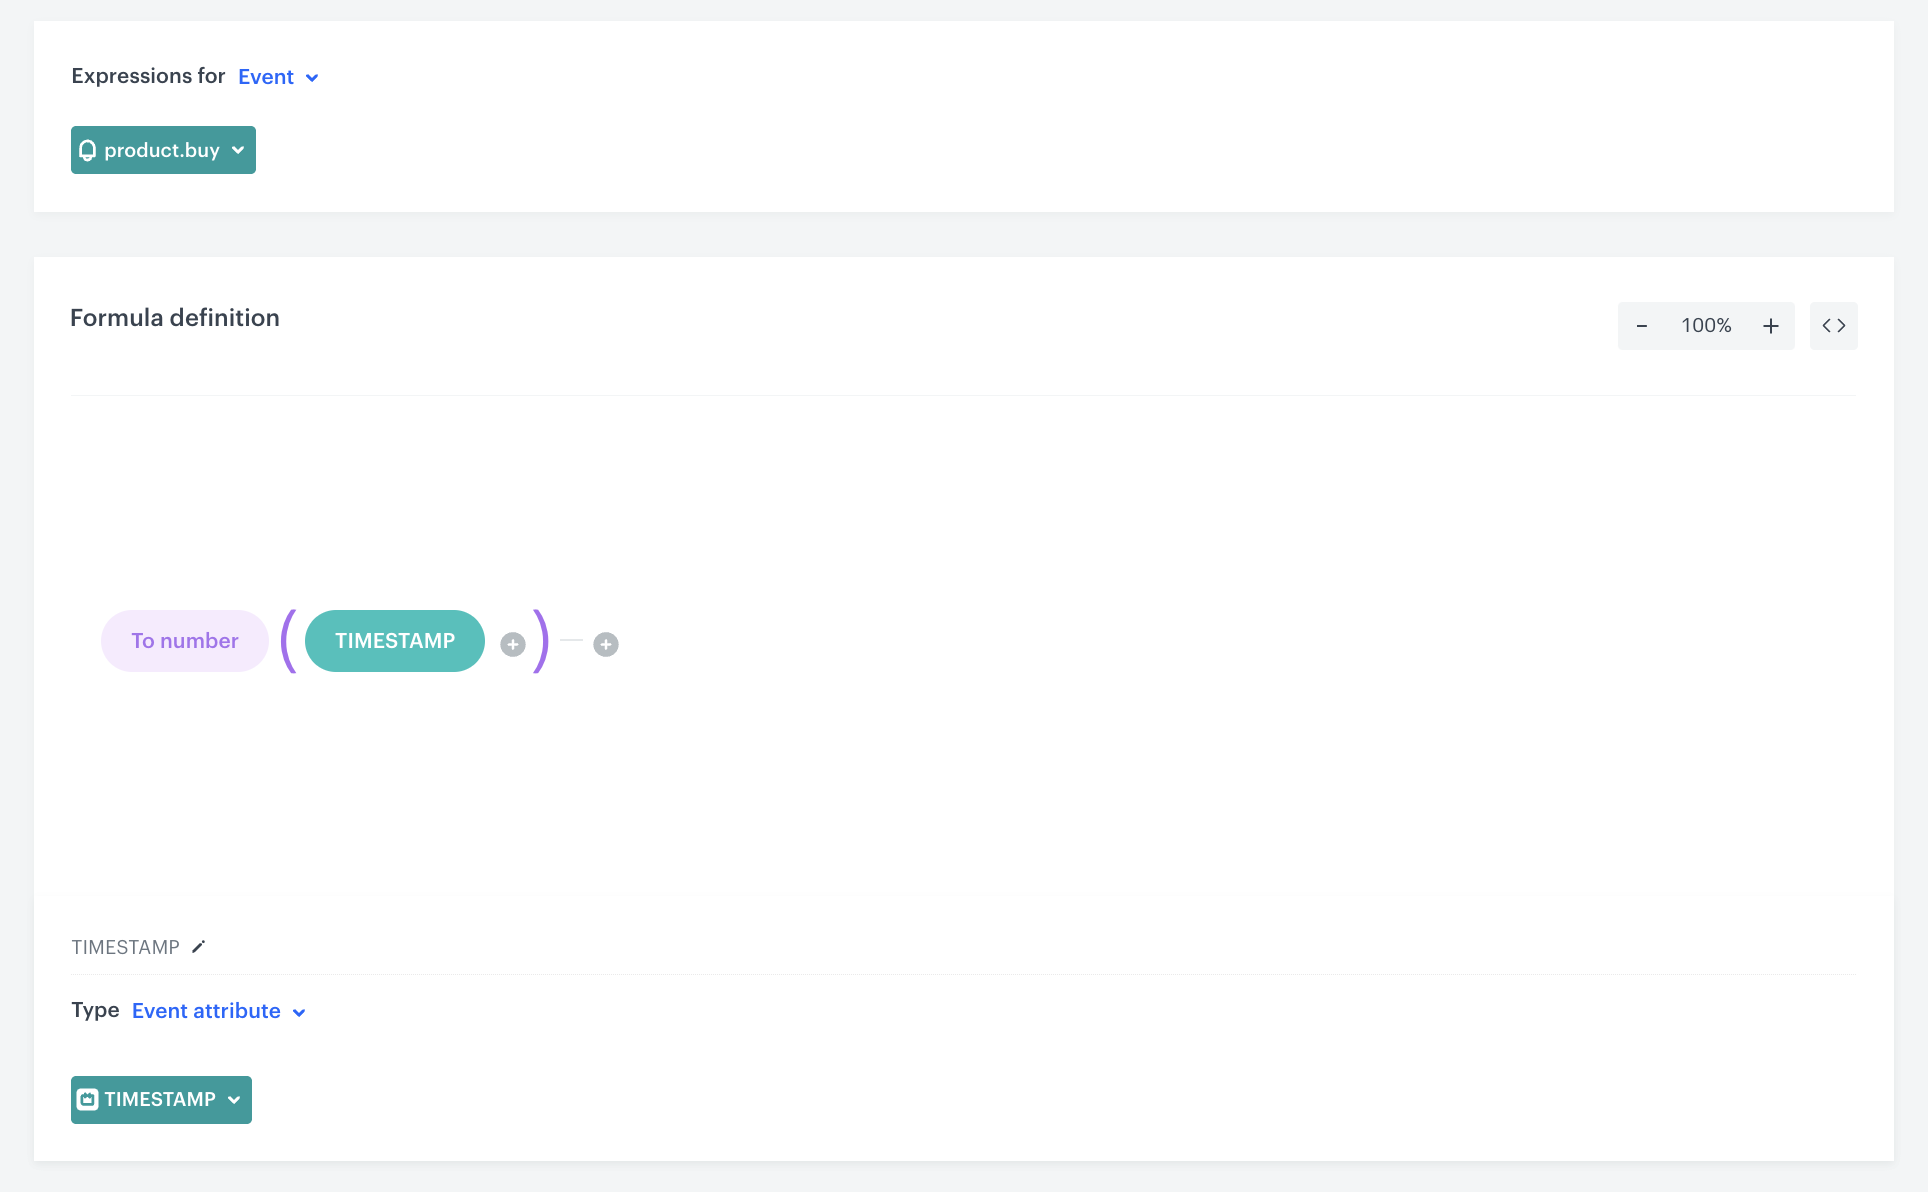
Create an expression
In this part of the process, you need to create an event expression that converts the timestamp of transaction to a number. This expression will be used later to create an aggregate.
- Go to
 Analytics > Expression > New expression.
 - Enter the name of the expression.
- Set the Expression for option to Event.
- From the drop-down list, select product.buy.
- In the Formula definition section, click Select.
- From the list that opens, select Function > To number.
- In the brackets, click the Select button and from the list, select Event attribute.
- Click the Unnamed node that appeared.
- At the bottom of the page, click Choose parameter.
- In the list of attributes, find and select TIMESTAMP.
- Save the expression.
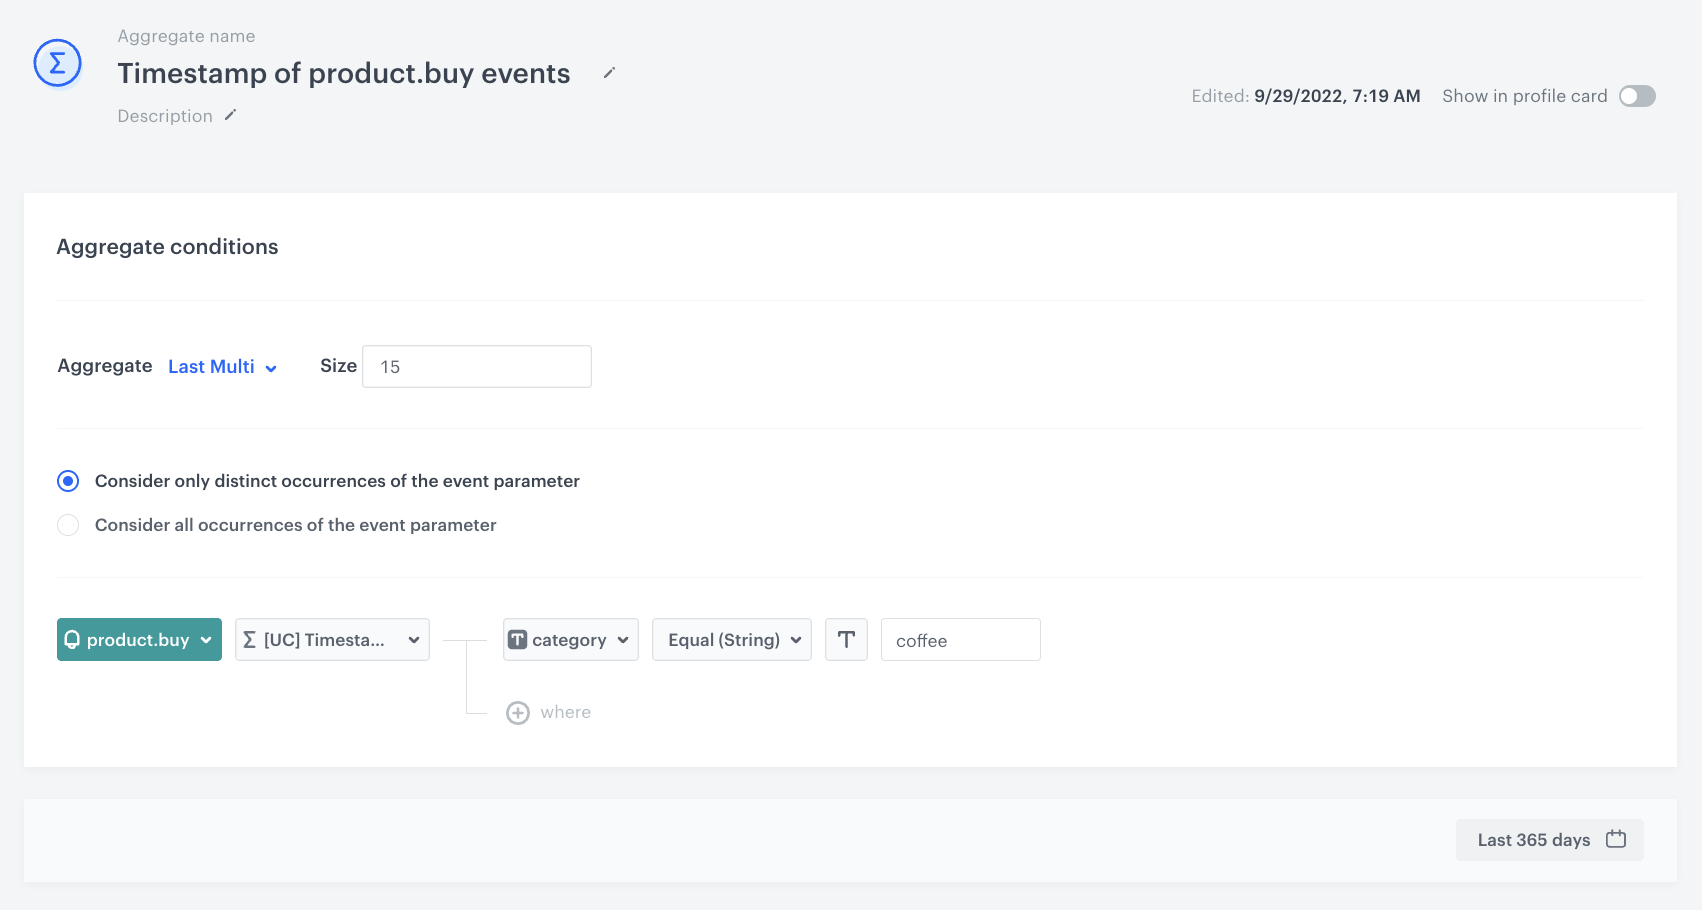
Create an aggregate
In this part of the process, you create a dynamic aggregate that returns timestamps of purchases from a specific category. The aggregate will return timestamps (as numbers) from product.buy events.
- Go to Analytics > Aggregates > New aggregate.
- Enter a meaningful name of the aggregate.
- As the aggregate type, select Last Multi and size
15.Note: This is the maximum number of a customer’s past transactions to be used in the calculation. You can change the number according to your business needs. - Select Consider only distinct occurences of the event parameter.
- Select the product.buy event.
- From the Choose event drop-down list, select the expression you created in the previous step.
- Click the + where button and from the Choose parameter drop-down menu, choose category.
- From the Choose operator drop-down, choose Equal.
- Enter the name of the product category.
In our example, it’scoffee. - Define the time range as Last 365 days.
- Confirm by clicking Apply.
Create a workflow to predict purchase time
You need to create a workflow that calculates the average number of days between a customer’s purchases from a given category. The result is used to calculate the customer’s next purchase probability.
- Go to Automation > Workflows > New workflow.
- Enter the name of the workflow.
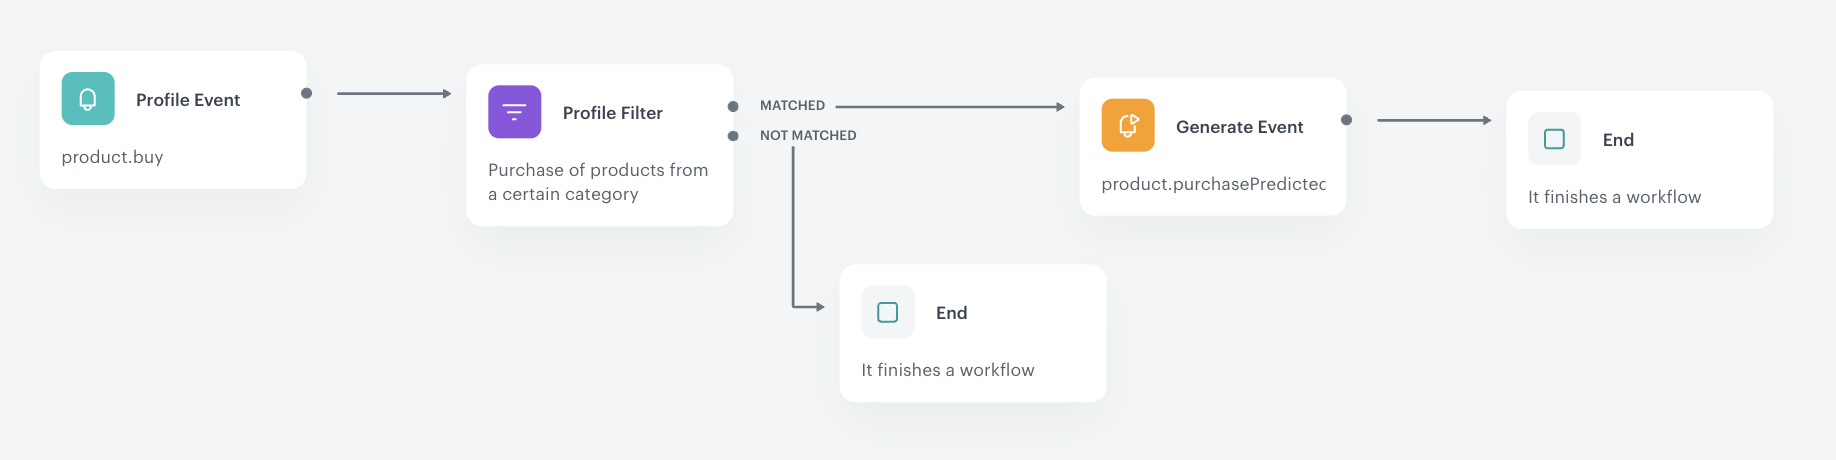
Define the Profile Event trigger node
At this stage you will configure the conditions that will trigger the workflow. As a trigger, you will use the product.buy event for the coffee category.
- As the first node of the workflow, add Profile Event. In the configuration of the node:
- From the Choose event drop-down menu, choose the product.buy event.
- Click the + where button and from the Choose parameter drop-down menu, choose category.
- From the Choose operator drop-down, choose Equal.
- Enter the name of the product category for which you want to predict the time of the customer’s next purchase.
In our case, it’scoffee. - Confirm by clicking Apply.
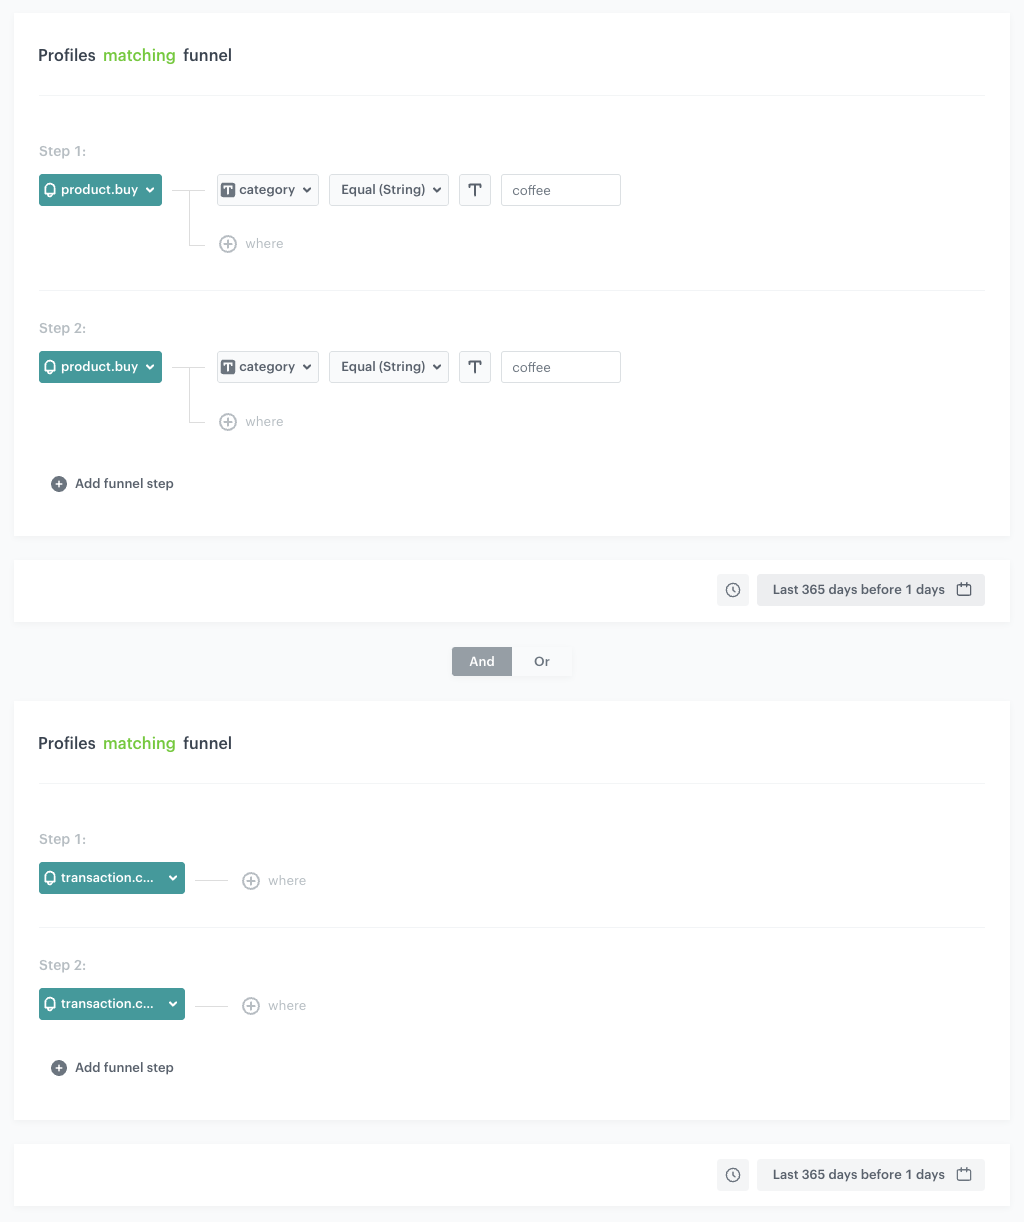
Define the Profile Filter node
In this part of the process, you need to identify customers for whom the workflow calculates the date of next purchase. It takes into consideration customers who have made at least three separate transactions (transaction.charge event) with products from the “coffee” category.
- Add the Profile Filter node.
- Click the node to open its settings.
- Click the Choose filter button and choose the product.buy event.
- Click the + where button and from the Choose parameter drop-down menu, choose category.
- From the Choose operator drop-down, choose Equal.
- Enter the name of the product category for which you want to predict the time of the customer’s next purchase.
In our case it’scoffee. - Click + Add funnel step button and repeat steps 3-6.
- Set the time range to Last 365 days before 1 days.
- Click the Choose filter button and choose the transaction.charge event.
- Click + Add funnel step button and another transaction.charge event.
- Set the time range to Last 365 days before 1 days.
- Confirm by clicking Apply.
- For the Not matched path, add the End node.
Define the Generate event node
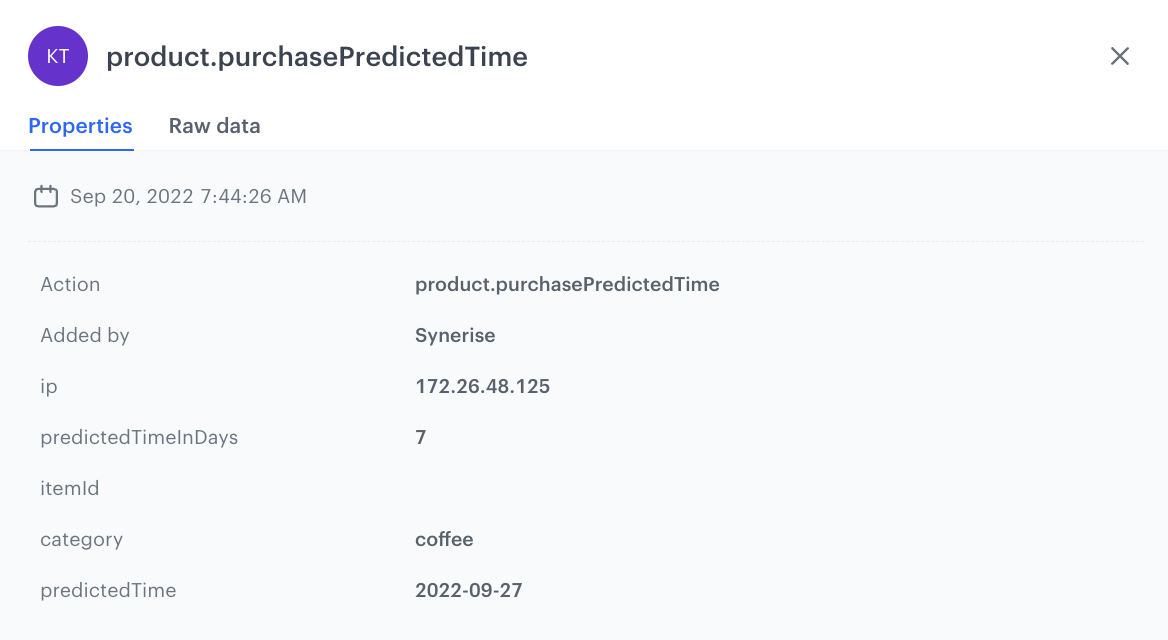
At this stage, an event is generated on the customer’s profile, returning the number of days between purchases and the date when the customer may make the next purchase. It contains the following parameters:
- category - the category of products for which the calculation is made,
- itemId - the ID of last product bought from the specific category,
- predictedTime - calculated date of the next purchase from the specific category,
- predictedTimeInDays - average number of days between purchases from the specific category.
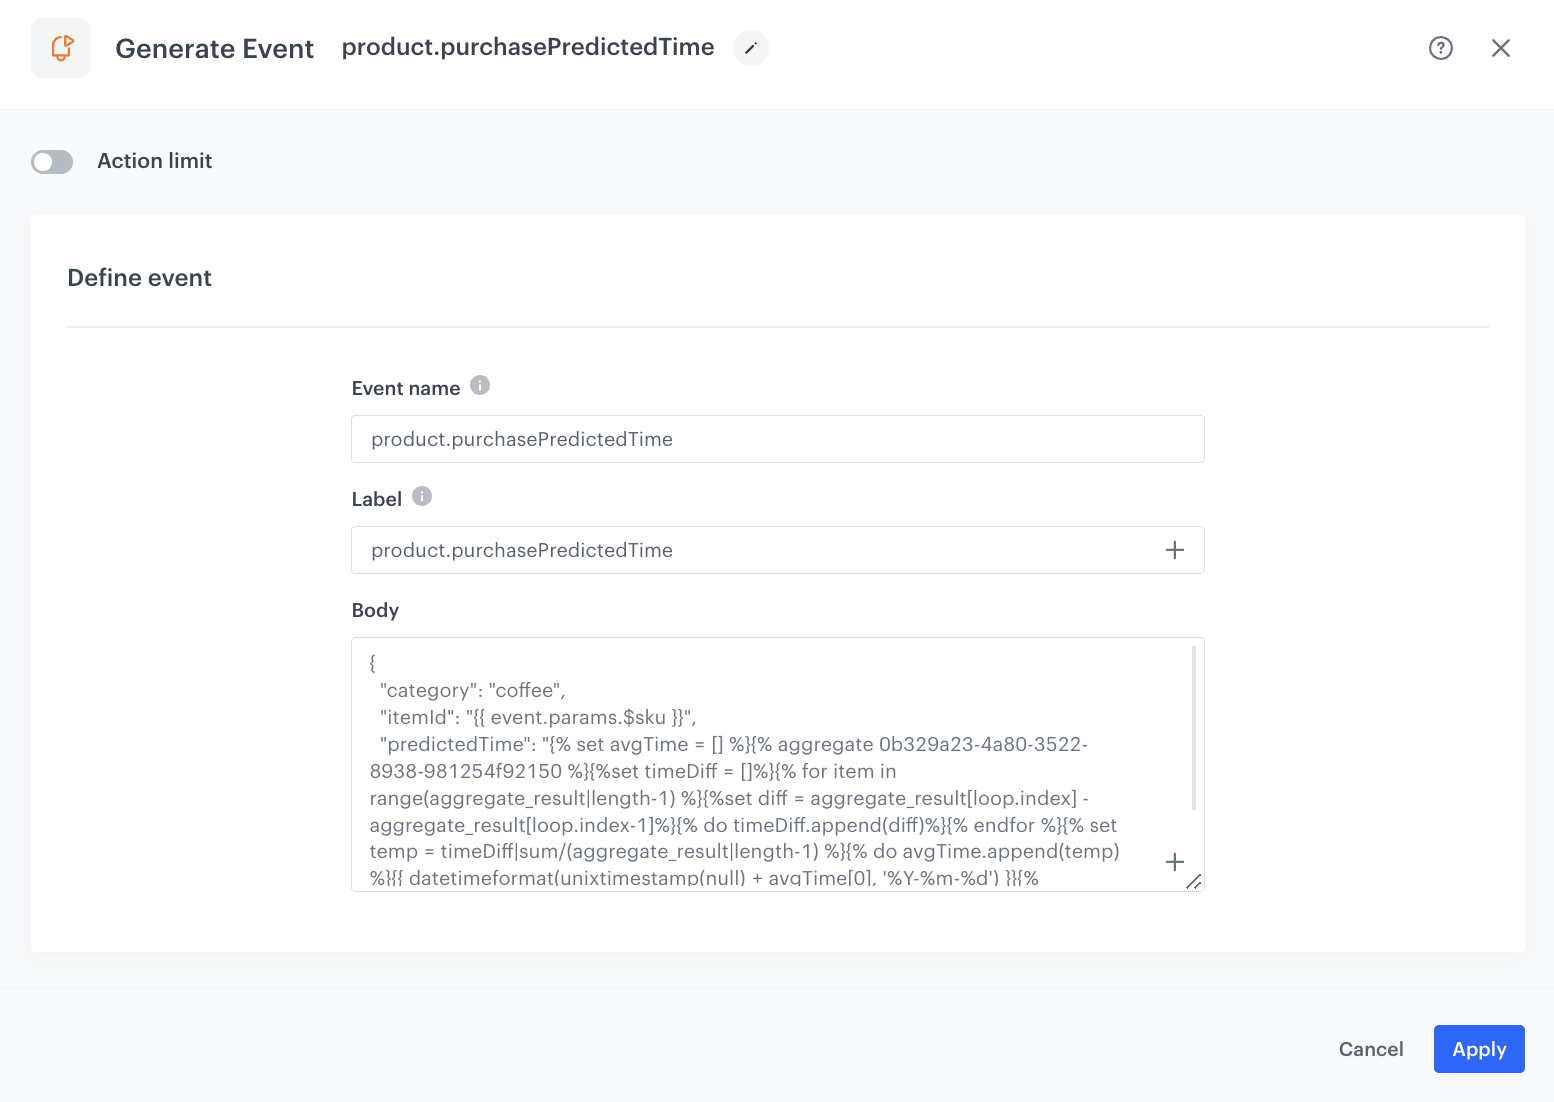
- To the Matched path of the Profile filter node created earlier, add a Generate event node. In the configuration of the node:
- In the Event name, enter the name of the event that will be generated on the customer’s profile. In this case, it is
product.purchasePredictedTime - The Label field exists for backwards compatibility. If your integration does not require this parameter, skip it.
- Add the JSON body of the event. You can use the example below.
Example jinjava code
{
  "category": "coffee",
  "itemId": "{{ event.params.$sku }}",
  "predictedTime": "{% set avgTime = [] %}{% aggregate PASTE_AGGREGATE_ID_HERE %}{%set timeDiff = []%}{% for item in range(aggregate_result|length-1) %}{%set diff = aggregate_result[loop.index] - aggregate_result[loop.index-1]%}{% do timeDiff.append(diff)%}{% endfor %}{% set temp = timeDiff|sum/(aggregate_result|length-1) %}{% do avgTime.append(temp) %}{{ datetimeformat(unixtimestamp(null) + avgTime[0], '%Y-%m-%d') }}{% endaggregate %}",
  "predictedTimeInDays": "{{avgTime[0]/86400000}}"
}
Note: The above jinjava code contains the logic of calculating the average number of days between purchases from the specific category and calculating the date of a next purchase. It can be copied 1:1 into the Generate event node. However, remember to replace the ID of aggregate in this code with the ID of the aggregate created earlier in the process. - Confirm by clicking Apply.
- In the Event name, enter the name of the event that will be generated on the customer’s profile. In this case, it is
Example of a generated product.purchasePredictedTime event:
Add final settings to your workflow
- Add the End node.
- Launch the workflow by clicking Save & Run.
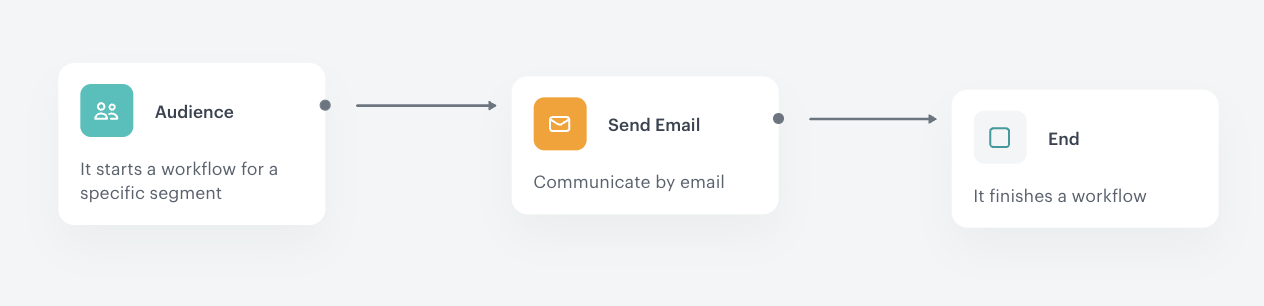
Create a workflow to encourage a purchase
With the above workflow in place, you can create another workflow in which you send a message reminding the customer of the next purchase. This workflow starts each day for a group of customers whose expected purchase date is the current day.
- Go to Automation > Workflows > New workflow.
- Enter the name of the workflow.
Define the Audience node
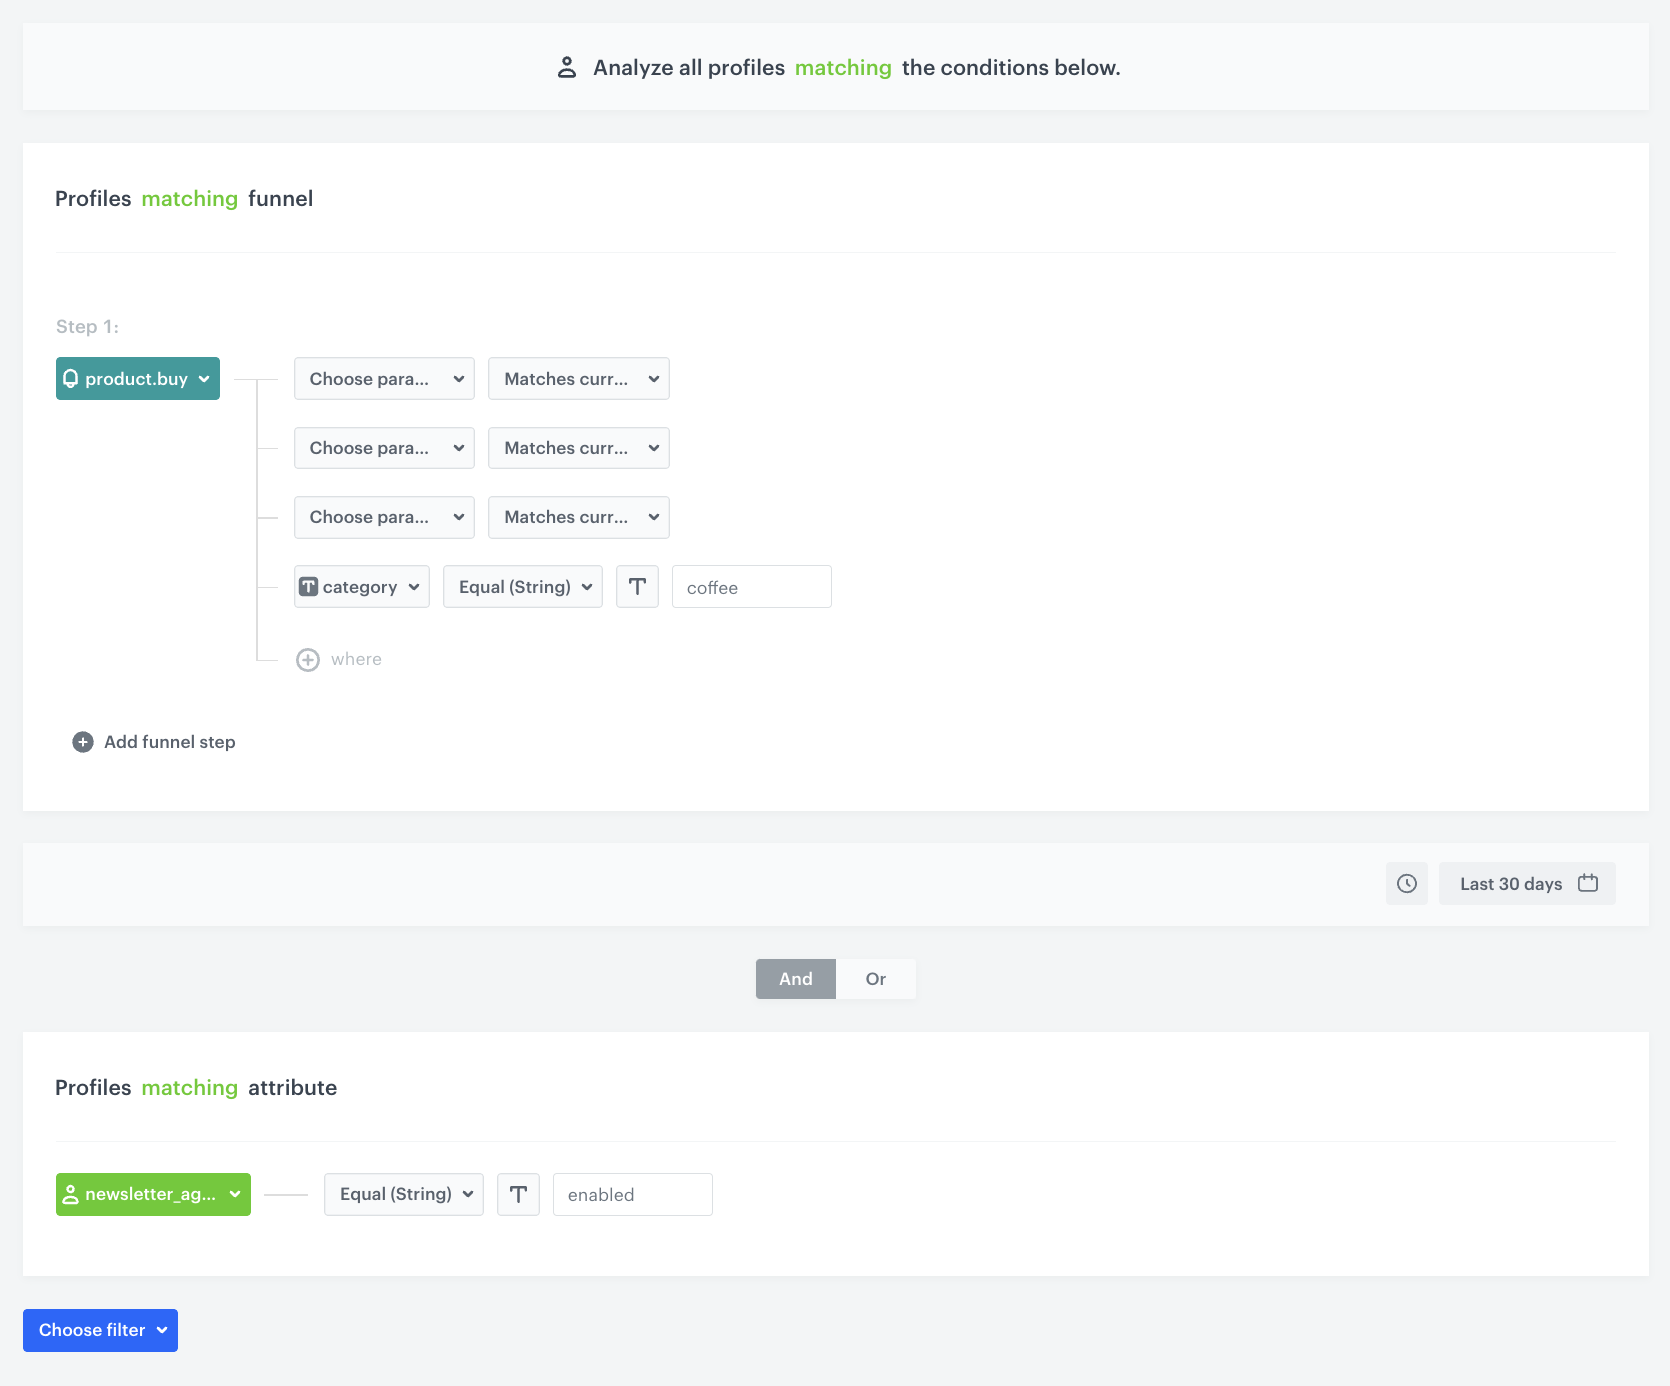
In this stage, you create an Audience that checks for the presence of the product.purchasePredictedTime event on a user’s card in the last 30 days with a specific product category (in our case, coffee), where the predicted purchase date is on the current day. In addition, the Audience filter includes only those customers who have agreed to receive communications.
- Start the workflow with the Audience node and open the node’s settings.
- In Define audience, choose New Audience and click Define conditions.
- From the Choose filter drop-down menu, choose the product.purchasePredictedTime event.
- Click the + where button and from the Choose parameter drop-down menu, choose predictedTime.
- From the Choose operator drop-down menu, select Date > Current date > Matches current day.
- Click the + where button and from the Choose parameter drop-down menu, choose predictedTime.
- From the Choose operator drop-down menu, select Date > Current date > Matches current month.
- Click the + where button and from the Choose parameter drop-down menu, choose predictedTime.
- From the Choose operator drop-down menu, select Date > Current date > Matches current year.
- Click the + where button and from the Choose parameter drop-down menu, choose category.
- From the Choose operator drop-down, choose Equal.
- Type the name of the product category -
coffee. - Define the time range to the Last 30 days.
- From the Choose filter drop-down, choose the newsletter_agreement parameter.
- From the Choose operator drop-down, choose Equal and and specify the condition as enabled.
- Confirm by clicking Apply.
Define the Send Email node
In this step, choose an email template for the upcoming purchase.
- To the Matched path, add the Send Email node and open its settings.
- In the Sender details section, choose the email account from which the email is sent.
- In the Content section, select the template that you prepared as a part of the prerequisites.
- Optional: In the UTM & URL parameters section, define the UTM parameters added to the links included in the email.
- In the Additional parameters section, optionally describe campaigns with additional parameters.
- Click Apply.
Add final settings to your workflow
- Add the End node.
- Launch the workflow by clicking Save & Run.
Check the use case set up on the Synerise Demo workspace
You can check the configuration of each step directly in the Synerise Demo workspace:
Create a workflow for purchasing time calculations
Create a workflow for sending a mailing communication
If you don’t have access to the Synerise Demo workspace, please leave your contact details in this form, and our representative will contact you shortly.