Dynamic audience conditions
There are definitely such business scenarios where you want to streamline your business automation by running a single process for a particular audience, but with the flexibility to switch audiences based on the day’s requirements. Instead of running multiple automations for different audiences, you aim to have one automation that adjusts the audience periodically as needed.
For instance, if you regularly promote specific product categories each day and want to target customers interested in the featured category, a single automation can adapt to reach the right audience every time.
In this use case, we focus on monthly brand promotions. The goal is to notify customers interested in a specific brand about the ongoing promotion for that brand in the current day. We achieve this by employing a dynamic query to define the audience.
General assumptions of the described scenario in this use case:
- A promotion for a specific brand is launched every day
- Information about the days of the week and brands for which the promotion is launched during the month is strored in the catalog (daily promotion works on one brand only)
- The updating of the information in the catalog can be carried out in various ways, for example through recurring automation in which the data in the catalog will be updated at a specific frequency
- We want to inform customers who are interested in promoted brands about an active promotion
- Interested users in our case are those who have purchased any product of the brand in the last 30 days
- To create a dynamic segment that identifies customers interested in a brand with an active promotion each day, we will create a dynamic query in the Audience node.
Prerequisites
- Implement Synerise tracking code into your website.
- Implement transaction events using SDK or API.
- You must be granted user permissions that allow access to Catalogs section and adding new catalogs.
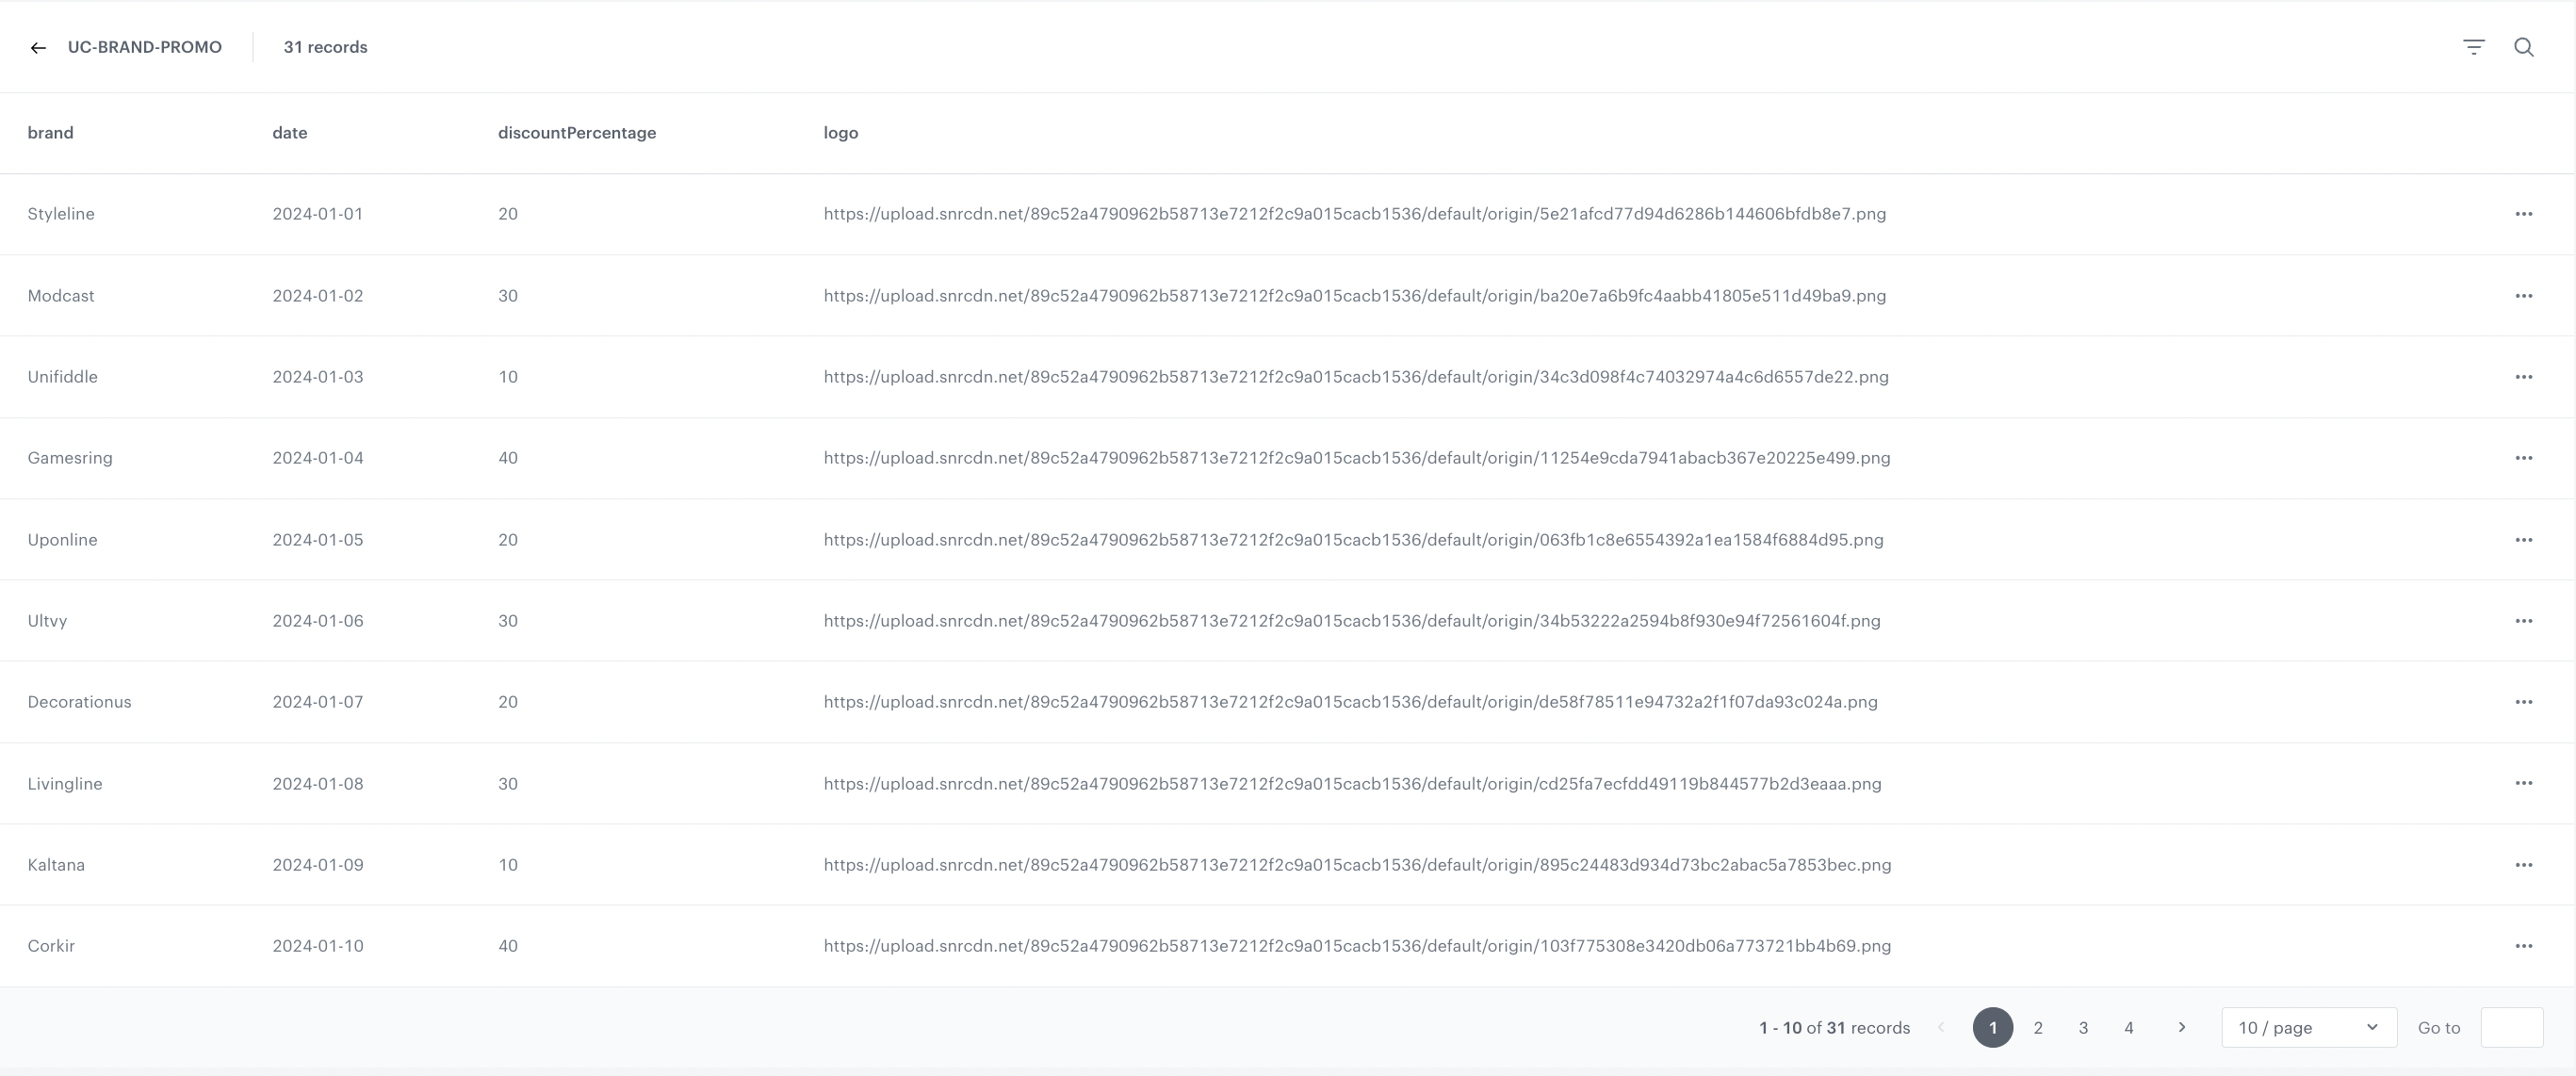
- Create a catalog with columns for the day of the month, brand, brand logo, and promotion percentage. Use the day of the month as the catalog’s key (primary key). You will refer to this catalog when creating both an email template and the dynamic query for the audience. An example of the catalog is provided below. For instructions on importing data into the catalog, check out this article.
- Configure a sender account.
Process
Create jinjava with dynamic query
Below is an example of the Jinjava code that will be used in this use case. Remember to modify specific code elements, such as the catalog name and the brand identifier, accordingly.
Jinjava explanation:
The following Jinja code retrieves today’s date, identifies a brand assigned to the promotion for the current day in a catalog, and then displays details about that brand.
    {%- set today = timestamp|timestamp_to_time|datetimeformat('%Y-%m-%d') -%}
    {%- set key = today -%}
    {%- catalogitemv2.BRAND-PROMO(key) allowEmpty=True -%}
    {%- set item = catalog_result -%}
    {{item.brand}}
{%- endcatalogitemv2 -%}- BRAND-PROMO is the name of the catalog created as part of the prerequisites.
- brand is the name of the column in the catalog that corresponds to the brand discounted on the current day.
Create an email template
In this part of the process, create an email template. You can use a predefined template or create your own template from scratch. In this case, we will use the predefined template.
- Go to
 Communication > Email.
 - On the left pane, click Templates and from the list of template folders, select Predefined simple templates.
- Select any template that closely aligns with the assumptions and objectives of the campaign. Result: You are redirected to the code editor.
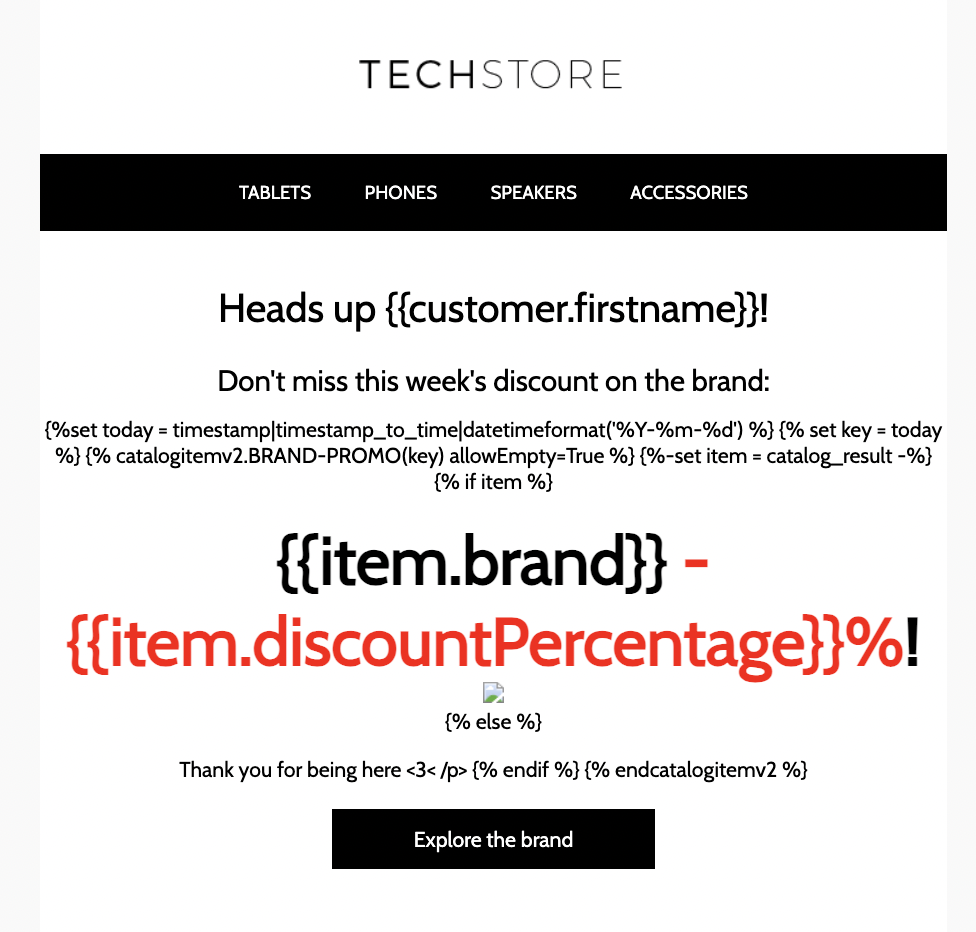
- Edit the template according to your needs and add the row dedicated to the section related to the information about discounted brand.
- From the Content section, add HTML to the created row and paste the Jinjava code you previously created. Customize the display view of the Jinjava code so it suits the style of the email.
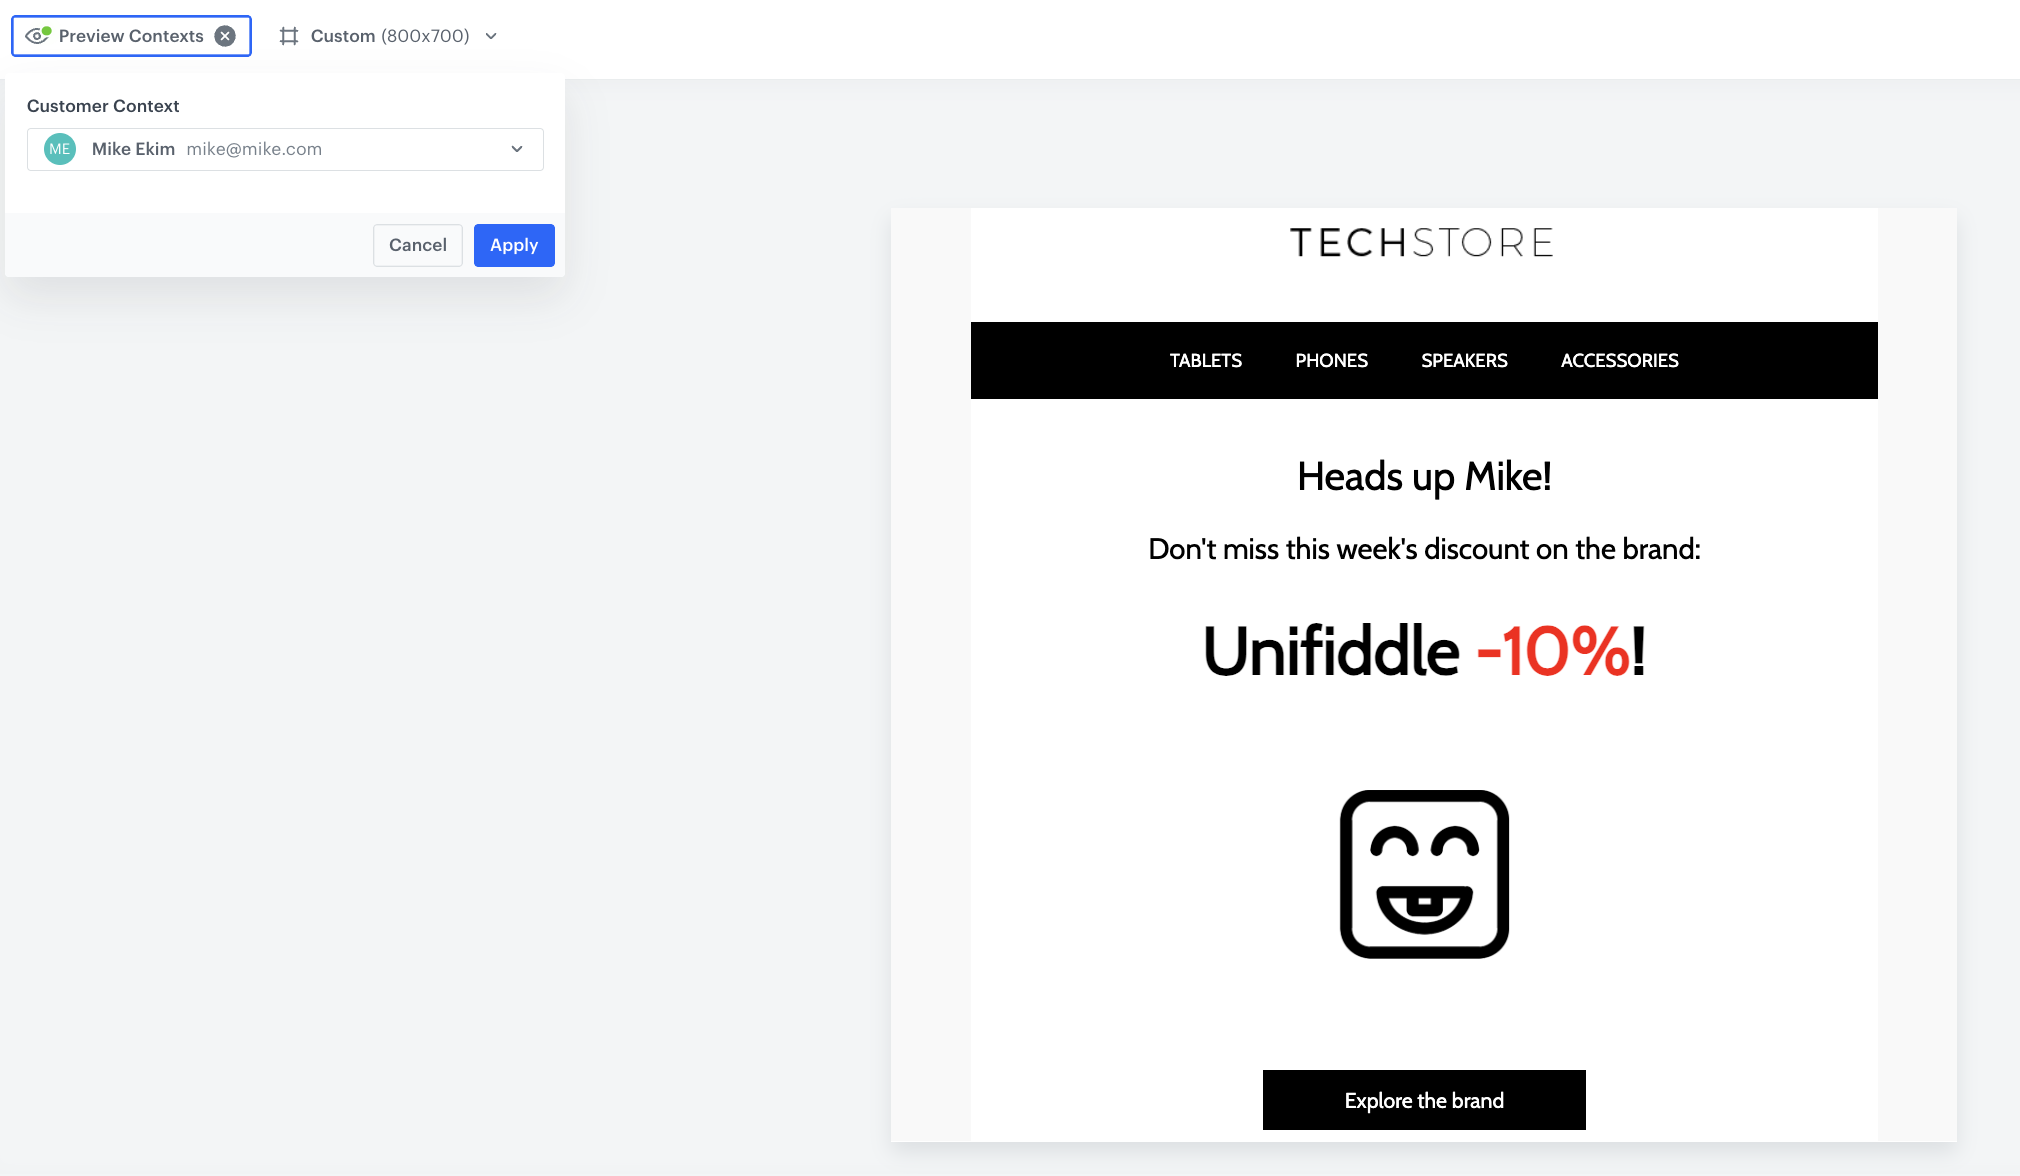
- After you make changes to the template, you can check the preview.
- Click the Preview Contexts button on the upper left side.
- Enter the ID of a customer.
- Click Apply.
- If the template is ready, in the upper right corner, click the arrow next to Next, and from the dropdown select Save as.
- On the pop-up:
- In the Template name field, enter the name of the template.
- From the Template folder dropdown list, select the folder where the template will be saved.
- Confirm by clicking Save.
Below you can find an example of email preview with and without context.
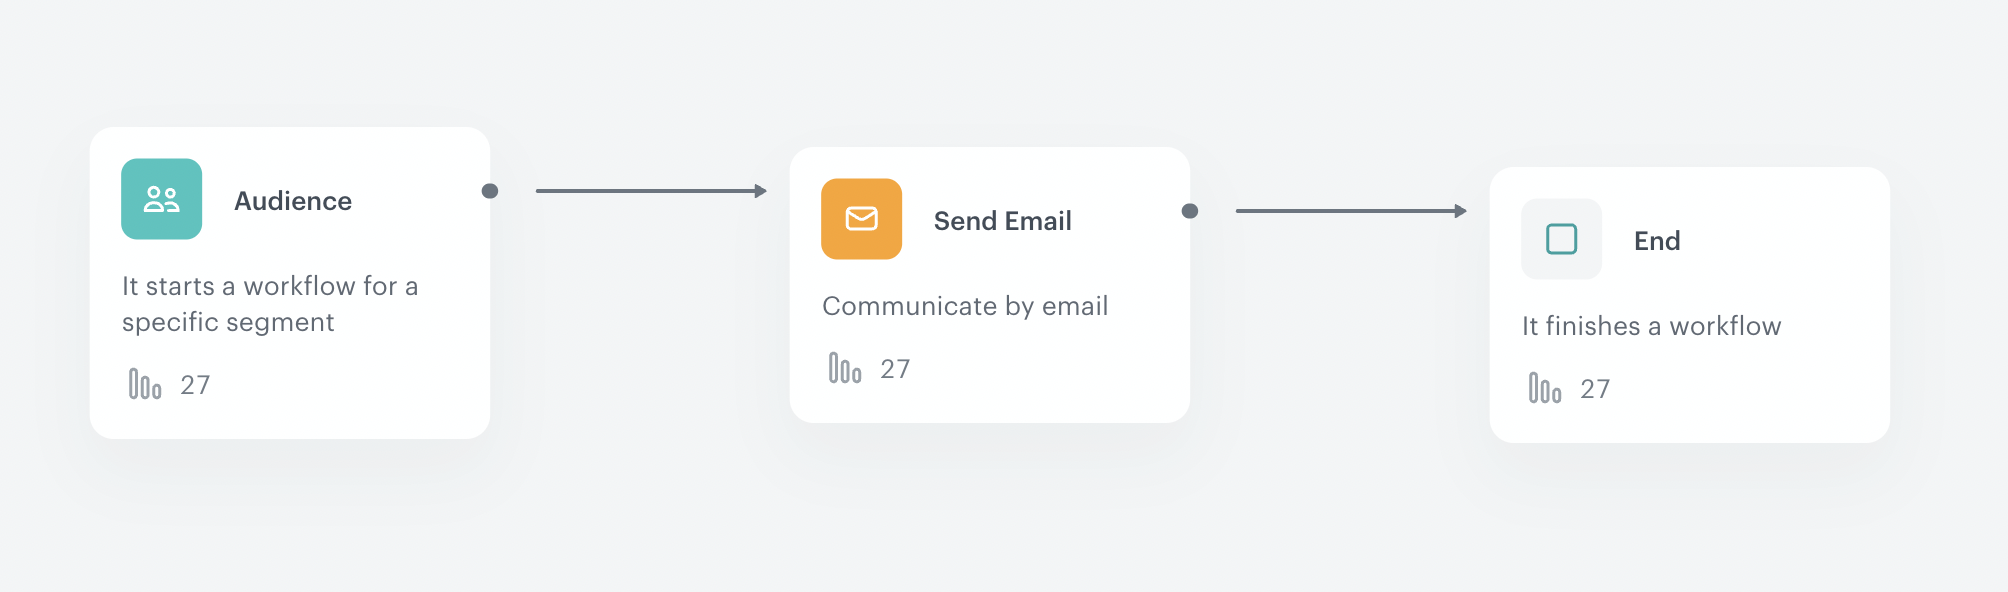
Create a workflow
In this part of the process, we create a recurring workflow to send emails about brand promotions active on the current day to customers who have bought any of the brand’s products in the last 30 days.
Configure a trigger
Choose the Audience node as the trigger. In this scenario, we’re building a dynamic audience to find customers interested in the brand currently being discounted.
- Start the workflow with the Audience node.
- In the configuration of the node, leave the Run trigger as repeatable.
- Set the interval to 1 day.
- Choose the day and time when the process starts.
- Select the time zone.
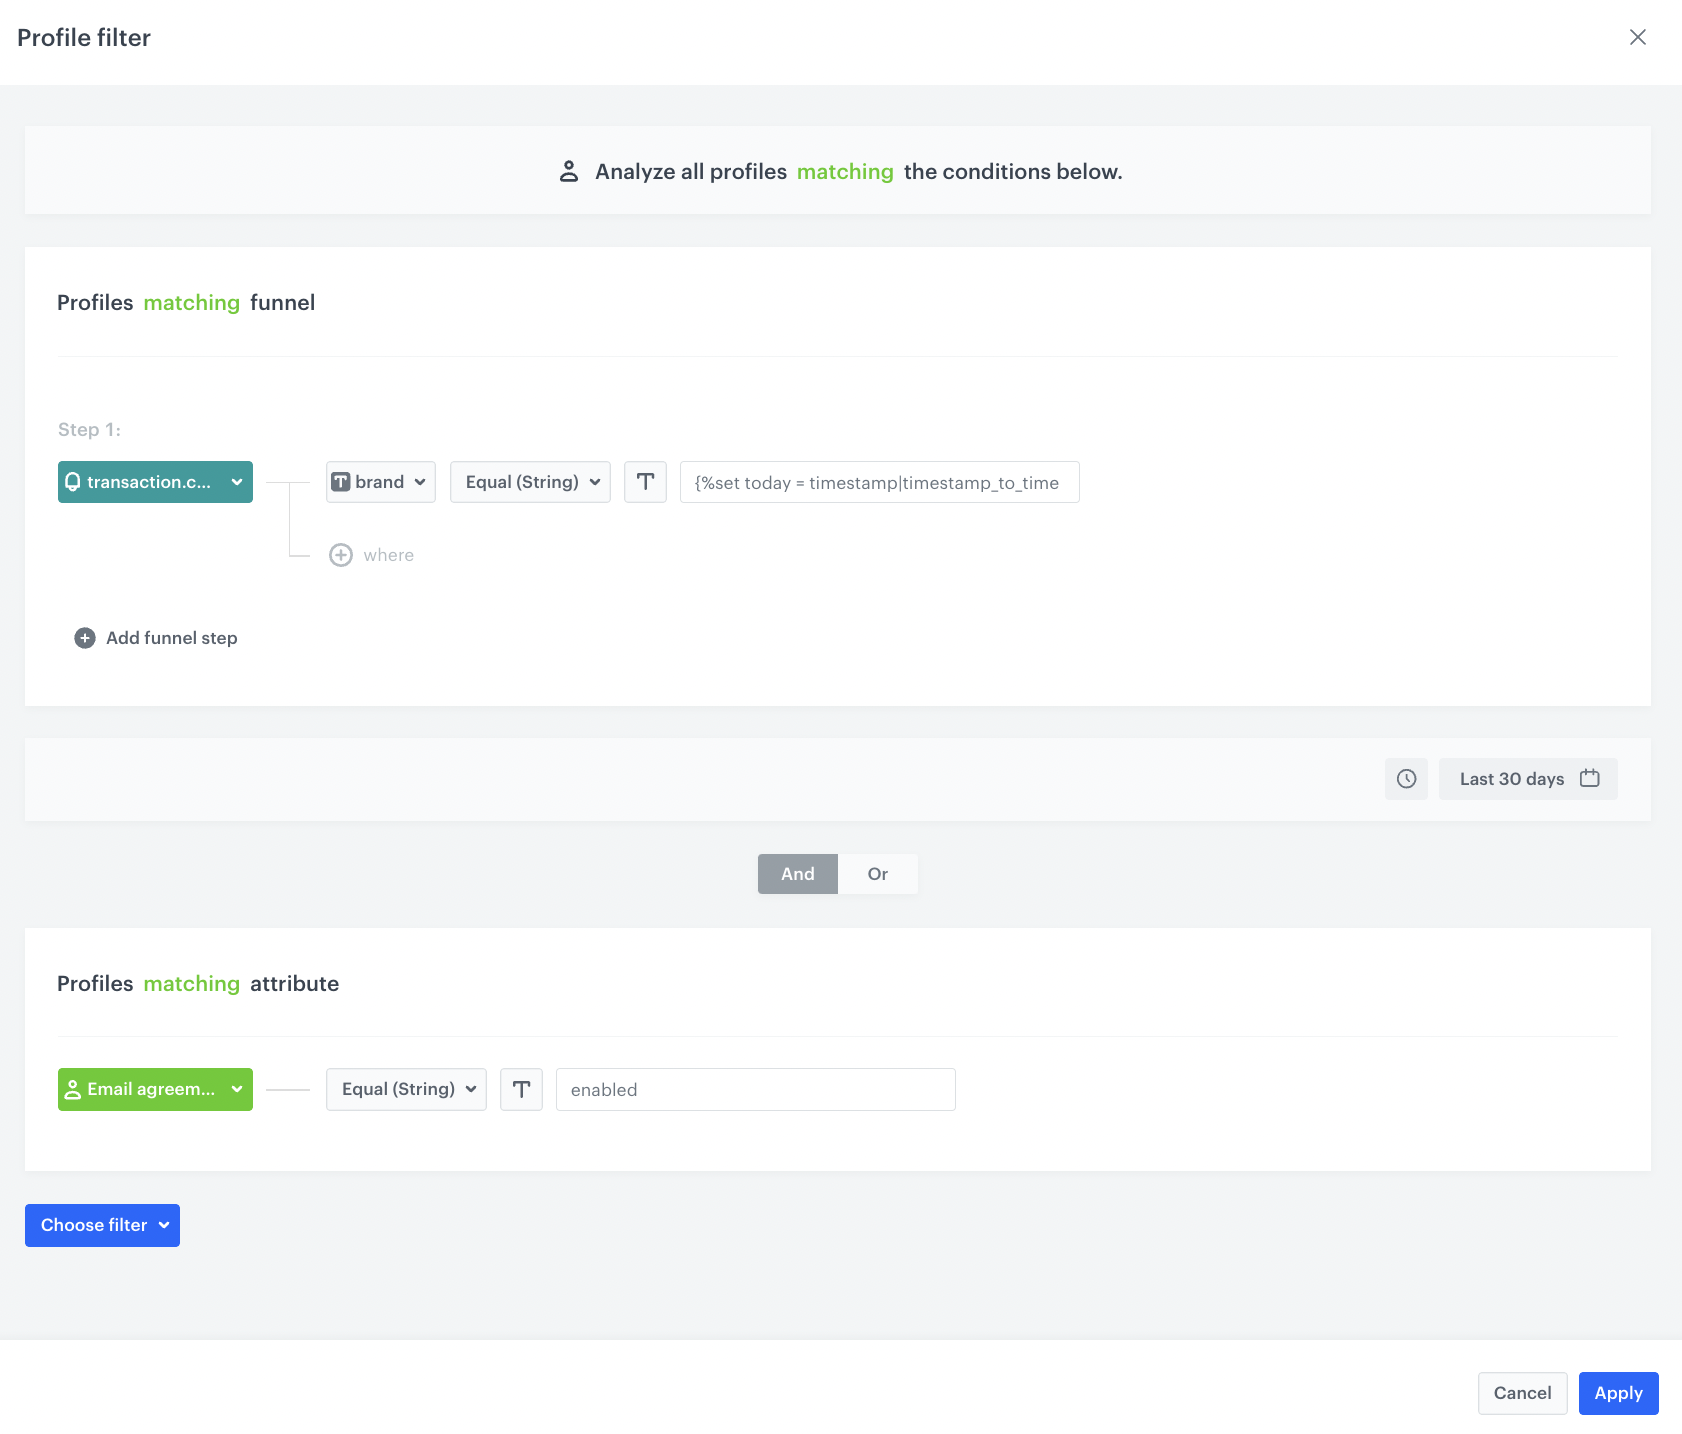
- In Define audience, choose New Audience and click Define conditions.
- As the first condition, from Choose filter dropdown menu, choose the
transaction.chargeevent. - From the Choose parameter dropdown list, select brand.
- From the Choose operator dropdown list, select Equal (String).
- In the text field enter the Jinjava created earlier in the process.
- From the Choose filter dropdown list, select the newsletter_agreement attribute.
- From the Choose operator dropdown, choose Equal (String) and in the empty field, type
enabled. - Define the time range from which you want to analyze this event. In our case, it’s Last 30 days.
Configure the Send email node
In this part of the process, email will be sent to customers who have been identified in the dynamic audience.
- Add the Send Email node and open its settings.
- In the Sender details section, choose the email account from which the email is sent.
- In the Content section, select the template that you prepared earlier in the process.
- Optional: In the UTM & URL parameters section, define the UTM parameters added to the links included in the email.
- Optional: In the Additional parameters section, define youradditional parameters which will be added to events related with this email.
- Click Apply.
Add final settings to your workflow
- Add the End nodes.
- Launch the workflow by clicking Save&Run.
Check the use case set up on the Synerise Demo workspace
You can check the configuration of each step from this use case in our Synerise Demo workspace:
If you don’t have access to the Synerise Demo workspace, please leave your contact details in this form, and our representative will contact you shortly.