
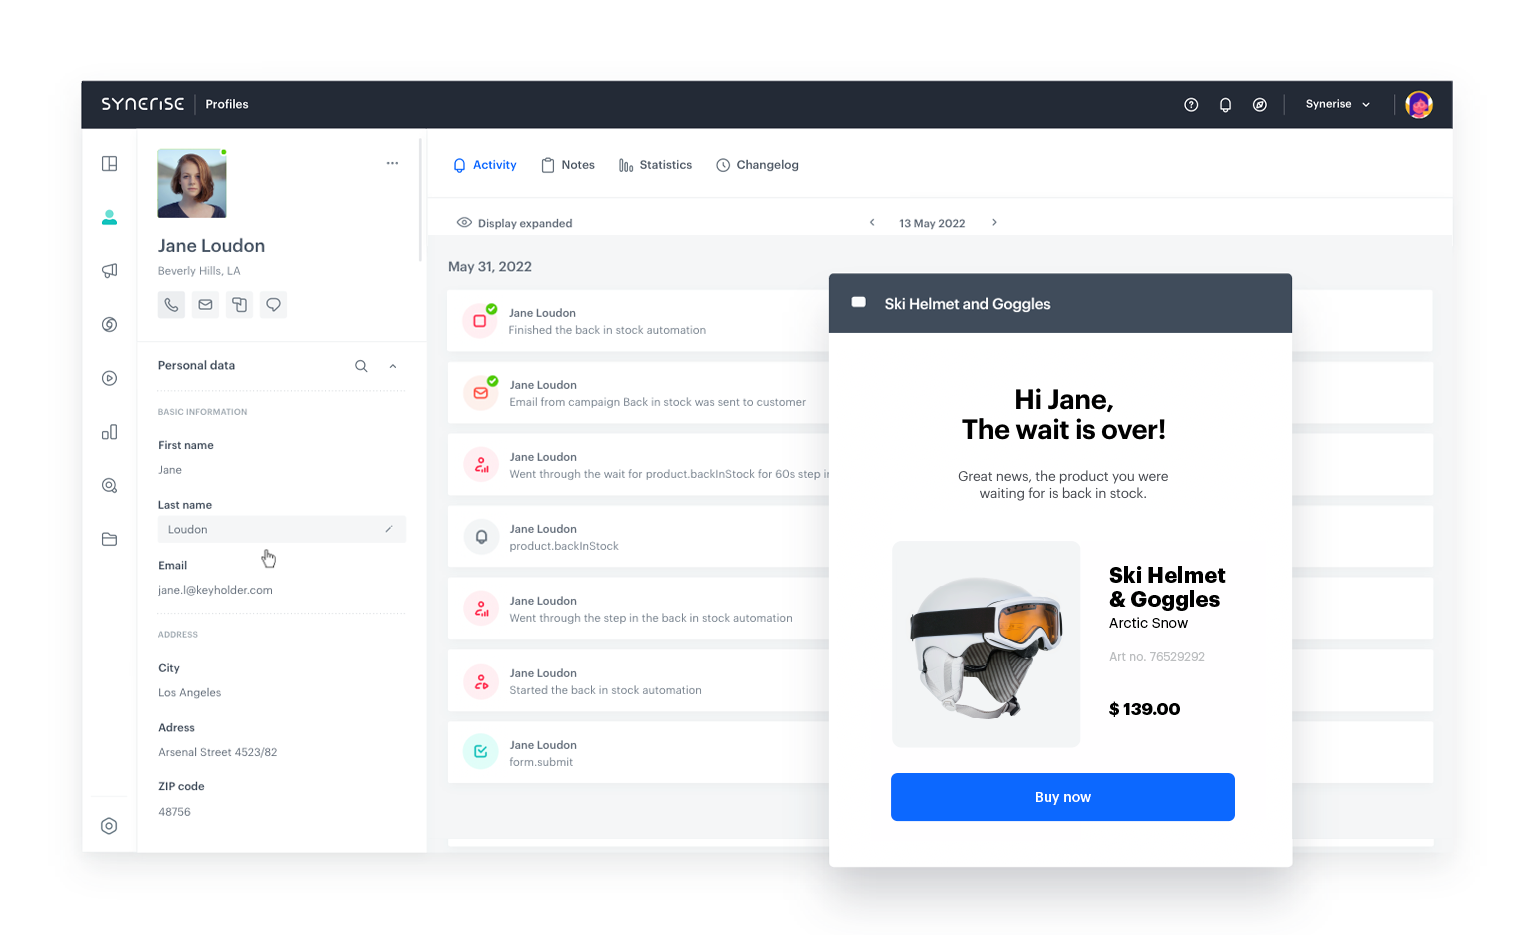
Back in stock campaign
There are many reasons why products go out-of-stock. As an example, it can be caused by a sudden trend or seasonal demands. As a result, customers can get a bit frustrated as they cannot buy the product they want at the time they need it. Leaving customers with this feeling in this situation is a very bad idea, as it can trigger them to move on to a competitor in hopes of finding a substitute for the product they were unable to buy in your store. At that point it not only causes you to lose sales, but also makes a long-term impact on customer satisfaction that was caused by the frustrating experience.
If you don’t want to lose your customers, it’s important to properly manage the out-of-stock situation and turn it into a positive customer interaction. One of the most effective actions in this regard is to allow the customer to sign up for a product availability notification list, so that when the product is back in stock, the customer receives an email notification about it. This simple action helps recover potentially lost revenue while keeping customers engaged with your brand.
This use case describes an example of a back in stock campaign that you can implement in your business. The scenario described involves sending email communications to customers with products that they were previously interested in and signed up for notifications about those products, and which are now back in stock.
Prerequisites
-
Send an event when a customer signs up for a product availability notification. Such an event should contain the ID of the product that the customer signed up for in order to be notified when the product is back in stock. This event will appear on the profile of the customer who signed up for such notification. You can send this event using the API or JS SDK.
Note: In this use case, this event is namedform.submit. We will use the nomenclature of this event in the subsequent steps of this use case. The name of the implemented event used in this case is just an example and depends on your implementation.Tip: You can use the dynamic content to display a sign-up form for product availability notifications on the card of unavailable product and send an event to Synerise when the form is filled out using the JS SDK method. -
Create an email template to be used in the back in stock campaign.
Note: You can find an example of Jinjava code that you may use in your mailing in the configuration of the Send email node. -
Create item catalog containing information about product availability.
Process
- Create a product.backInStock event
- Create an aggregate with products for which the customer has signed up for notifications
- Create an aggregate collecting SKUs of products already received by the customer that are back in stock
- Create a workflow
Create a product.backInStock event
In this part of the process, add the product.backInStock event, which will later be generated in the workflow that checks whether the product is back in stock. In addition, this event must include the parameter sku, which contains the SKUs of all restocked products the customer signed up for.
- Go to
 Data Management > Events > Add event.
 - In the Name field, enter
product.backInStock.
In the API and SDK, the name parameter is usually calledactionoraction name. - Optionally, define a human-friendly display name that will be shown in the Data Managament and Analytics modules.
- Optionally, in the Description field, enter the description of the event.
- Enable the Make this event available to anonymous profiles without JWT toggle.
- Click Apply.
- In the list of events, find the event you just created.
- On the right side of the screen, click Add property.
- In the Source parameter field, enter
sku. - In the Property name field, enter a human-readable label for display in the Synerise platform.
- Optionally, in the Description field, you can add an explanation about the purpose of this parameter.
- To complete the process, click Save.
Create an aggregate with products for which the customer has signed up for notifications
The aggregate created will later be used in workflow to check which products have returned to stock.
- Go to
 Analytics > Aggregates > New aggregate.
 - Enter the name of the aggregate.
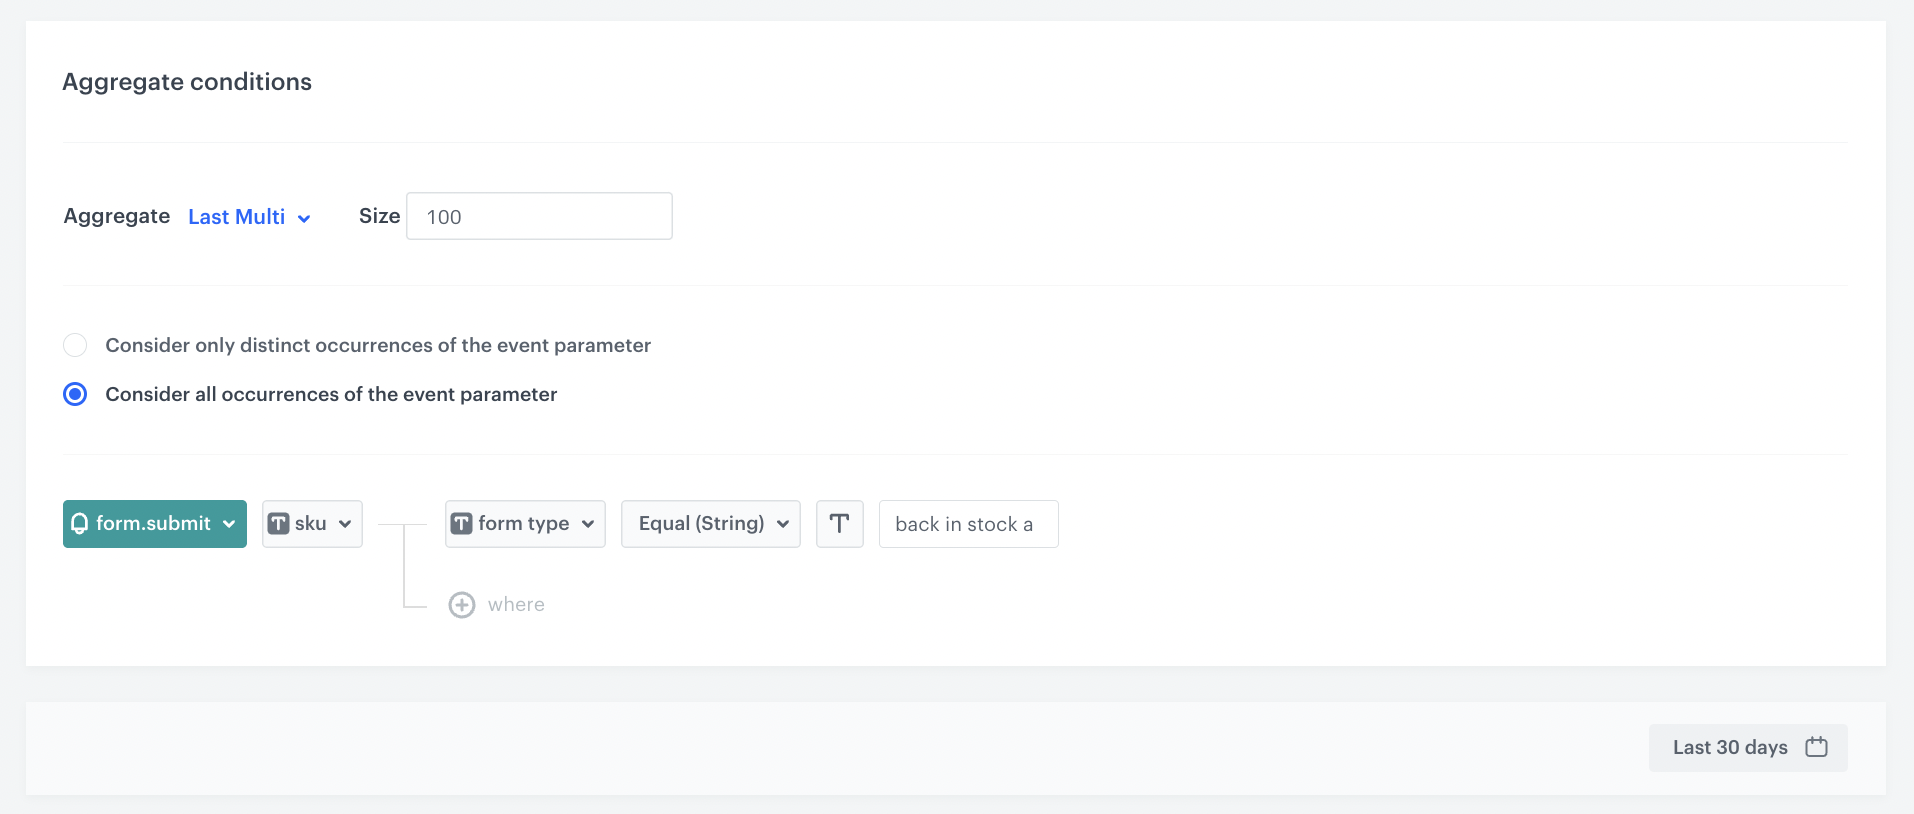
- As the type of the aggregate, select Last multi and in the Size field, enter
100. - Select the Consider all occurrences of the event parameter radio button. This includes ALL occurrences of the event in the aggregate.
- From the Choose event dropdown list, select the form.submit event.
- As the event parameter, select sku.
- Click + where button.
- From the Choose parameter dropdown list, select the form type parameter.
- From the Choose operator dropdown list, select Equal.
- Enter the name of the form. In our case it’s
back in stock alert. - Set the period from which the aggregate will analyze the results to the last 30 days.
- Save the aggregate.
Create an aggregate collecting SKUs of products already received by the customer that are back in stock
This aggregate will be used later in the process to exclude products already sent to customers when sending the next notification email.
- Go to Analytics > Aggregates > New aggregate.
- Enter the name of the aggregate.
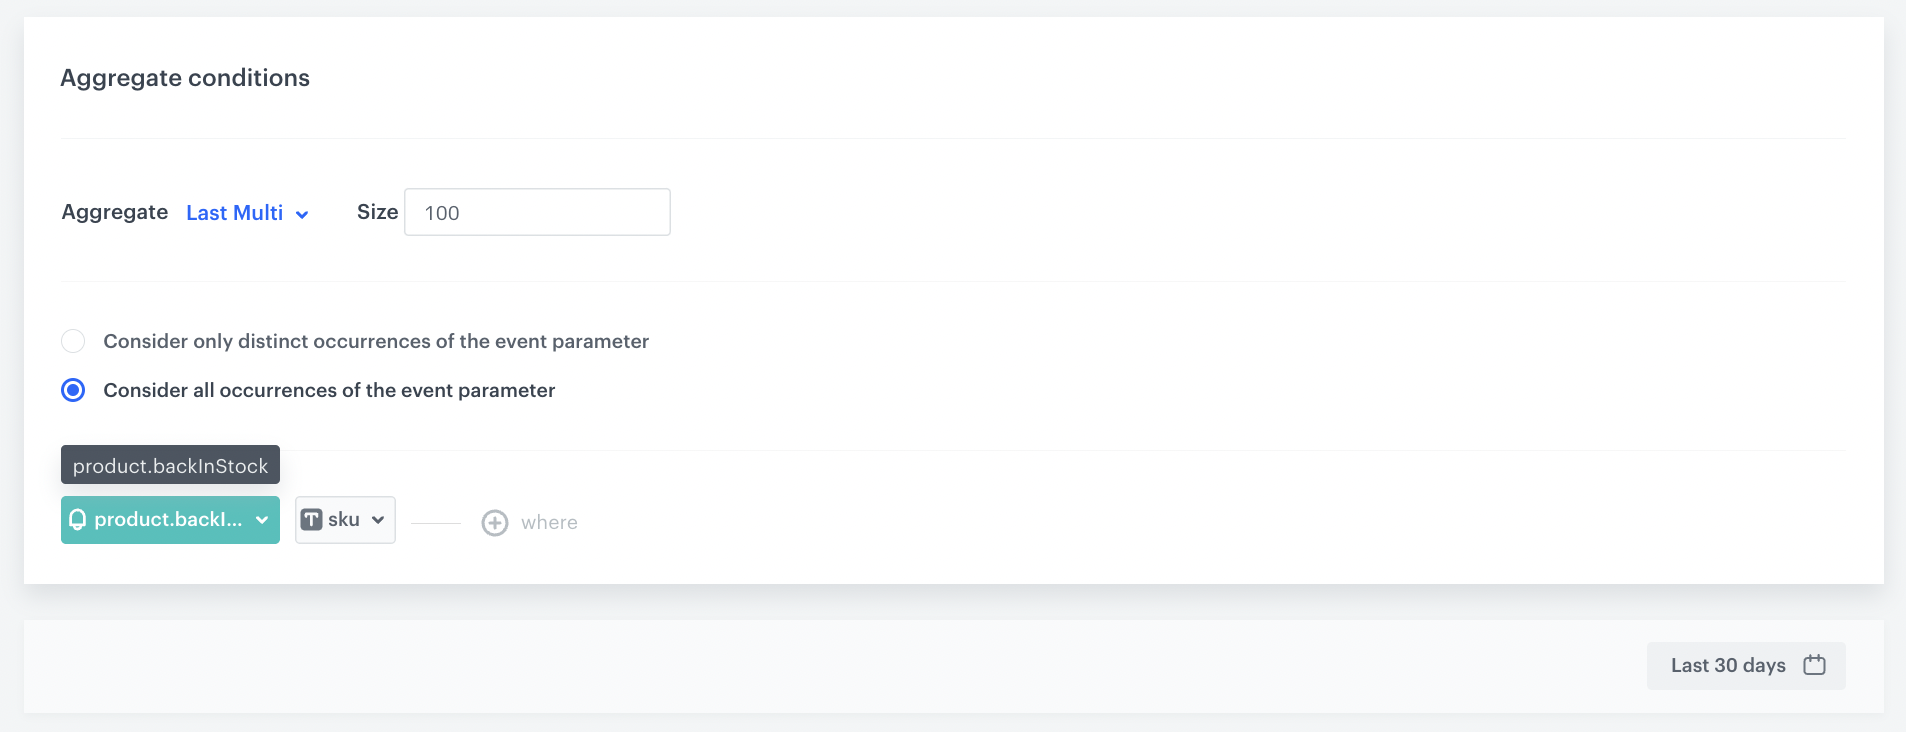
- As the type of the aggregate, select Last multi and in the Size field, enter
100. - Select the Consider all occurrences of the event parameter option.
- From the Choose event dropdown list, select the product.backInStock event.
- As the event parameter, select sku.
- Set the period from which the aggregate will analyze results to the last 30 days.
- Save the aggregate.
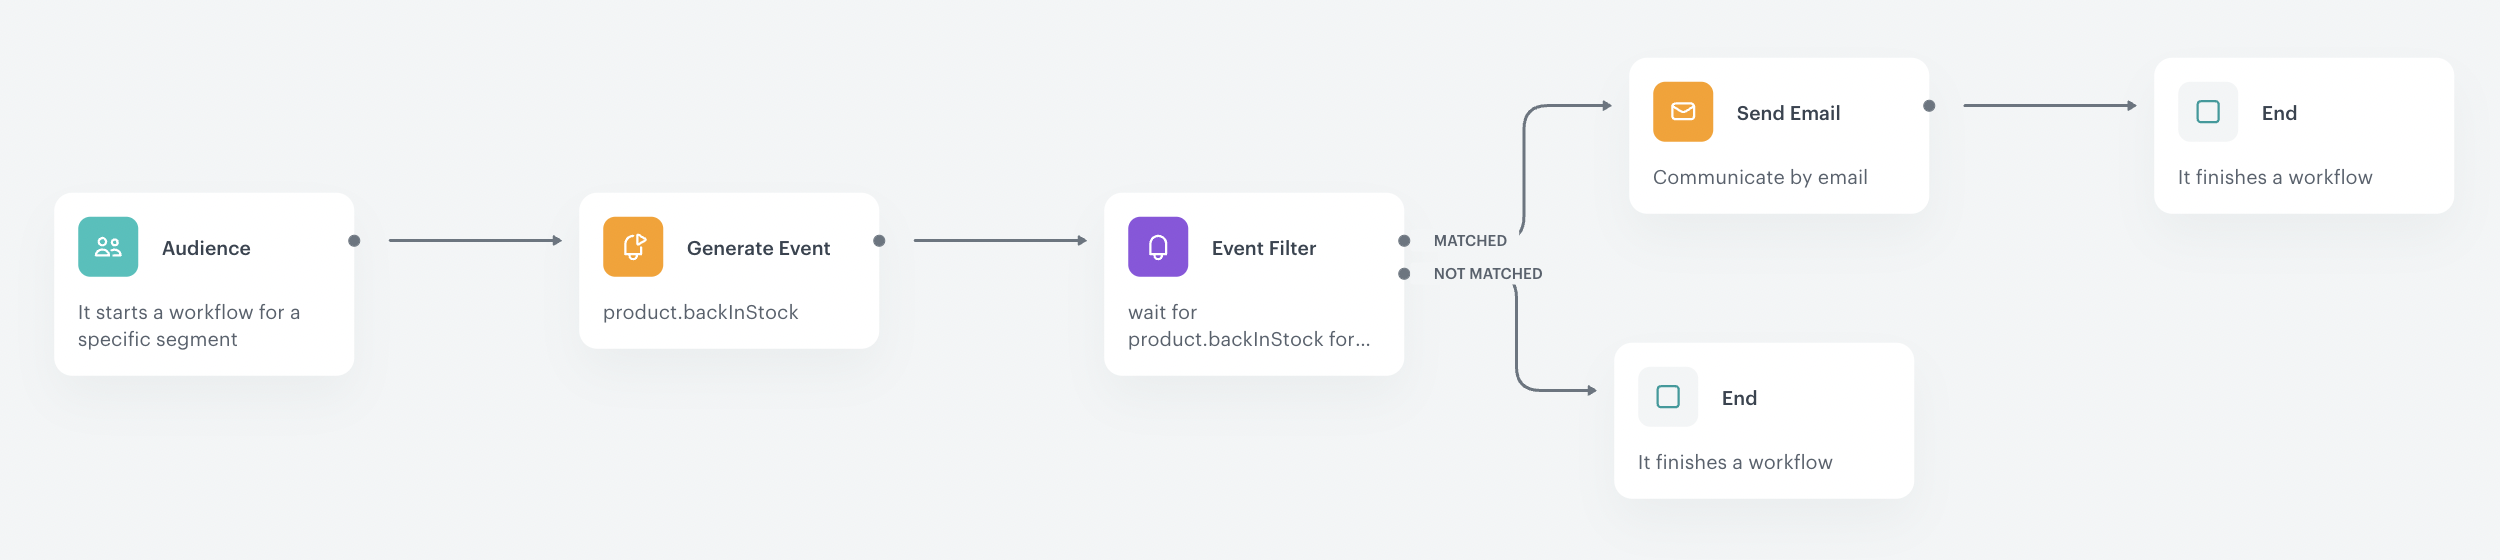
Create a workflow
Create a workflow that will check daily whether the products that customers have signed up for notifications have returned to stock. If so, the prepared workflow will send an email to the customer with the relevant information.
- Go to Automation > Workflows > New workflow.
- Enter the name of the workflow.
Configure the trigger
In this part of the process, select the segmentation for which you will run this campaign. In our case, these are those customers who have signed up for product availability notifications in the last 30 days and agreed to receive messages through the email channel.
- Start the workflow with the Audience node. In the configuration of the node:
- Set the Run trigger option to repeatable.
- Set the interval at which you want to run the workflow.
- Select the time zone.
- Select the New audience tab.
- Click Define conditions.
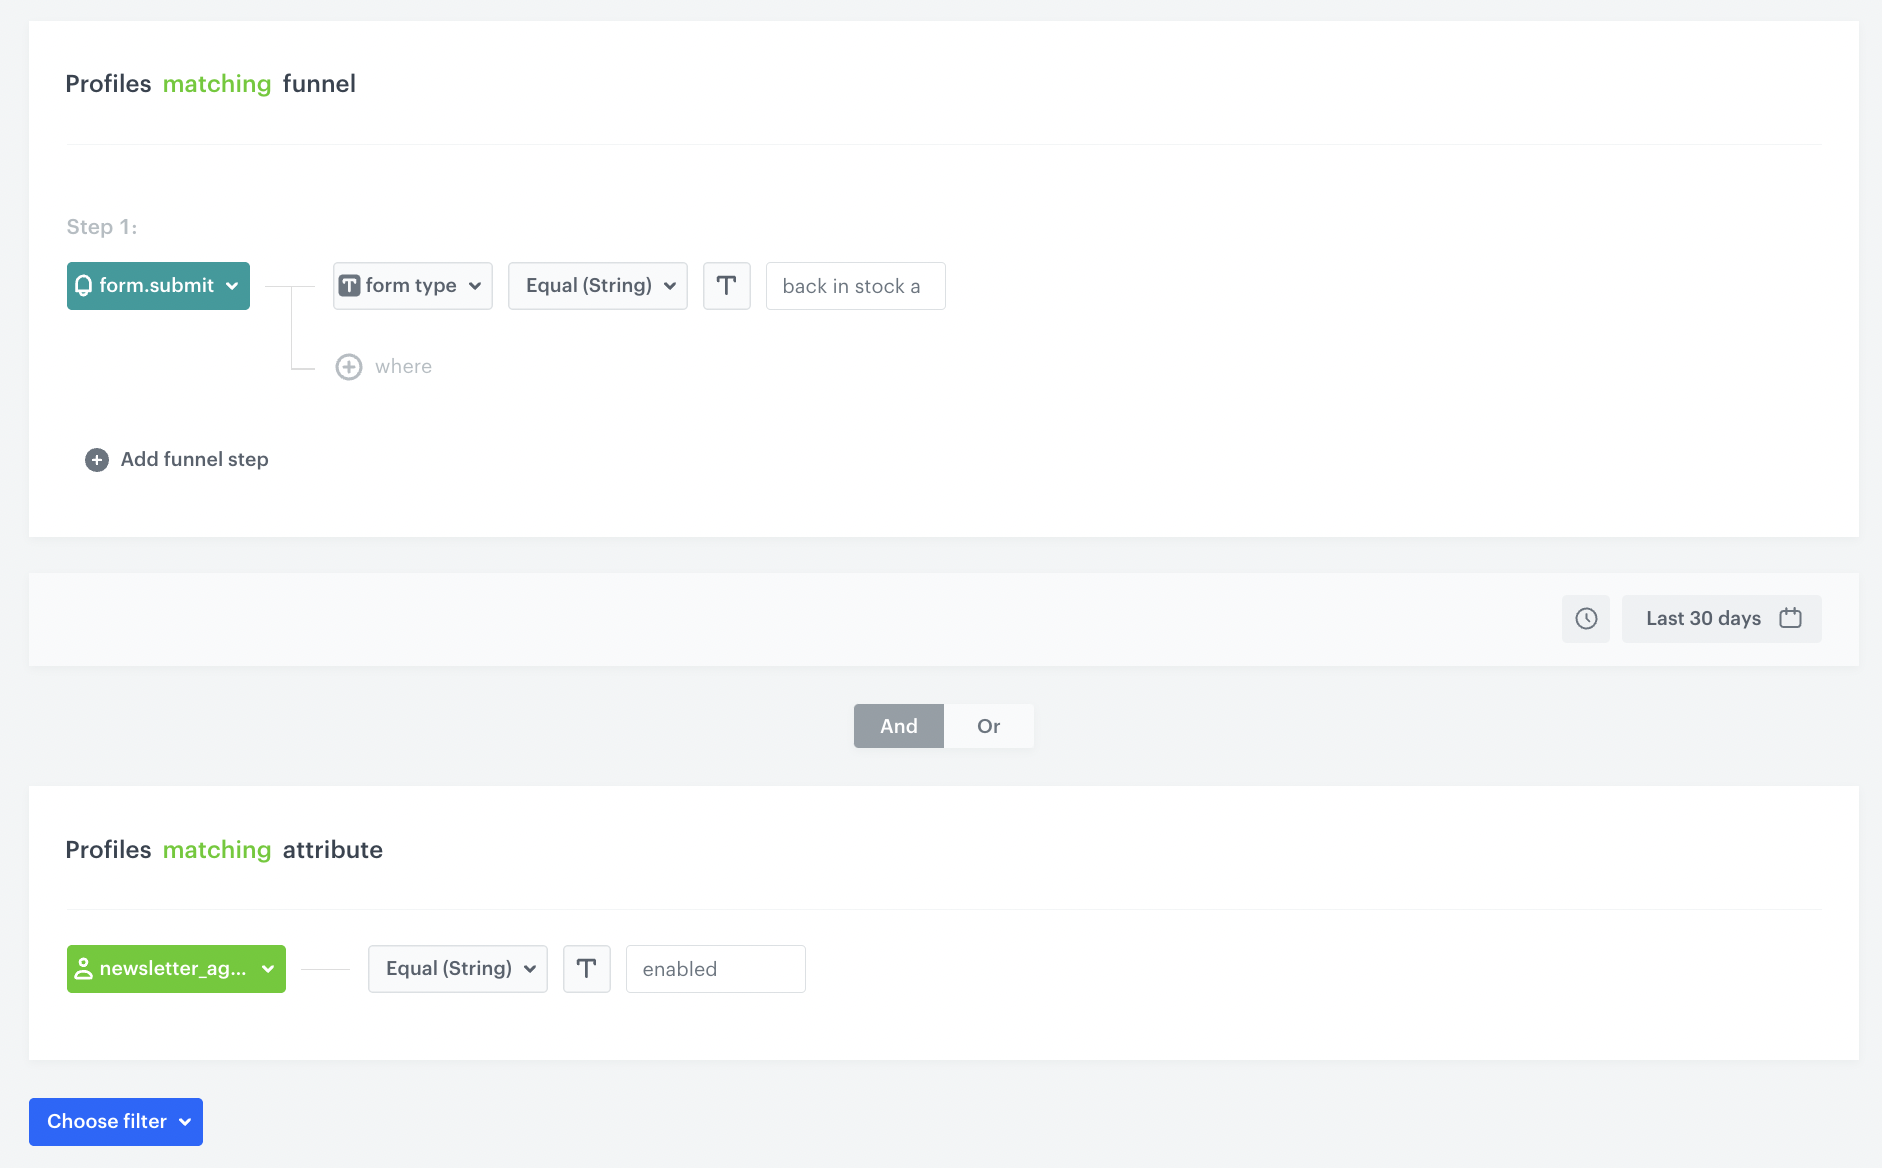
- From the Choose filter dropdown list, select the form.submit event.
- Click + where button.
- From the Choose parameter dropdown list, select the form type parameter.
- From the Choose operator dropdown list, select Equal.
- Enter the name of the form. In our case it’s
back in stock alert. - Define the time period for the last 30 days.
- From the Choose filter drop-down list, select the newsletter_agreement parameter.
- From the Choose parameter drop-down list, select the Equal operator and specify the condition as enabled.
- Confirm by clicking Apply.
Configure the Generate event node
Before sending the email to the customer, an event must be generated on the customer’s profile, which will be defined in this step. The event must contain the SKUs of restocked products (these are the products that will be sent to the customer in the email).
The system will verify the restocking based on the availability parameter in the item catalog which was created as part of the prerequisites.
Additionally, the products for which notifications have already been sent to the customer previously are excluded.
- Add the Generate event node.
In the configuration of the node:
-
Enter the Event name. In our case, we are using
product.backInStockevent.
The Label field exists for backwards compatibility. If your integration does not require this parameter, skip it.Note: Jinjava inserted in Generate event body must have all empty spaces deleted. -
In the Body section, use the following Jinjava and modify it to your needs:
        {
    "sku":"
    {% set signedProducts = [] %}
    {% set receivedProducts = [] %}
    {% set finalSku = [] %}
      {% aggregate LAST-SKU-SIGNED %} {# aggregate collecting product sku #}
      {% for sku in aggregate_result|reverse %} {# saving sku from aggregate to signedProducts variable #}
        {% do signedProducts.append(sku) %}
      {% endfor %}
    {% endaggregate %}
      {% aggregate LAST-SKU-RECEIVED %} {# aggregate collecting product sku sended to user #}
      {% for sku in aggregate_result|reverse %} {# saving sku from aggregate to receivedProducts variable #}
        {% do receivedProducts.append(sku) %}
      {% endfor %}
    {% endaggregate %}
    {% for sku in signedProducts %}
      {% catalogvar.catalog(sku).availability %}
          {% if catalog_result == 'in stock' %}  {# condition to check if products are availability#}
              {% if sku in receivedProducts|join(',') %} {# condition that adds a comma to items #}
              {% else %}
                  {% do finalSku.append(sku) %}
              {% endif%}
          {% endif %}
      {% endcatalogvar %}
    {% endfor %}
    {% set counter = 0 %}
    {% for sku in finalSku %} {# listing the final sku in the sku parameter #}
    {% set counter = counter + 1 %}
        {{sku}}
    {% if counter < finalSku|length%},{% endif %}{%endfor%}"
  }
-
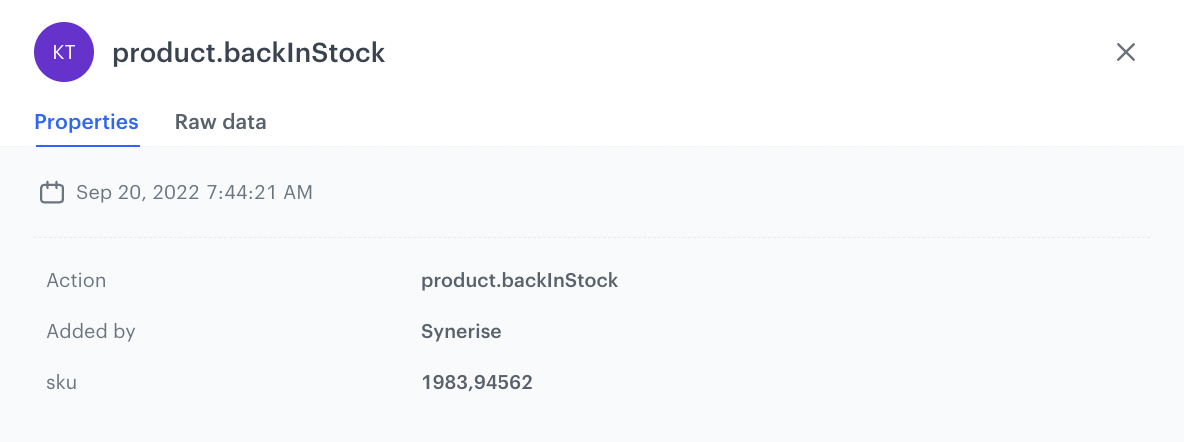
As a result is a product.backInStock event which in the sku parameter contains the SKUS of products that are back in stock. The list of the products will be sent in the email, separated by commas. If the event is empty, it means that none of the products have met the back in stock conditions.
An example of a generated event:
Configure the Event filter node
The workflow waits for the event generation from the previous step and sends the email based on it.
- Add the Event filter node. In the configuration of the node:
- Check event for period of time.
- Define the time range to 1 minute.
- From the Choose event dropdown list, select the product.backInStock event.
- As the event parameter, select sku.
- From the Choose operator dropdown list, select Regular expression.
- As the value, enter
.+Note: The.+value means any number of characters. We add this value to exclude from the communication customers for whom an empty SKU parameter was generated in the previous event. It happens when none of the products the customer signed up for were returned to stock. - Confirm by clicking Apply.
- For the not matched path, select the End node.
- For the matched path, select the Send Email node.
Configure the Send email node
At this stage, an email is sent to customers, which contains the products returned in the event from the previous step.
-
In the email configuration, select the template you previously prepared for the back in stock campaign.
In the template, you can retrieve event data from the Event filter node.
You can learn more how to reuse event parameters here.The following code is an example of how to do it:
Example Jinjava code{% set sku_array = event.params.sku %} {% set sku_from_array = sku_array|split(',') %} <ul> {% for sku in sku_from_array %} <li data-snr-ai-product-id="{% catalog.Snrs-produktu-ogTag(sku).product:retailer_part_no %}"> <a class="snrs-AI--item-link" href="{% catalog.Snrs-produktu-ogTag(sku).og:url %}" title="{% catalog.Snrs-produktu-ogTag(sku).og:title %}"> <img src="{% catalog.Snrs-produktu-ogTag(sku).og:image %}" class="products-slider__item-image snrAI-product-image snrAI-product-image-{% catalog.Snrs-produktu-ogTag(sku).og:image %}" width="90" alt="{% catalog.Snrs-produktu-ogTag(sku).og:title %}" id="snrAI-image-{% catalog.Snrs-produktu-ogTag(sku).product:retailer_part_no %}"> <h3 class="snrs-AI-product--product-name"> <span class="snrs-AI-product--name-first">{% catalog.Snrs-produktu-ogTag(sku).og:title %}</span> </h3> </a> </li> {% endfor %} </ul>In addition, you can retrieve, for example, images or other parameters from your catalog.
-
Confirm by clicking Apply.
Add final setting to your workflow
- Add the End node.
- Launch the workflow by clicking Save&Run.
Check the use case set up on the Synerise Demo workspace
You can check the configuration of each step directly in the Synerise Demo workspace:
If you don’t have access to the Synerise Demo workspace, please leave your contact details in this form, and our representative will contact you shortly.