Schema permissions
Permissions in Schema Builder allow you to assign access to schemas and scope of actions you can perform (edit the schema structure, adding records to the schema, duplicating, and deleting). It helps you control the contributions to the schema and restrict the access to the defined users.
Prerequisites
To define schema permissions, you must create a schema first.
Permission types
You can assign permissions on two levels:
- General schema permissions - You can assign the access and editing permissions to users for a whole schema.
- Schema record permissions - You can assign users who can add records to the schema.
General schema permissions
There are four types of general schema permissions:
| Permission type | Explanation |
|---|---|
| Private | Schema is viewable and editable by its author |
| Public | Every user can view, edit the schema, and add records to it (default) |
| Read-only | Only the author can edit the schema, all other users can view it |
| Restricted | You can define different permissions for different users and user groups |
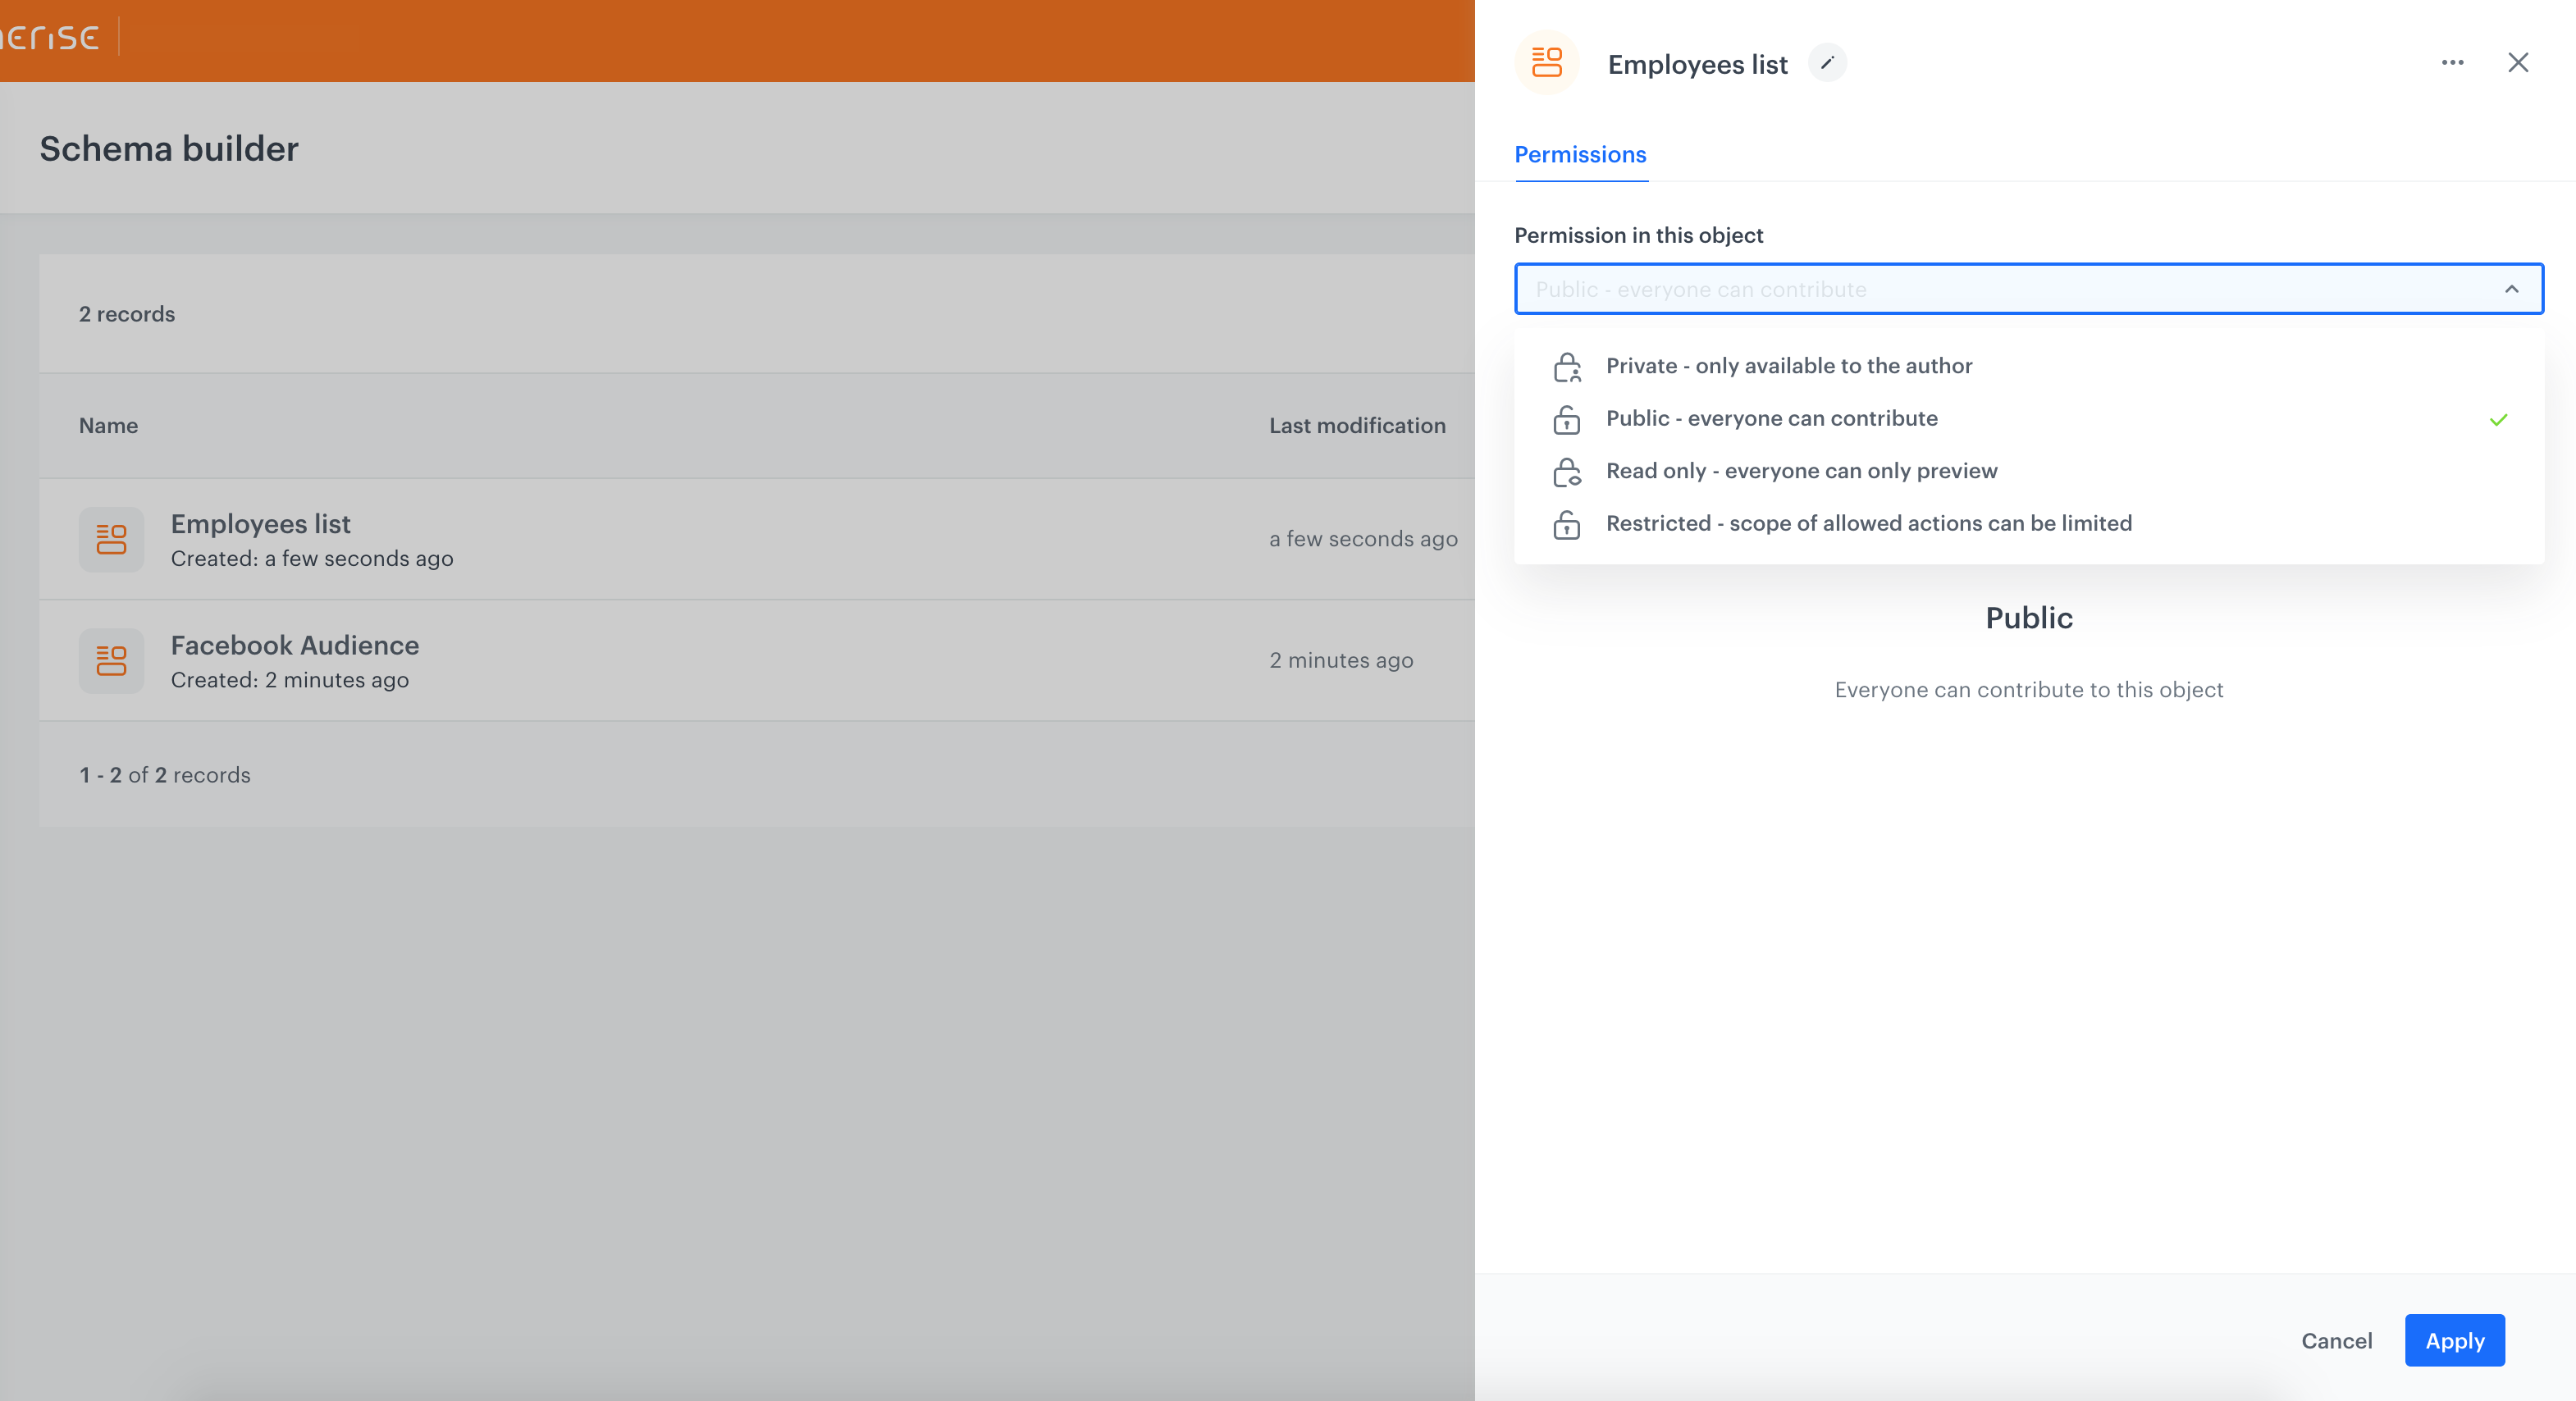
Defining general schema permissions
- Go to Data Management > Schema builder.
- On the list, find the schema you want to define permissions for.
- Next to the name of the schema, click the padlock icon.
- From the dropdown list, select the permission.
Schema record permissions
There are four types of record permissions:
| Permission type | Explanation |
|---|---|
| Private | Only the author of the schema can add records to the schema, schema records are not visible or searchable for other users |
| Public | All users can add records to the schema |
| Read-only | Only the author of the schema can add records to it, all other users can view the records |
| Restricted | You can define different permissions for different users and user groups |
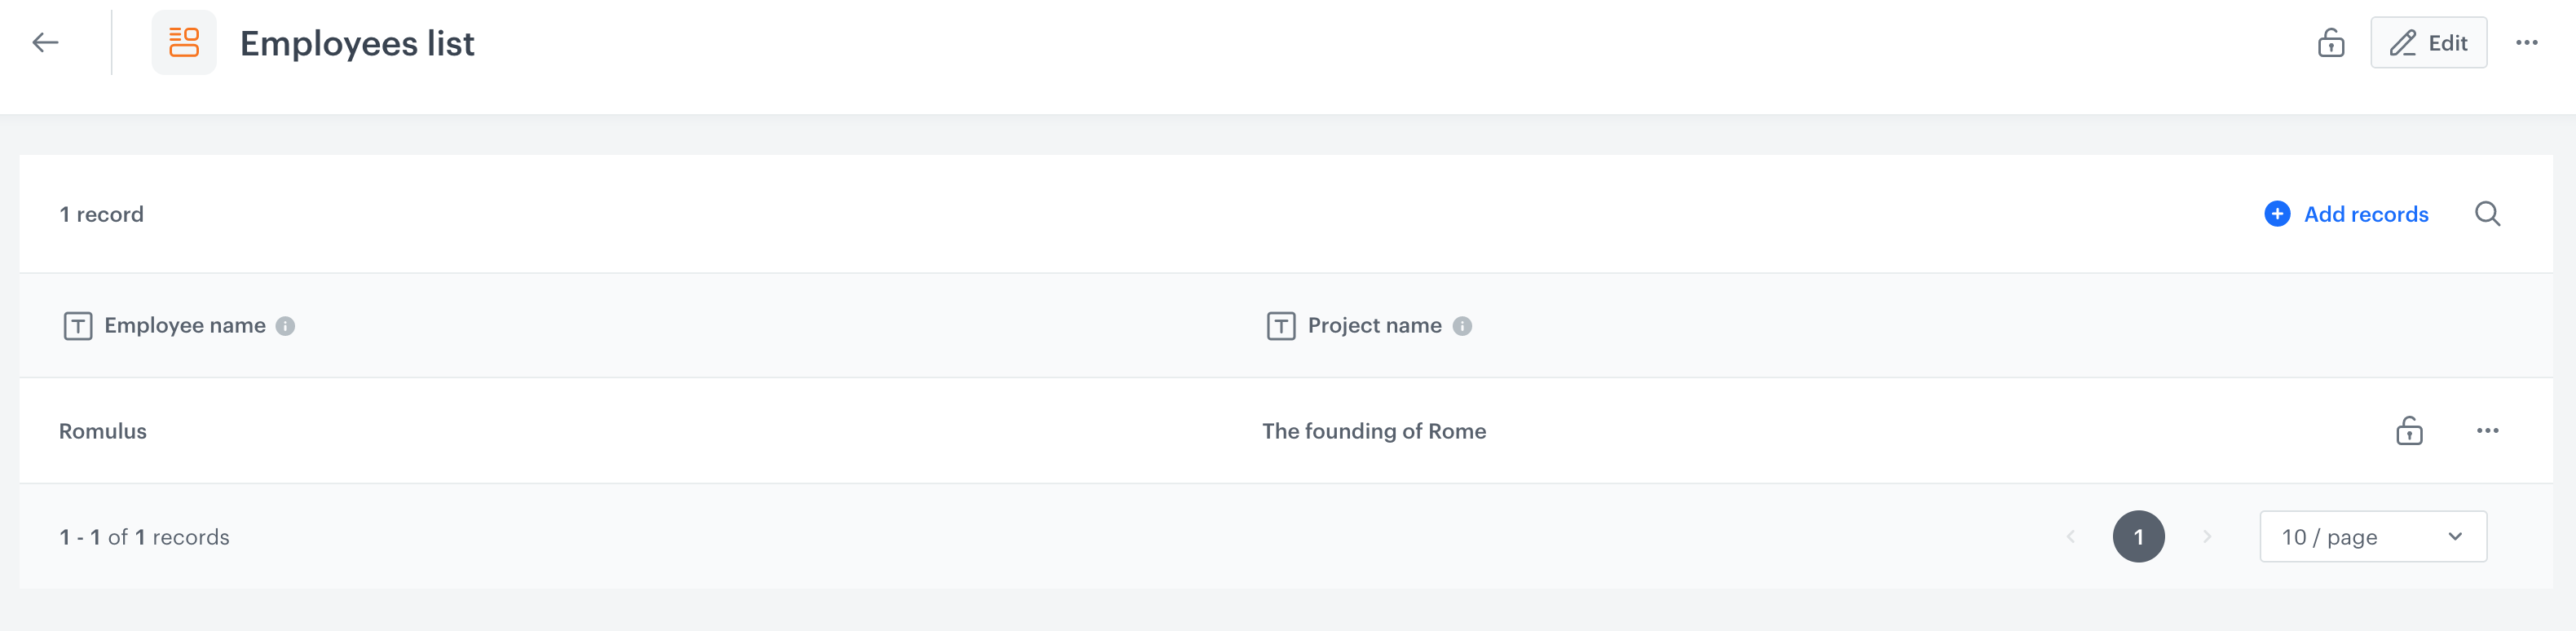
Defining schema record permissions
- Go to Data Management > Schema builder.
- On the list, find and click the schema you want to define record permissions for.
- Click the padlock icon on any schema record.
Assigning record permissions to the schema - From the dropdown list, select the permission. Permission you selected is applicable for all records.
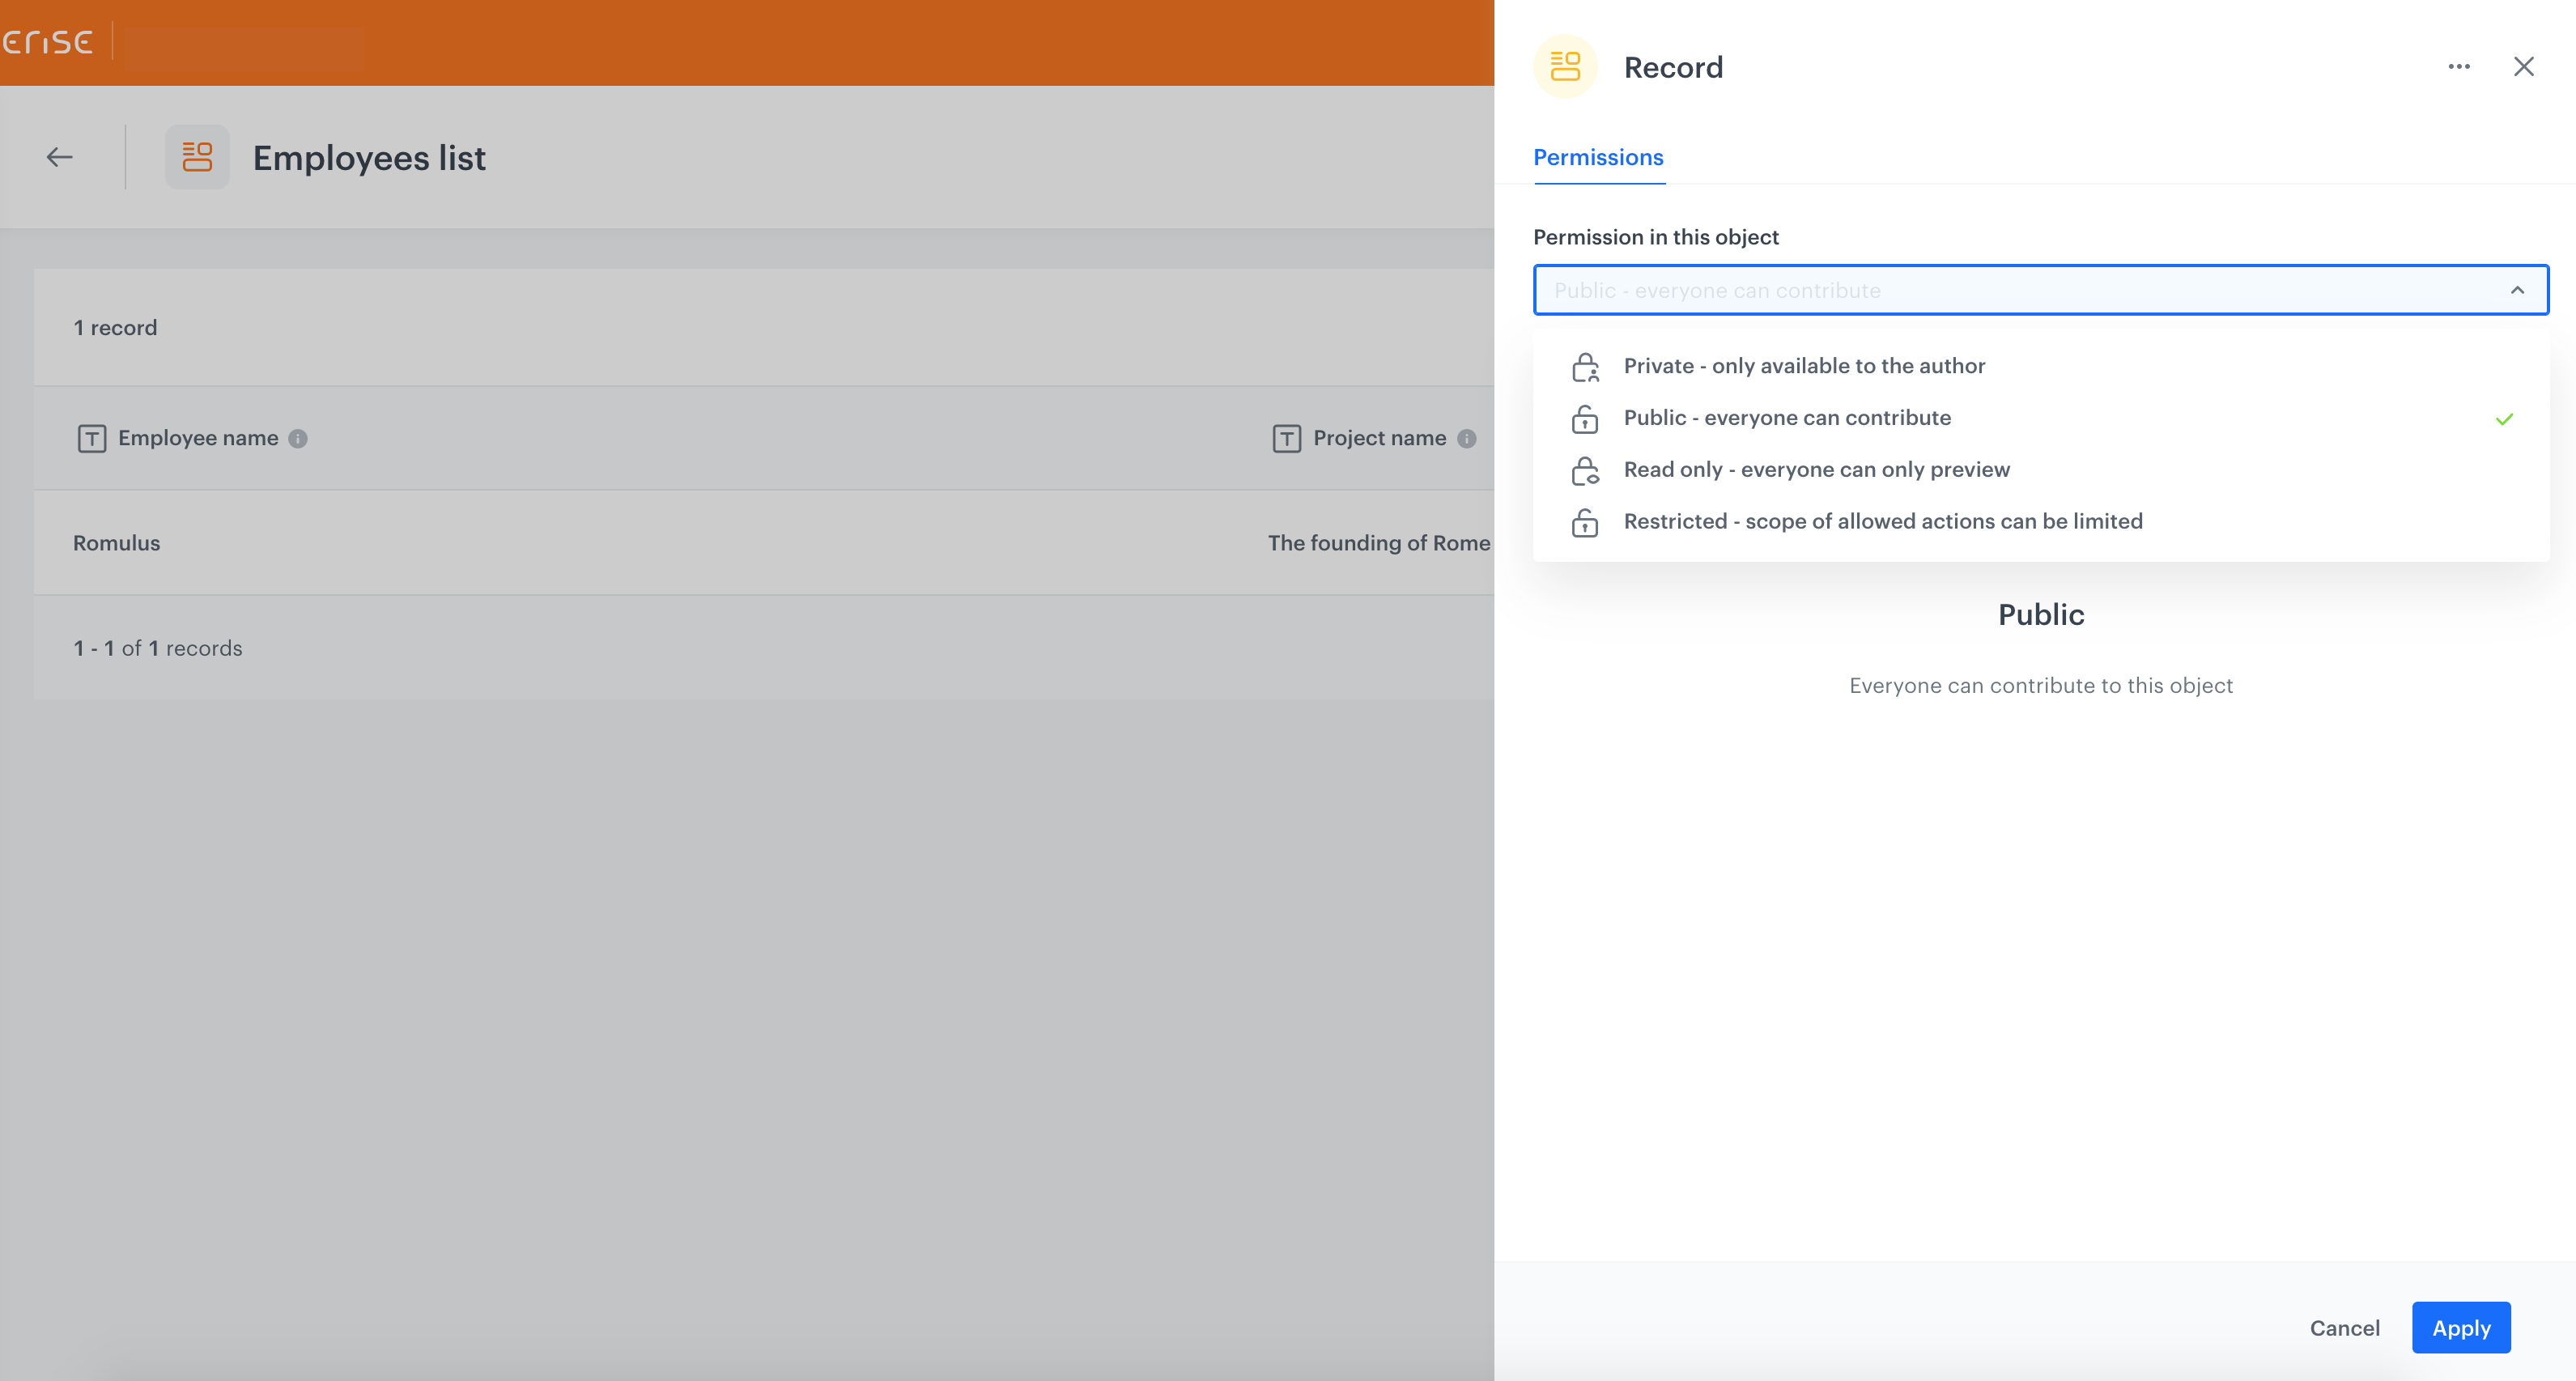
Selecting record permissions to the schema
User groups and users
For the Restricted type of permission (general and schema record permissions), you can either define users or user groups and their permission scope.
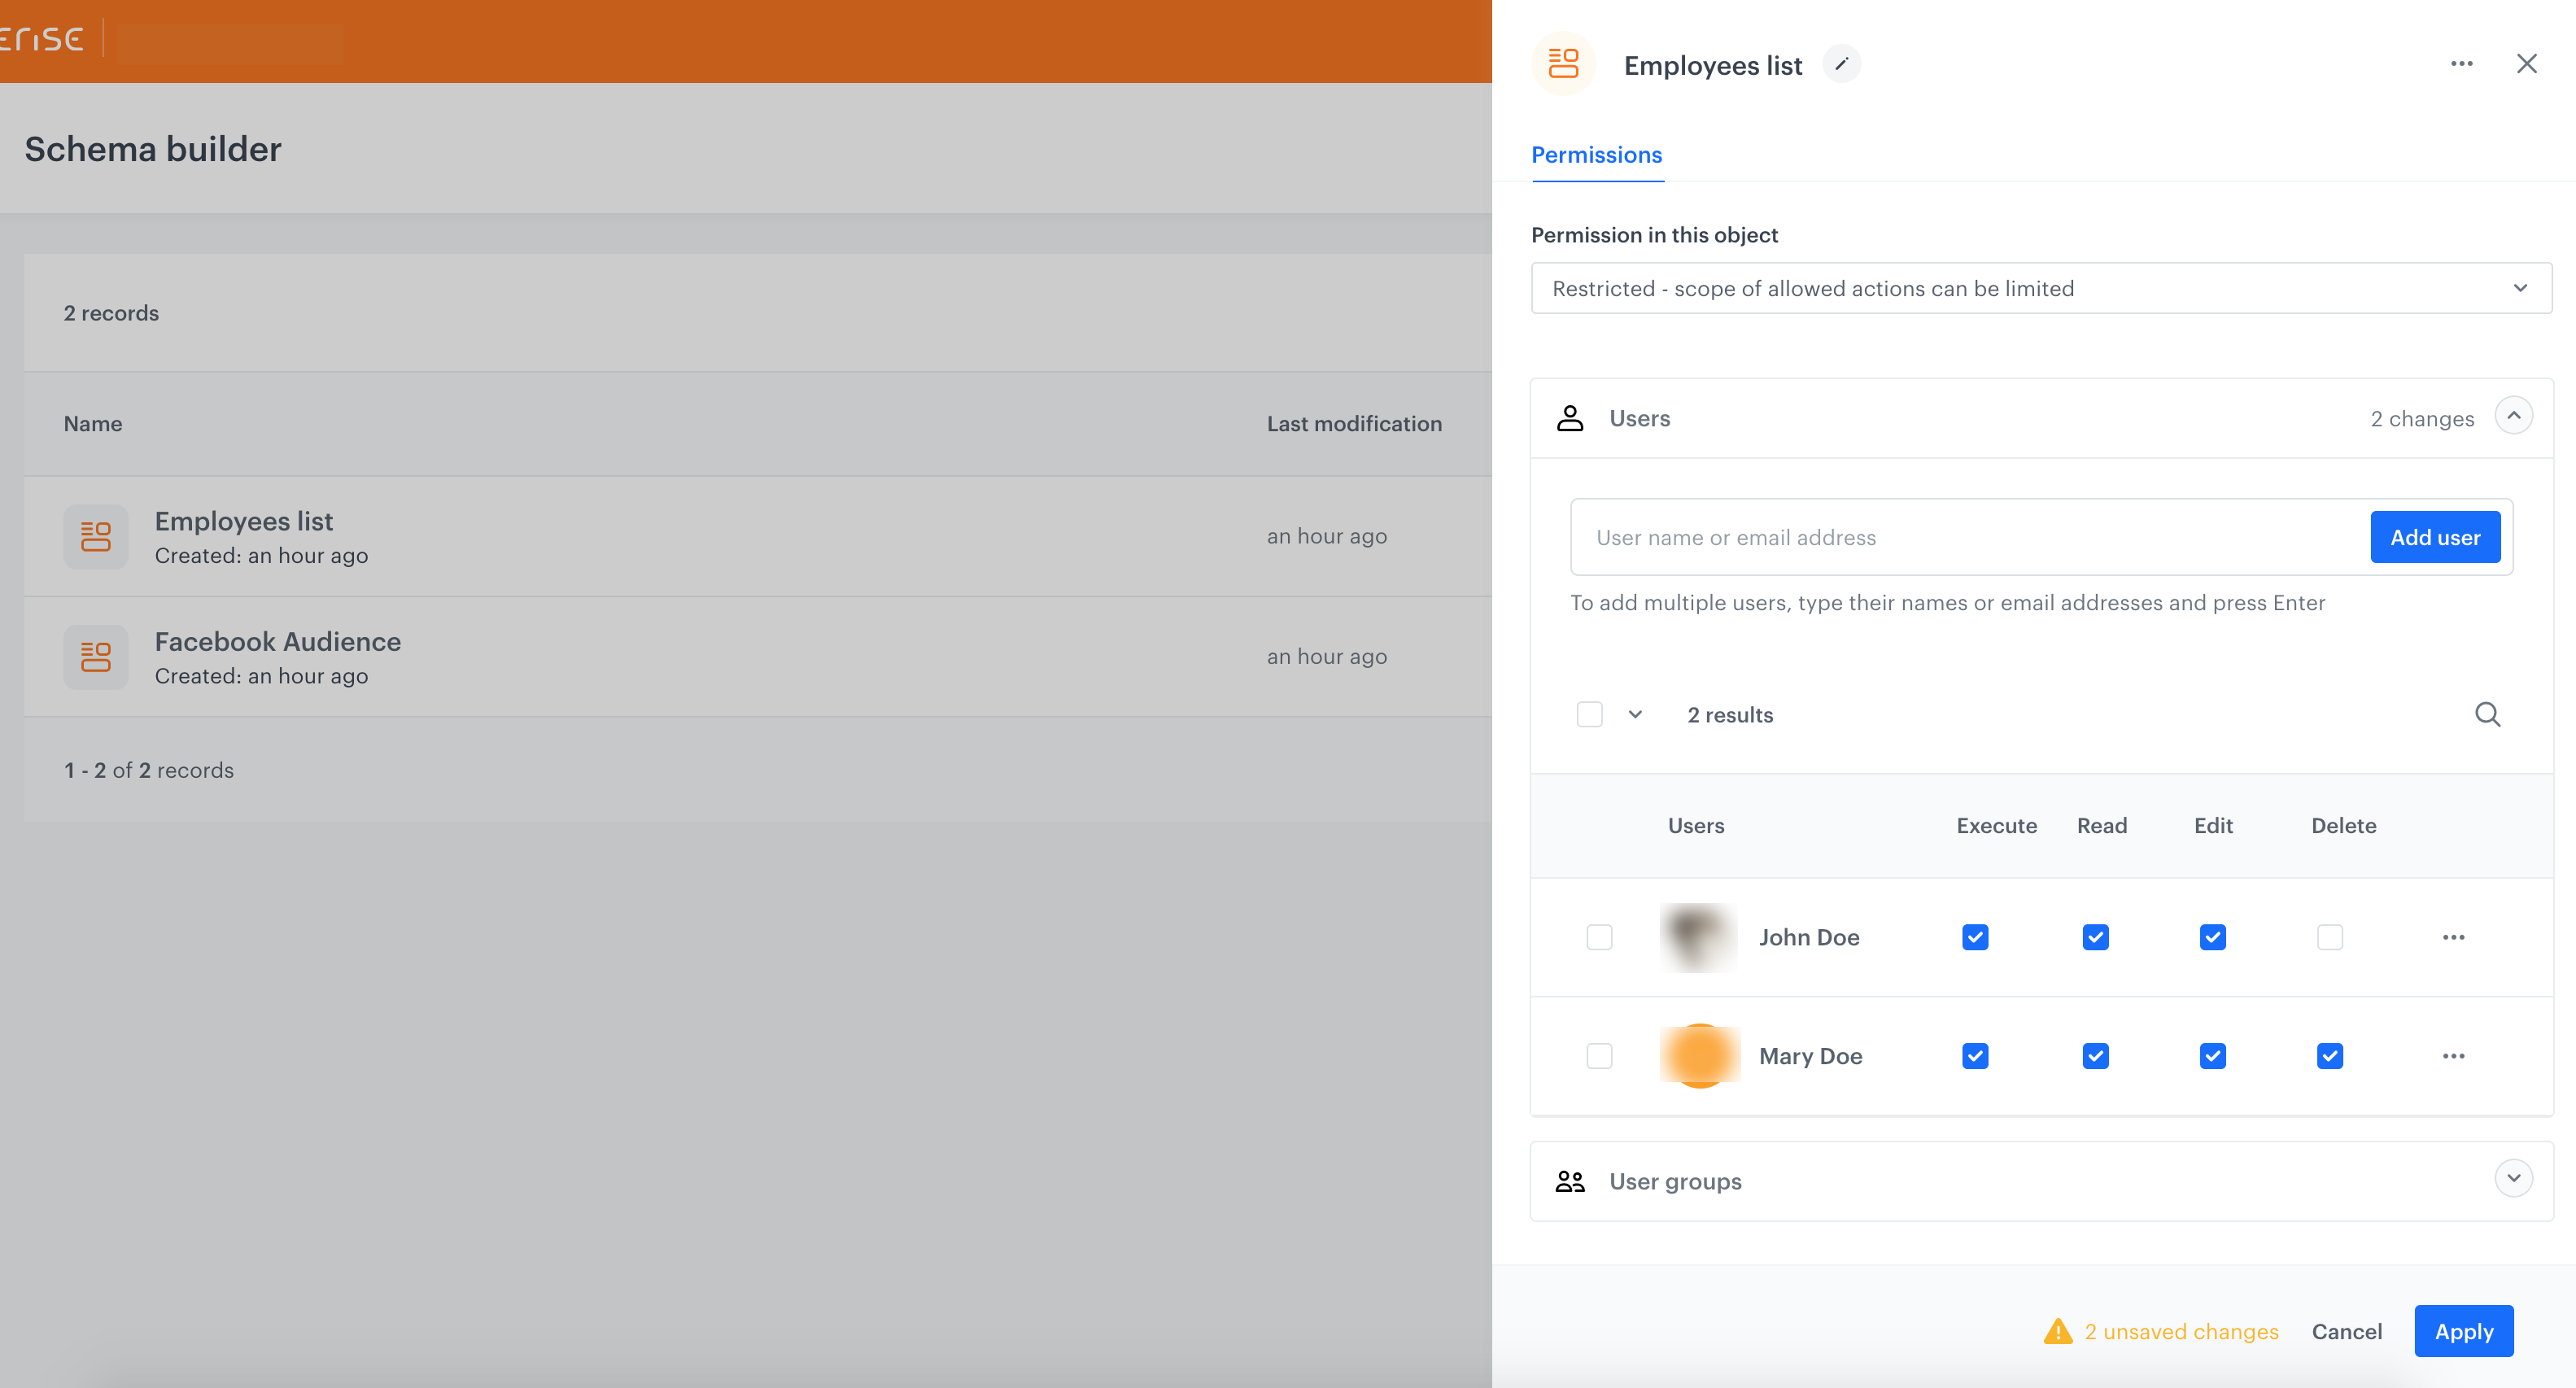
Users
- Select the Users tab.
- Enter the name or email addresses of users who you want to grant permissions.
- Confirm your choice by clicking Add user.
- In the table below, select permissions for the selected users.
- Execute to complete actions such as editing the schema or adding records to the schema.
- Read to preview schema or records in schema.
- Edit to edit the structure of the schema and schema records.
- Delete to delete schemas or schema records.
- Confirm by clicking Apply.
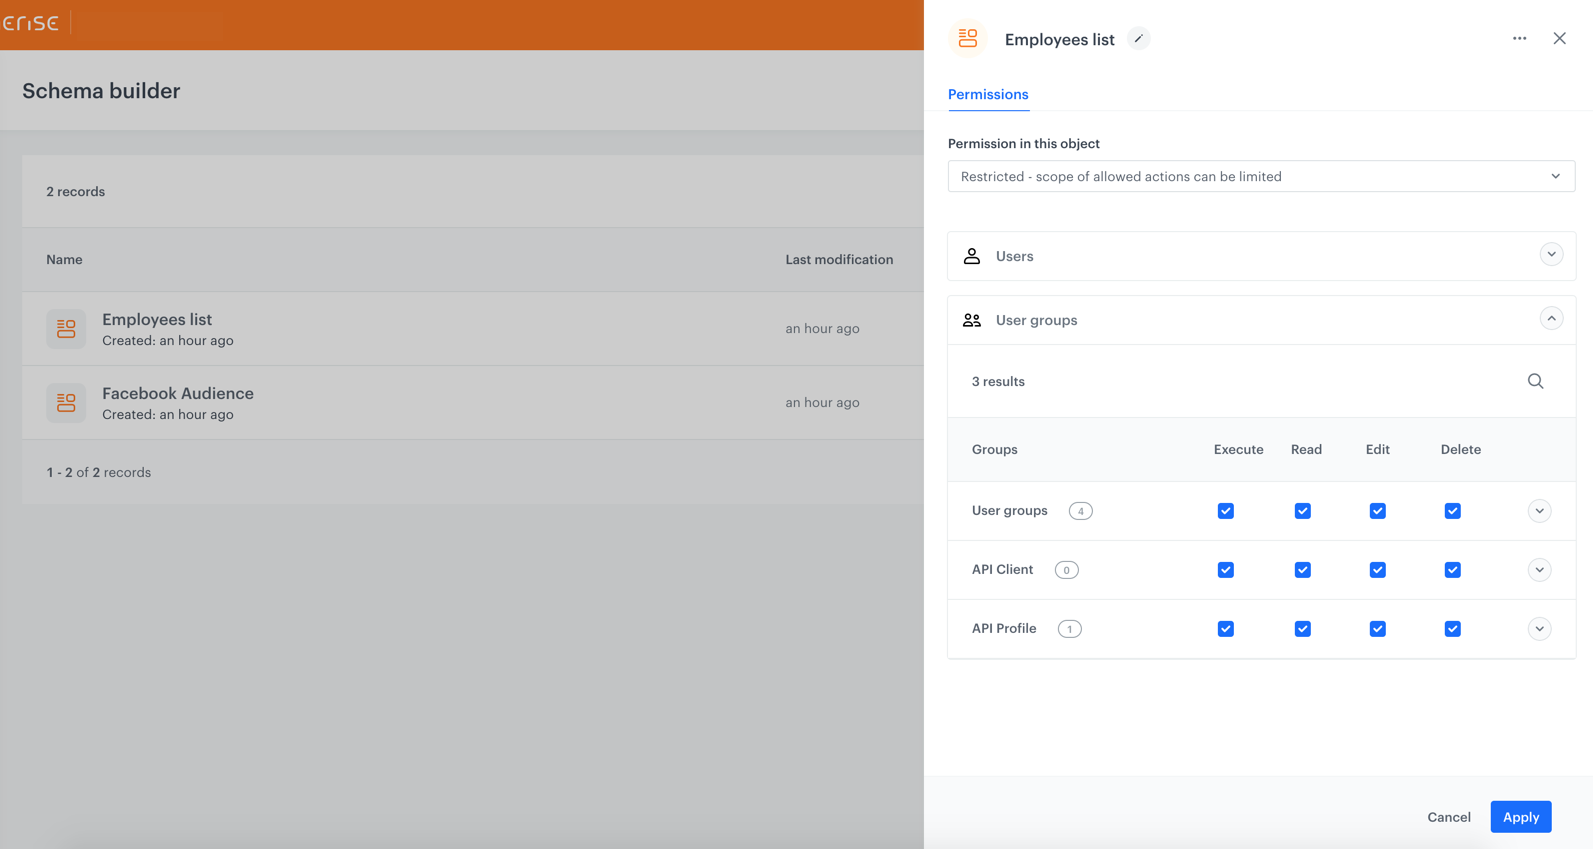
User groups
The users groups are sourced from Settings > Roles.
- Select the User groups tab.
- Click the user group or user groups for which you want to define the permissions.
- In the table below, select permissions for the selected users.
- Execute to complete actions such as editing the schema or adding records to the schema.
- Read to preview the schema or records in the schema.
- Edit to edit the structure of the schema and schema records.
- Delete to delete schemas or schema records.
- Confirm by clicking Apply.
If there are users who are assigned with permissions as individuals and they belong to a user groups with different set of permissions at the same time, the user group permissions are applicable then.