Testing dynamic content on a production site
When you create dynamic content, you may want to check if it renders correctly on your website, especially if it contains Jinjava or JavaScript. For this purpose, you can use life preview, however, it lets you preview this campaign in isolation, without checking its impact on other dynamic campaigns.
This article contains instructions on how to test a dynamic content campaign along with other active dynamic campaigns on the website.
Activate dynamic content for one user
This option is best if you want to see how the dynamic content campaign renders on the website only for a particular user. You can do so by indicating a particular email address (only for a recognized user) or UUID as the audience of the dynamic content.
- Go to your website.
- Open a browser console.
- Execute the following command:
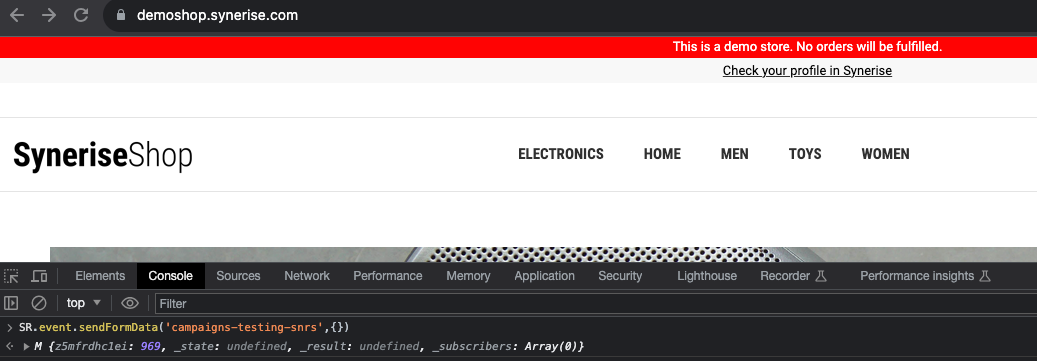
SyneriseTC.uuid
Result: Your UUID is returned.
The image presents browser console with the Get UUID script executed - Copy the UUID and save it in the notepad.
- In the settings of the dynamic content, in the Audience section, click Define.
- Select the New audience tab.
- Click Choose filter.
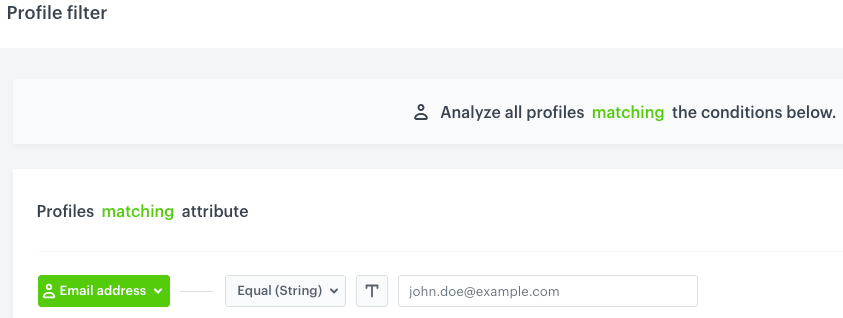
- On the dropdown list, in the search box, enter
Email addressorUUID.
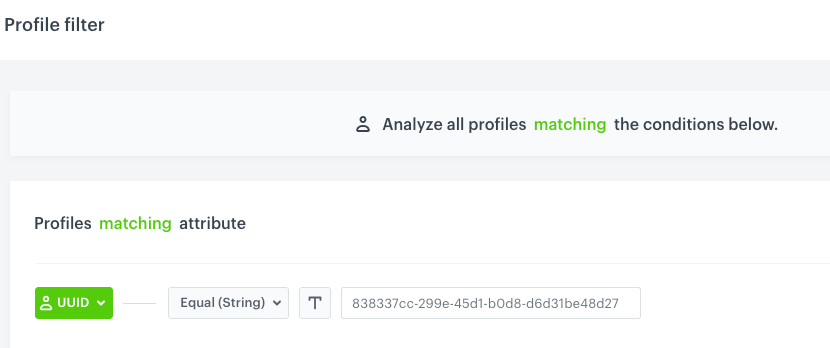
A user with the specific UUID is selected - Select the searched attribute.
- From the Choose operator dropdown list, select Equal.
- In the text field, enter the email address or UUID you saved in the notepad.
Result: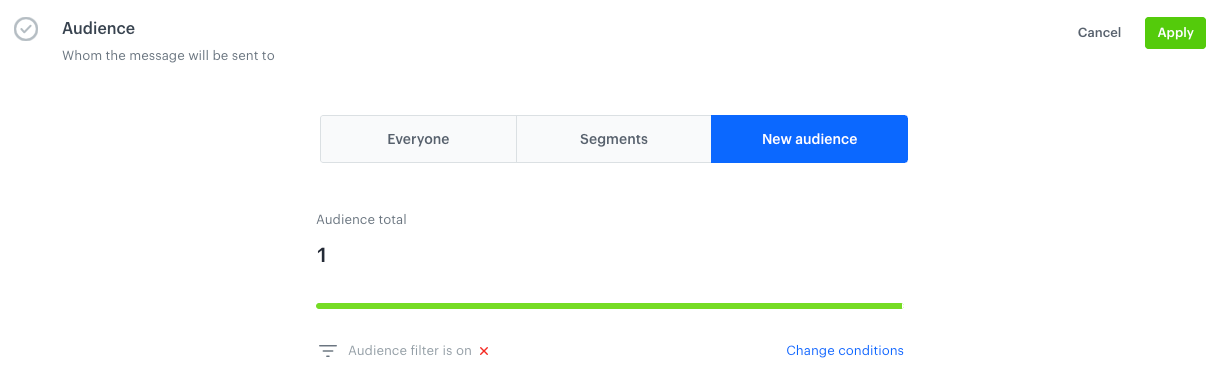
One user selected as the audience of the dynamic content - Confirm by clicking Apply.
- Confirm the settings in the Audience section by clicking Apply.
- In the Schedule section, click Define.
- Select the Display immediately option.
- Confirm the settings in the Schedule section by clicking Apply.
- In the upper right corner, click Activate.
Result: Dynamic content runs on the website (if this is the Insert object type, it appears in the specific area on the website indicated in the Content section) and is visible only to the user with specific email address/UUID.
Activate dynamic content for a user group
This option is best if you want to let multiple people test the dynamic content. This involves assigning a tag to their profiles and setting the DC’s audience to the profiles with this tag.
You can assign a tag in the following ways:
- Add a tag manually on the profile card of the testing users.
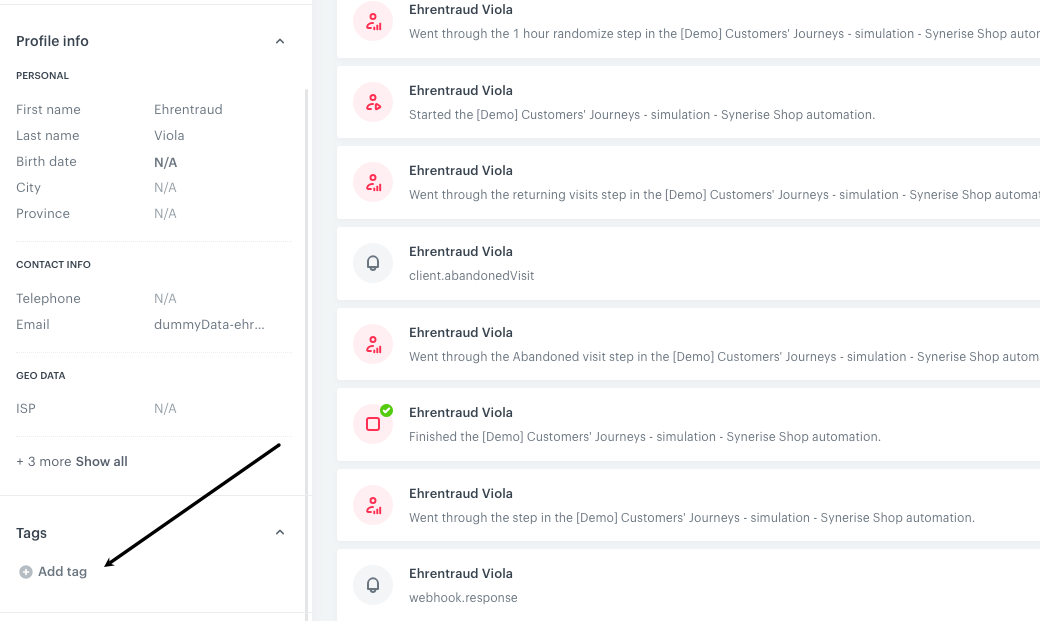
The Tags section on a profile card - Each tester executes a command in the browser’s console (as described in “Assign a tag to testing users”).
This method is recommended for the testers who are unrecognized users on the website. The advantage of this method is that the access to the Synerise platform is unnecessary. - Assign a tag to testing users through API using one of the following methods:
Alternatively, you can perform the instructions in “Activate dynamic content for one user” and include more users by indicating their UUIDs/email addresses by adding one condition with a specific identifier per tester.
Assign a tag to testing users
- Decide on the name of the tag, for example
campaigns-testing-snrs - Each tester must perform the instructions below:
- Go to your website.
- Open the browser console.
- Paste the following code to the console and execute it:
ReplaceSR.event.sendFormData('campaigns-testing-snrs',{})campaigns-testing-snrswith your own tag.
Result: A tag is assigned to users.
The image presents the browser console with the 'Assign tag' function executed
Define the users with a tag as campaign audience
- In the settings of the dynamic content, in the Audience section, click Define.
- Select the New audience tab.
- Click Choose filter.
- On the dropdown list, in the search box, enter the name of the tag.
- Select the tag.
- From the Choose operator dropdown list, select Is true.
Result: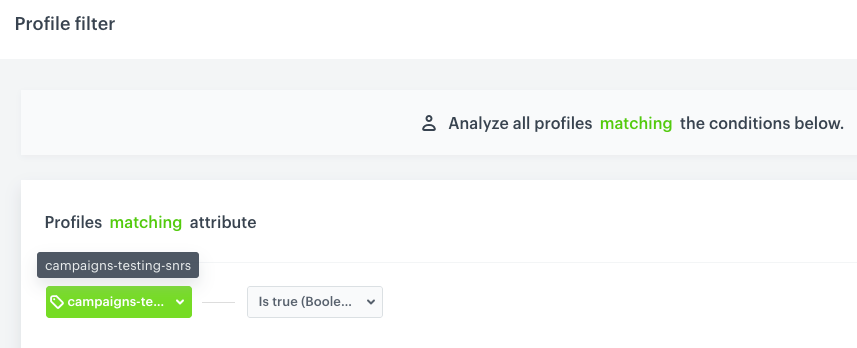
A user with the specific tag is selected - Confirm by clicking Apply.
- Confirm the settings in the Audience section by clicking Apply.
- In the Schedule section, click Define.
- Select the Display immediately option.
- Confirm the settings in the Schedule section by clicking Apply.
- In the upper right corner, click Activate.
Result: Dynamic content runs on the website (if this is the Insert object type, it appears in the specific area on the website indicated in the Content section) and is visible only to the users with the selected tag.
Activate dynamic content with a query parameter
This option is best if you want to see how dynamic content campaign renders on the testing page within the monitored domain.
- In the settings of the dynamic content, in the Display settings section, click Define.
- Expand the Advanced options.
- In the Page targeting section, select Others.
- From the dropdown list, select Page URL containing.
- In the text field, enter the URL of the subpage within your monitored domain.
Result:
Selecting the URL where the dynamic content will be displayed - Confirm the settings by clicking Apply.
- Make sure the dynamic content is set to display immediately.
- In the upper right corner, click Activate.
Result: Dynamic content appears under the specified URL (if this is the Insert object type, it appears in the specific area on the website indicated in the Content section).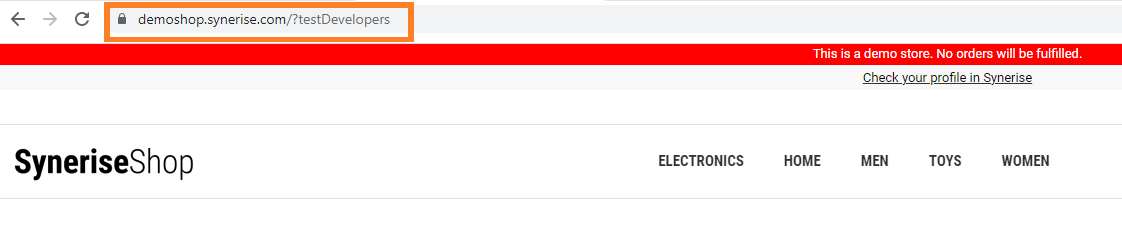
URL where dynamic content is displayed
Combining test methods
You can combine the methods; for example by creating a group of test users and displaying different versions of the dynamic content depending on the query parameter they enter.