Using the visual mobile push builder
Within the visual template builder, you can design your simple push notifications and preview them in real-time. The content of your message can be personalized using inserts, which enable you to reference customer attributes (such as name, city, or size), product recommendations (such as recently viewed or items in cart), and various aggregates, expressions, metrics, and voucher pools. Additionally, you can use the context preview, which allows you to preview the message from the perspective of a specific user and visualize the insert results for that user.
You should become familiar with the prerequisites and image requirements before creating a push notification template.
Image requirements
- Allowed format:
.jpg,.jpeg, or.png - Allowed width: minimum 645 px
- Allowed size: maximum 1 MB
- Recommended aspect ratio is 2:1
Opening the visual builder
- Go to Communication > Mobile > Templates.
- In the upper-right corner, click New template.
Result: A pop-up appears. - Select Simple Push.
- Select Visual builder.
Result: The builder opens: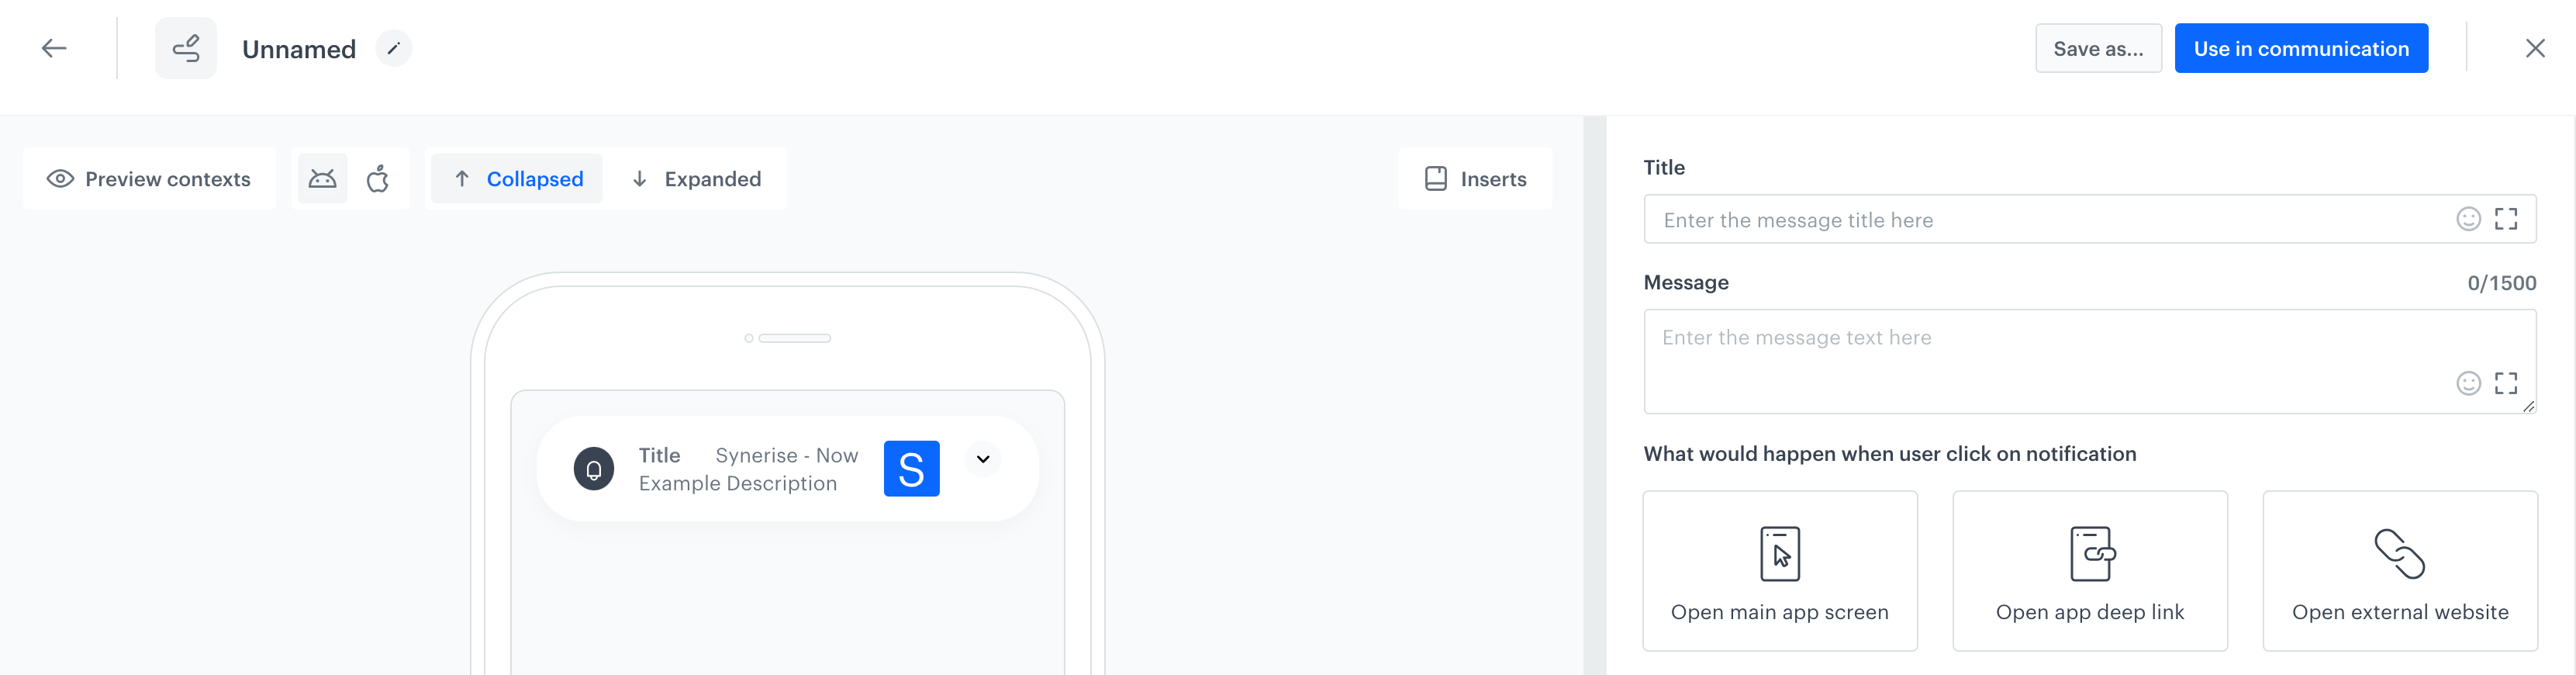
Visual builder for push notification templates
Defining basic notification features
- In the Title field, enter the text that will display in the header of the notification. We suggest a 50-character limit to avoid being shortened, but the length depends on the OS. You can personalize the title using inserts and emojis.
- In the Message field, enter the text that will display in the body of the notification. We suggest a 100-character limit to avoid being shortened, but the length of the text vary across OS. You can personalize the message using inserts and emojis.
- To define what happens when the user clicks the notification, in the Action type section, select one of them:
- Open app main screen - After clicking the notification, the user is redirected to the main screen of your app.
- Open app deep link - After clicking the notification, the user is redirected to a place in your app, such as a message displayed in the application.
- Open external web URL - After clicking the notification, the user is redirected to the link which opens in a browser.
- Define the additional settings for operating systems of devices which will receive the notifications. Your choice must be consistent with the selected OS type in the mobile push campaign settings. We recommend defining settings for both OS. For details, see “Defining additional settings for Android” and “Defining additional settings for iOS”.
Defining additional settings for Android
Adding image
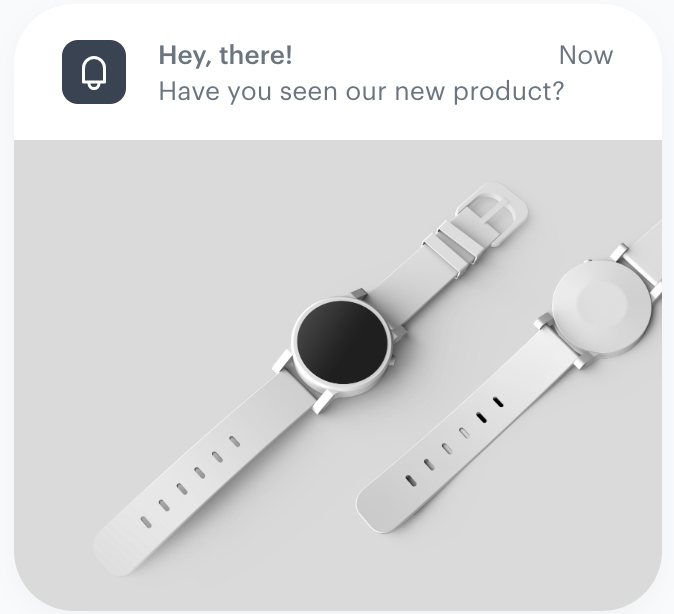
You can add a single image to your notification which be displayed under the main text of the notification.

- To add an image to your notification, enable Add image to your notification.
- Enter the URL of the image. It can be an external image source or an URL of an image from Data Management > Files.
Adding action buttons
Action buttons in push notifications let users take specific actions directly from the notification, such as proceeding to a product page.
- To add a button to your notification, enable the Action buttons option.
- In the top field, enter the text that will display on the button. You can personalize the text on the button using inserts and emojis.
- Select the linking option:
- URL - Choose this option if you want to refer a user to a website.
- Deep link - Choose this option if you want to refer a user to a place in the application.
- In the URL/Deep link field, enter the address of the website or location in the app.
- To add more buttons, click Add.
- Repeat steps 2-4.
Defining notification priority
Priority determines the behavior of push notification delivery in relation to the device’s mode (such as battery-saving mode, focus mode, sleep mode, and so on).
- To set the priority of the notification, enable Priority.
- Select one of the priority modes:
- Normal - notifications are sent while considering the device’s battery status. If the device is currently out of the normal mode (for example, battery-saving mode), the push notification will be displayed after the device exits this mode.
- High - the notification is sent immediately, regardless of the battery status of the device.
- If you don’t configure the Priority section, it will be automatically set to High.
Defining custom notification sound
When a notification is delivered to a device, the user is alerted by the notification sound, which is typically a default sound chosen on the device. However, you can customize the notification sound to make it more unique and personalized for your app. You can do so by adding the file with your notification sound to the application bundle and then defining the name of the file in the configuration of the Sound section in the visual builder.
- To set the custom notification sound, enable Sound.
- In the File name, enter the name and the extension of the file with notification sound which you added to the application bundle, for example
custom-sound.mp3
Defining additional settings for iOS
Adding a single image
You can add a single image to your notification, which is displayed under the main text of the notification.
- To add an image to your notification, enable Add image to your notification.
- Enter the URL of the image. It can be an external image source or an URL of an image from Data Management > Files.
Adding image carousel
You can add a series of images or cards to be displayed horizontally within the push notification. Users can swipe through these images to view different content or offers directly from the notification.
- To add a carousel of images to your notification, enable Image Carousel.
- In the Call to action URL/Deep link field, enter the URL to which a user will be redirected after they click the image.
- In the Caption field, enter the text that will be displayed at the bottom of the image.
- In the Subcaption field, enter the text that will be displayed under the image.
- In the Image URL field, enter the URL of the image source. It can be an external image source or an URL of an image from Data Management > Files.
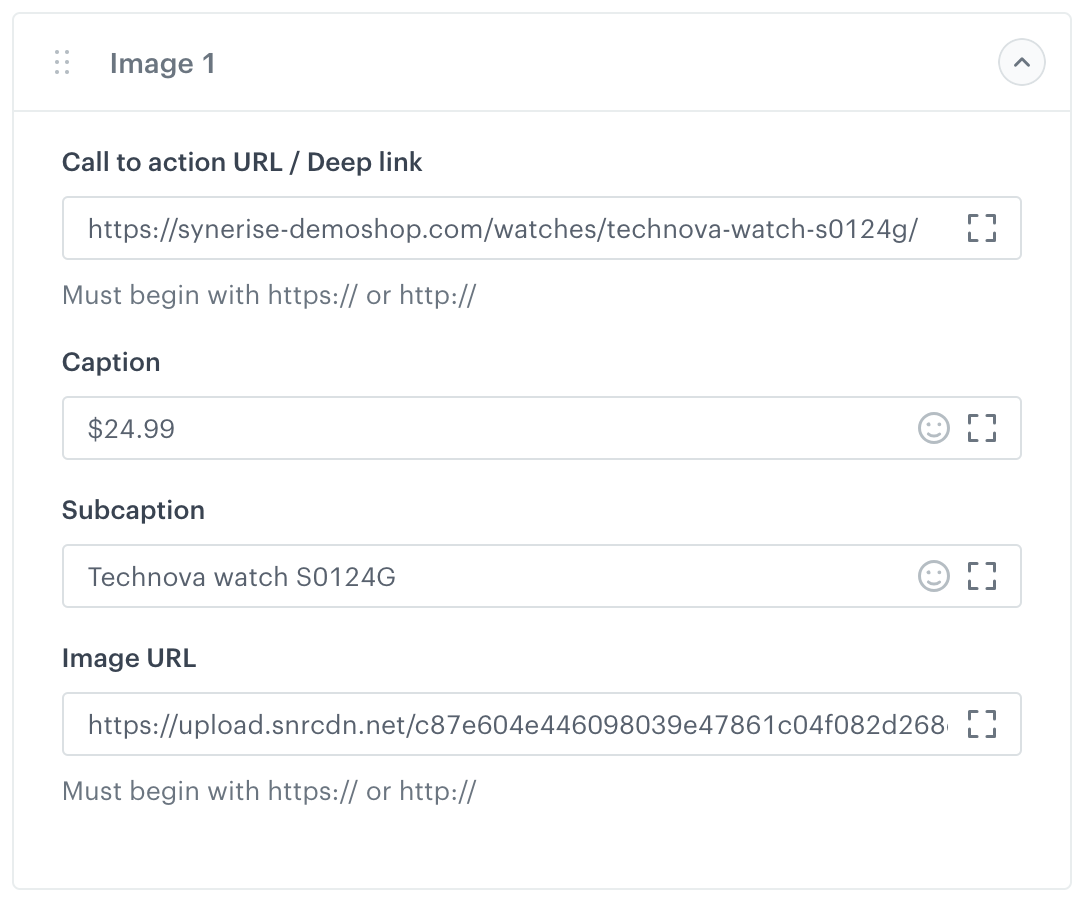
Example form configuration of image carousel - To add more images to the carousel, click Add item and repeat steps 2-5.
Defining notification category
A category serves as a unique identifier of your notification type, enabling you to assign Notification Content Extensions (if implemented) and distinguish between various notification scenarios.
- To define a notification category, enable Category.
- In the text field, enter a category name consistent with one of the values included in your application’s
UNNotificationExtensionCategorykey in your Content Extension\*.plistfile.
Adding action buttons
Action buttons in push notifications let users take specific actions directly from the notification, such as proceeding to a product page.
- To add a button to your notification, enable the Action buttons option.
- In the top field, enter the text that will display on the button. You can personalize the text on the button using inserts and emojis.
- Select the linking option:
- URL - Choose this option if you want to refer a user to a website.
- Deep link - Choose this option if you want to refer a user to a place in the application.
- In the URL/Deep link field, enter the address of the website or location in the app.
- To add more buttons, click Add.
- Repeat steps 2-4.
Defining notification priority
Priority determines the behavior of push notification delivery in relation to the device’s mode (such as battery-saving mode, focus mode, sleep mode, and so on).
- To set the priority of the notification, enable Priority.
- Select one of the priority modes:
- Normal - notifications are sent while considering the device’s battery status. If the device is currently out of the normal mode (for example, battery-saving mode), the push notification will be displayed after the device exits this mode.
- High - the notification is sent immediately, regardless of the battery status of the device.
- If you don’t configure the Priority section, it will be automatically set to High.
Defining custom notification sound
When a notification is delivered to a device, the user is alerted by the notification sound, which is typically a default sound chosen on the device. However, you can customize the notification sound to make it more unique and personalized for your app. You can do so by adding the file with your notification sound to the application bundle and then defining the name of the file in the configuration of the Sound section in the visual builder.
- To set the custom notification sound, enable Sound.
- In the File name, enter the name and the extension of the file with notification sound which you added to the application bundle, for example
custom-sound.mp3
Enabling content-available option
By enabling this option, the application can be activated even if it is not currently running, whether it is in the background or has been killed. This ensures that the necessary method and code responsible for receiving background notifications will be executed. As a result, the application is woken up, allowing for the execution of startup processes, even if the application itself is not actively opened. For more information, refer to the Content-Available parameter section in the Mobile SDK documentation.
Enabling mutable-content option
To pass the notification to your notification service extension before delivery, enable the Mutable-Content option. This allows modifying the content of a notification before it appears to the customer and tracking push.view events.
In order for this option to work, you must implement the Synerise notification service extension.
Enabling this option allows:
- gathering the
push.viewevent will be generated - including the thumbnail image (a smaller version of a full digital image) before expanding the notification.
- adding native action buttons, if the message contains any
Read more in the Mutable-Content parameter section in Mobile SDK documentation.