Configuring web push notifications
Before you create and send your first web push notification, you must:
- integrate with Synerise via JS SDK,
- create a Firebase account and integrate it with Synerise to start collecting web push agreements on your website.
- install service worker on your server.
Web push notifications will be shown to a visitor, who agreed to receive web push notifications, according to the settings. The following web push related events are collected by default:
webpush.subscribe- a visitor has agreed to receive web push notificationswebpush.subscribeBlock- a visitor hasn’t agreed to receive web push notificationswebpush.subscribeDiscard- a visitor closed an agreement form (there is a possibility that the visitor will subscribe in the future)webpush.send- a web push notification was sentwebpush.show- a web push notification was displayedwebpush.click- a visitor clicked a web push notificationwebpush.notRegistered- a web push notification wasn’t sent due to an invalid token
Requirements
- You must be granted user permissions to access the Settings module.
- Your site must fully support HTTPS.
- Your site must redirect all
http://requests tohttps://requests. - Integrate with Synerise via Synerise JS SDK (make sure your tracking code covers web push notifications).
Important: Perform the configuration in the given order.
Integrate Firebase with Synerise
The full procedure of Integrating Firebase with Synerise is available here.
Install service worker
- Go to
 Settings > Web push.
 - Click Show in General section.
- Switch the Web notifications currently disabled toggle to Web notifications currently enabled.
Result: The installation instruction appears.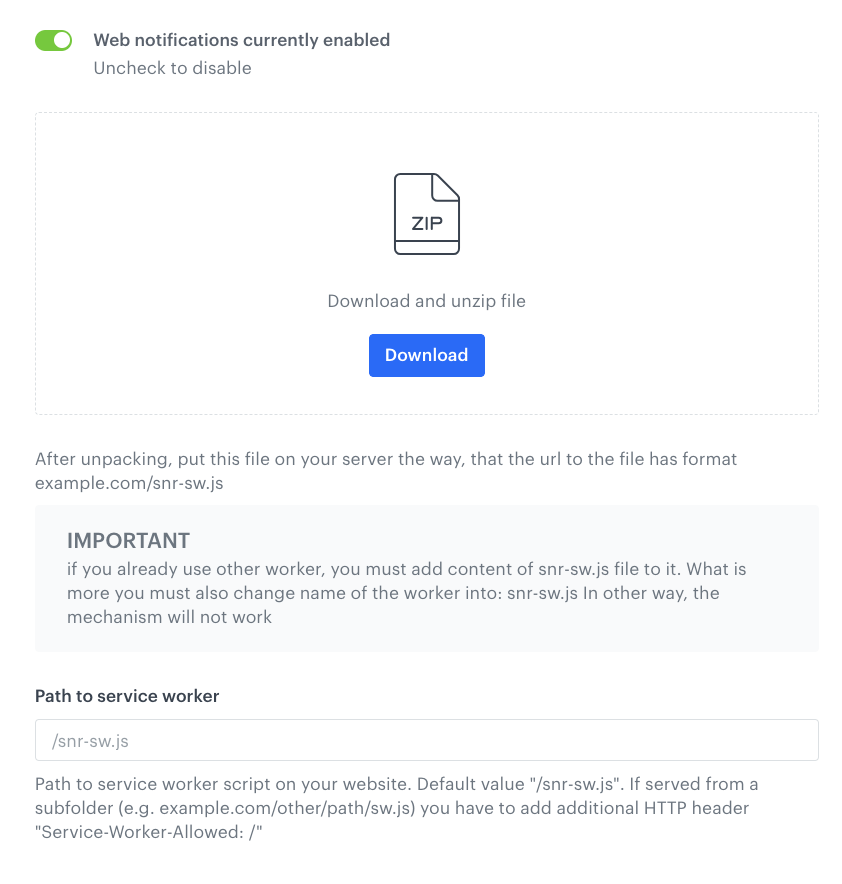
The installation instruction - Follow the commands on the interface.
Tip: The file should be available under the site root with the same filename, for example:
example.com/snr-sw.js. Example for a subfolder:example.com/other/path/snr-sw.js.
If you choose other directory than the root, to properly use the service worker you must declare theService-Worker-Allowed: /header. In case you use a different worker, you can addsnr-sw.jscontents to your worker file and rename it tosnr-sw.js. - In the Path to service worker field, enter the path.
- Confirm by clicking Apply.
Result: The configuration is completed. The next step is to prepare web push agreement forms.
Important: In service worker version 3.0.0 (or higher), we have optimized the size of webpush frames sent to Firebase and enabled action buttons in web push notifications. The version of the service worker stored in the customer’s browser can be identified in the webpushToken.update event in the version parameter
What if web push notifications still don't display?
- Make sure the web push notification doesn’t contain errors.
- In case there are any inserts used in the template, make sure that the item of information you want to display using an insert is available on the customer cards of the recipients. For example, if you want to mention the recipient’s city name in the template, check if all recipients have the name of the city in the customer’s card, otherwise, this insert will not display.
- If a web push is displayed differently than expected, check how the specific browser, operating system, or device handles web pushes.
- If the web push notification is created correctly, go to your website.
- Open the console.
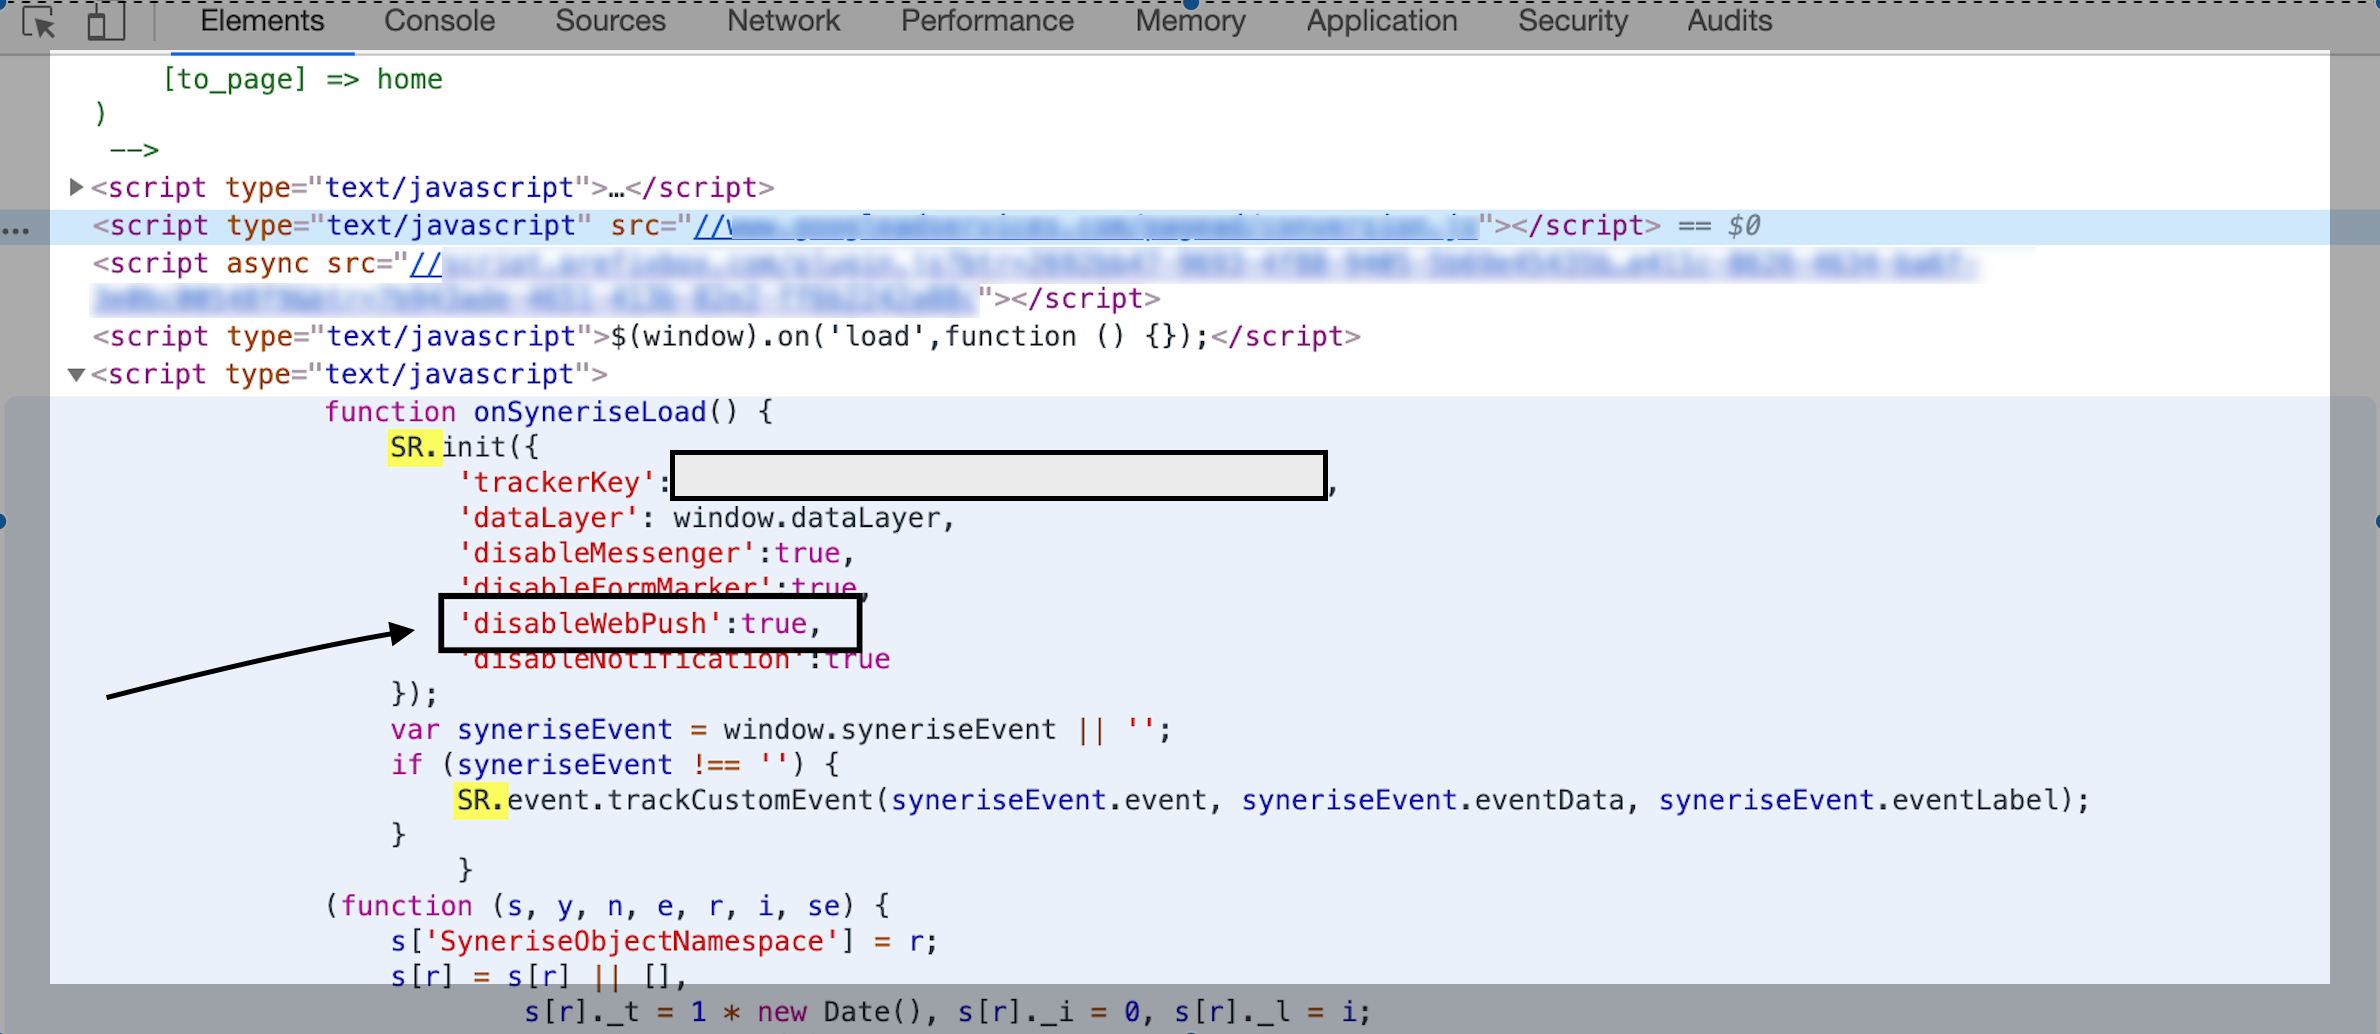
- Search for
SR.init. - If there is the
disableWebPushparameter, contact your developers to remove it.