Incoming integration
The Incoming integration allows creating an endpoint that receives data from external systems. This way, there is no need to send data for a particular customer separately. Then, in the Automation module, the received data is processed and, if data contains any customer identifier, it can be transformed into customer’s data.
Incoming integration facilitates a launch of a workflow based on the received data from the external systems. Data sent to the endpoint through Incoming integration must be in the JSON format. If the data is nested, it will be flattened in accordance with the structure.
There are two types of incoming integrations:
- Without authentication - Anyone who have address to the endpoint can send requests.
- JWT authentication - Each request sent to the endpoint must be authenticated by JSON Web Token (JWT). For this purpose, you must select the API key used for generating a JWT token.
- Without authentication - Anyone who have address to the endpoint can send requests.
WARNING: You must implement a solution that allows you to authenticate this way.
With JWT authentication
- Go to Automation > Incoming > New integration.
- On the pop-up, select JWT authentication.
Define endpoint
- In the Endpoint section, the endpoint URL is generated automatically. The endpoint is unique for every integration. Optionally, you can personalize the integration by adding an icon.
- From the API key dropdown list, select the key which has permissions to authenticate. This API key is used to generate the JWT token used for authentication. You must implement a solution that allows you to authenticate this way.
Tip: You can find more information about generating JWT token here. - Confirm the settings by clicking Apply.
Retrive data
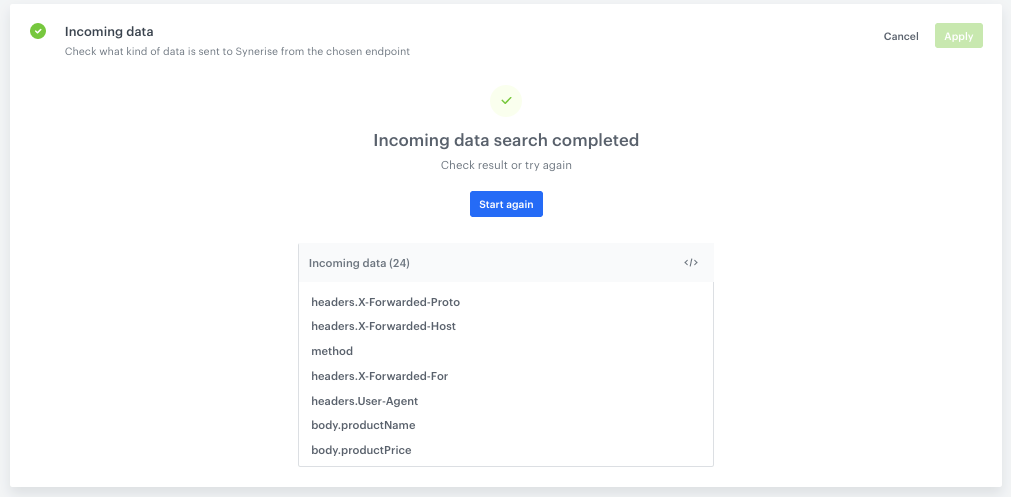
If the endpoint receives the data, they appear in flattened form.
Requests deduplication
Deduplication is the process that Incoming Integration uses to ensure your workflow only triggers for new information, avoiding duplicates. To prevent duplicated requests, it is possible to select the request parameters from which the deduplication hash will be calculated.
- To select request parameters, you must first configure the form in the Retrive data in section.
- Select up to 5 parameters from which the deduplication hash is to be built. You can use any incoming data from both request body and headers.
- Confirm the settings by clicking Apply.
Before you start using request deduplication, it’s worth reviewing the key concepts:
- all deduplication keys are stored for the 7 days. It means that Synerise deduplicates requests with the same deduplication hash for a period of only 7 days from the last sent request.
- if a duplicated request is sent, Synerise will return
204HTTP status code - for non-duplicated request, Synerise will return
200HTTP status code - if you would like to provide your own deduplication hash, you can do so by including it in the request headers. In this case, choose only your header in the Deduplication section in the Incoming Integration settings.
Without authentication
- Go to Automation > Incoming > New integration.
- On the pop-up, select Without authentication.
Define endpoint
- In the Endpoint section, the endpoint URL is generated automatically. The endpoint is unique for every integration. Optionally, you can personalize the integration by adding an icon.
- Confirm the settings by clicking Apply.
Retrive data
If the endpoint receives the data, they appear in flattened form.
Requests deduplication
Deduplication is the process that Incoming Integration uses to ensure your workflow only triggers for new information, avoiding duplicates. To prevent duplicated requests, it is possible to select the request parameters from which the deduplication hash will be calculated.
- To select request parameters, you must first configure the form in the Retrive data in section.
- Select up to 5 parameters from which the deduplication hash is to be built. You can use any incoming data from both request body and headers.
- Confirm the settings by clicking Apply.
Before you start using request deduplication, it’s worth reviewing the key concepts:
- all deduplication keys are stored for the 7 days. It means that Synerise deduplicates requests with the same deduplication hash for a period of only 7 days from the last sent request.
- if a duplicated request is sent, Synerise will return
204HTTP status code - for non-duplicated request, Synerise will return
200HTTP status code - if you would like to provide your own deduplication hash, you can do so by including it in the request headers. In this case, choose only your header in the Deduplication section in the Incoming Integration settings.
Example of use
Prepare a simple integration which is triggered by an incoming request received by the Business Event node. The data received in the request is used in a structure that is required to send a profile event.
-
Add a Business Event trigger node. In the configuration of the node, select the Incoming integration prepared according to the instructions described in this article. Configure the incoming integration so it receives data about products in the cart and the email as the identifier.
Click to see example data received from external service{ "body": { "customer_email": "example@example.com", "order_number": "111111111", "type": "email", "language": "eng", "products": [ { "name": "Earwax", "category": "Hygiene", "id": "abcdefgh", "image_url": "http://exampleimage.url", "product_url": "http://exampleproduct.url", "group_id": "groupid" } ] } "businessProfileId": 611, "endpointId": "XXXX-XXXX-XXXX-XXXX-XXXXXXXXXX", "eventId": "XXXXX-XXXX-XXXX-XXXX-XXXXXXXXXXXX", "headers": { "X-Request-ID": "XXXXXXXXXXXXXXXXXXX", "X-Forwarded-Host": "example host", }, "method": "POST", "time": 1583206296408 } -
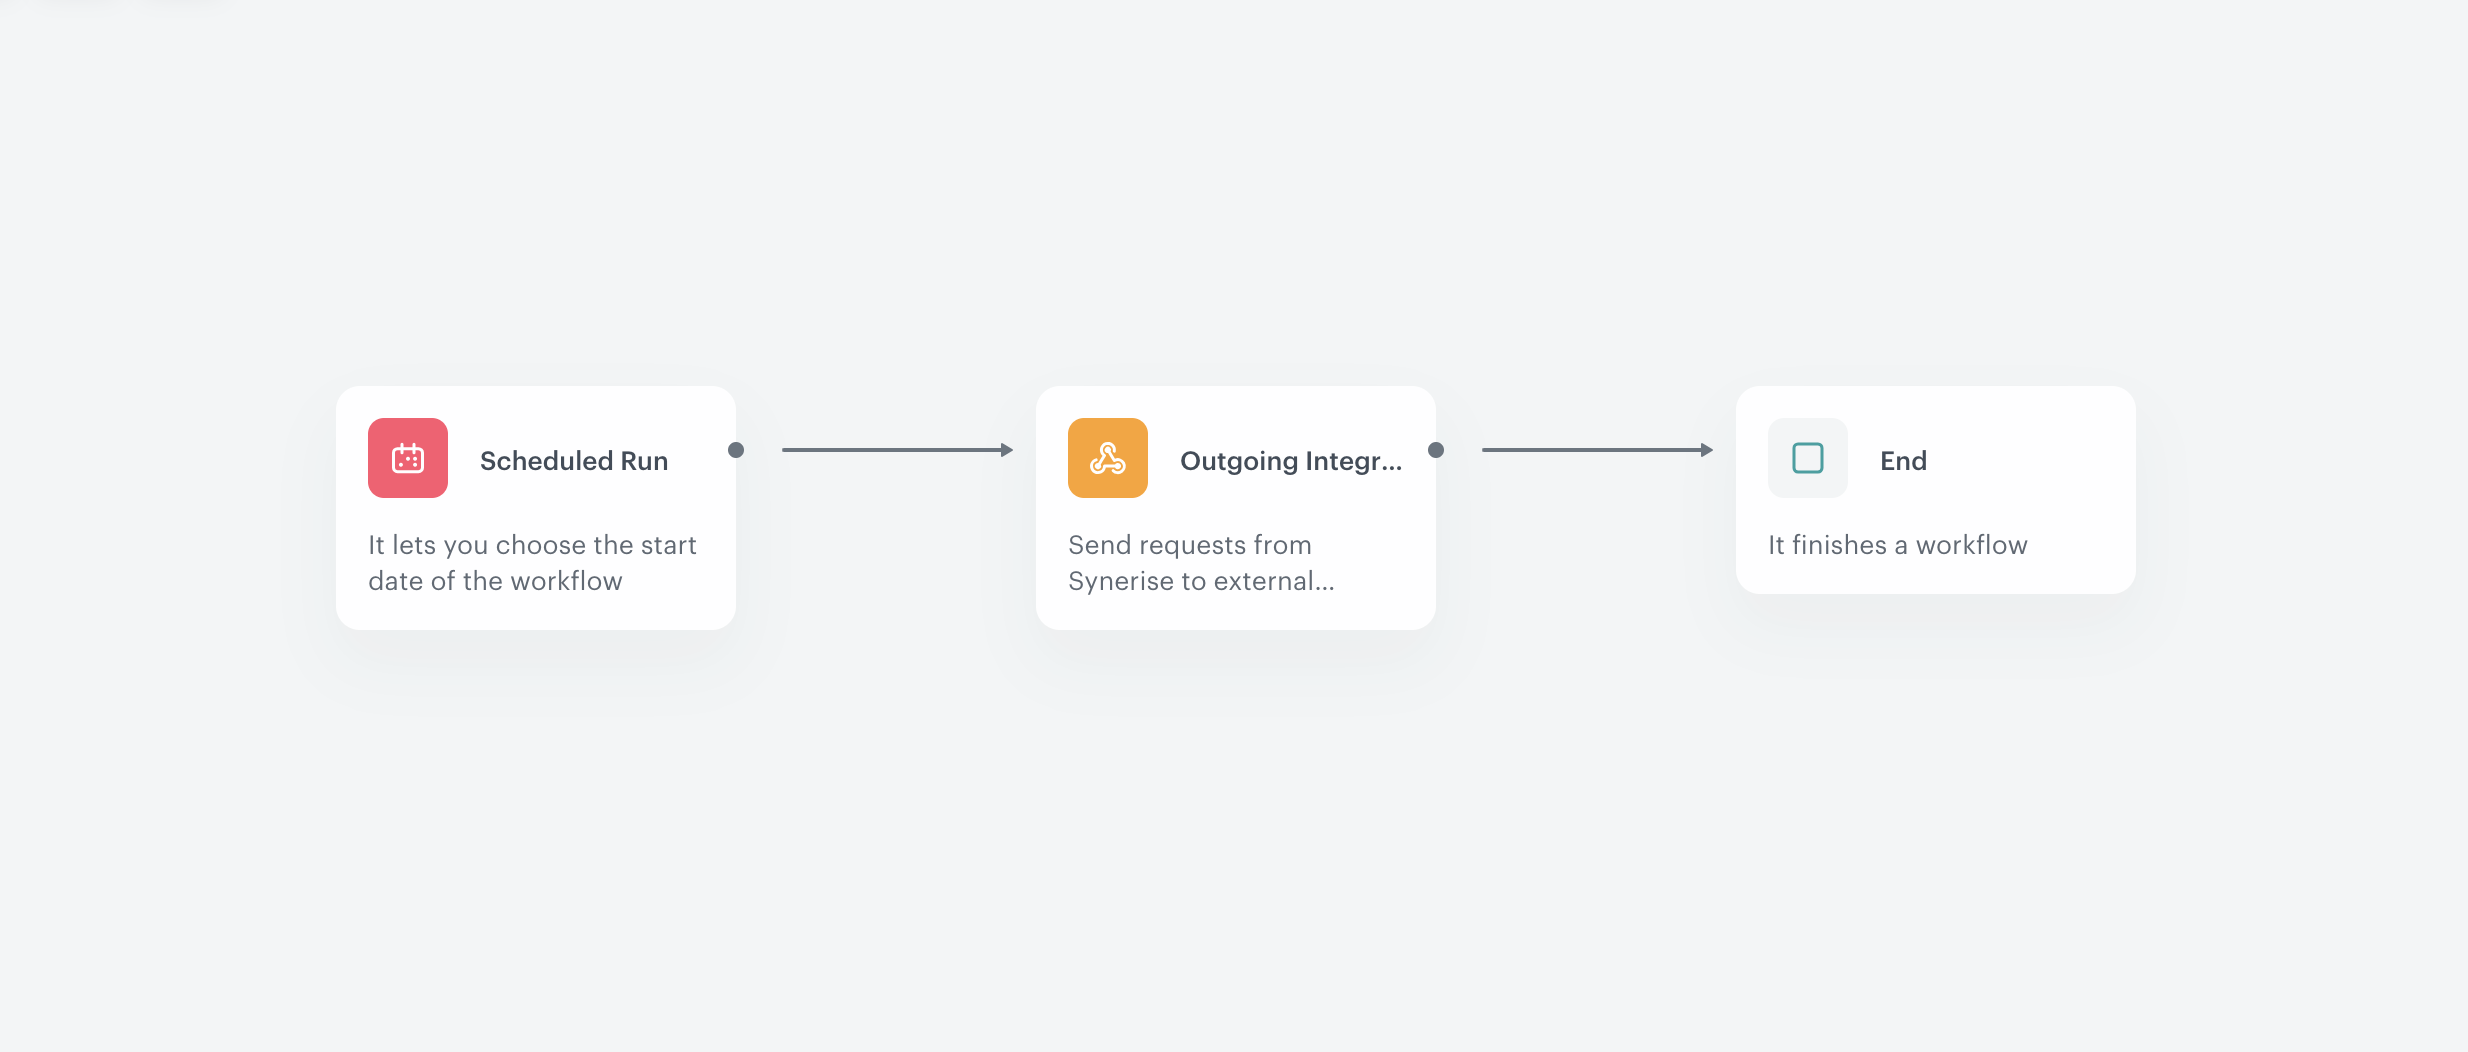
Connect the Business Event trigger node with the Outgoing Integration node. In the configuration of node:
- In the Action name, enter the name of the event.
- Select the POST method.
- Enter the endpoint URL:
https://{SYNERISE_API_BASE_PATH}/v4/events/custom - In the request body, enter the JSON of a custom event.
Click to see example request body{ "action":"goal.achieve", "label":"goal.achieve", "client":{ "email":"{{request.body.customer_email}}" }, "params":{ "created_at":"2021-04-28T14:09:27.000Z", "group_id":"{{request.body.group_id}}", "image_url":"{{request.body.customer_email}}", "name":"{{request.body.name}}", "product_url":"{{request.body.product_url}}" } } - Select the appropriate authorization method.
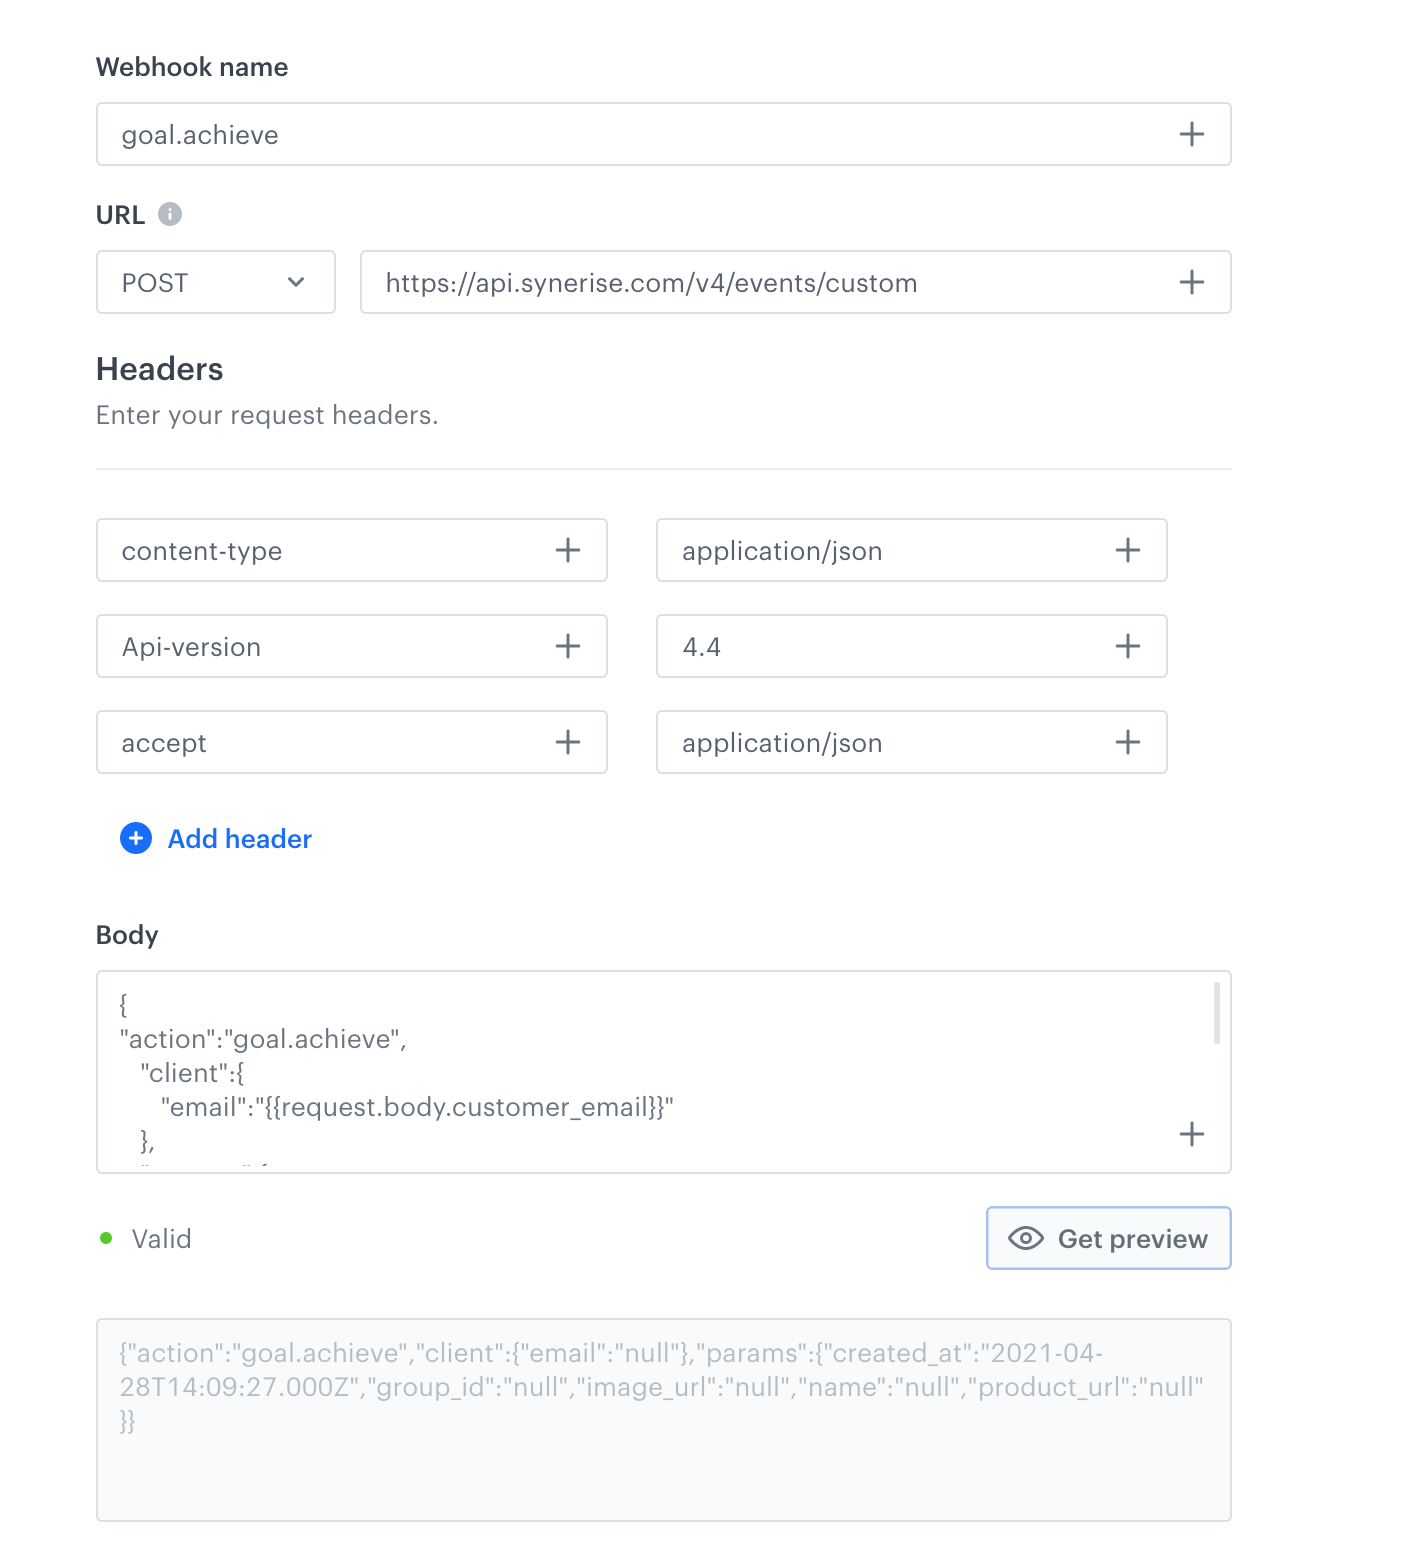
Example configuration of Outgoing webhook node To pass further the values received in the Incoming integration to the Outgoing integration node, use Jinja.
- For the parameters in the request body, use
{{request.body.paramName}} - For the parameters in the request headers, use
{{request.headers.headerName}}
Example
- To pass the value of
customer_email, in the body of the Outgoing Integration enter:
{{request.body.customer_email}} - To pass the value of the
X-Request-IDheader, in the body of the Outgoing Integration enter:
{{request.headers["X-Request-ID"]}}
-
Connect the Outgoing Integration with the End node.
Result: A custom event is generated on a customer’s profile.