"Get Statistics" node
The Get Statistics node lets you retrieve Synerise campaign statistics sent manually or through the Automation module and incorporate them into a workflow. This way, you can distribute campaign statistics to external services where these data is crucial for business operations.
The campaign scope includes emails, SMS, web push notifications, and push notifications. You can select specific campaigns for statistical export or choose to export statistics for campaigns launched within a specified time period (with a 30-day limitation). Exporting a mix of campaign types is not permitted.
You can also choose whether to report campaigns with multiple versions (A/B testing) as a single aggregated record or as separate entries. Additionally, you can select scheduled campaigns, but you must make sure that the workflow trigger date aligns with the campaign send date.
Prerequisites
Create an email/SMS/web push/push notification campaign.
Node configuration
- To create a workflow that lets you export campaign results, go to Automation > Workflows > New workflow.
- Select one of the business trigger nodes, for example Scheduled Run.
- Click THEN > Synerise > Get Statistics.
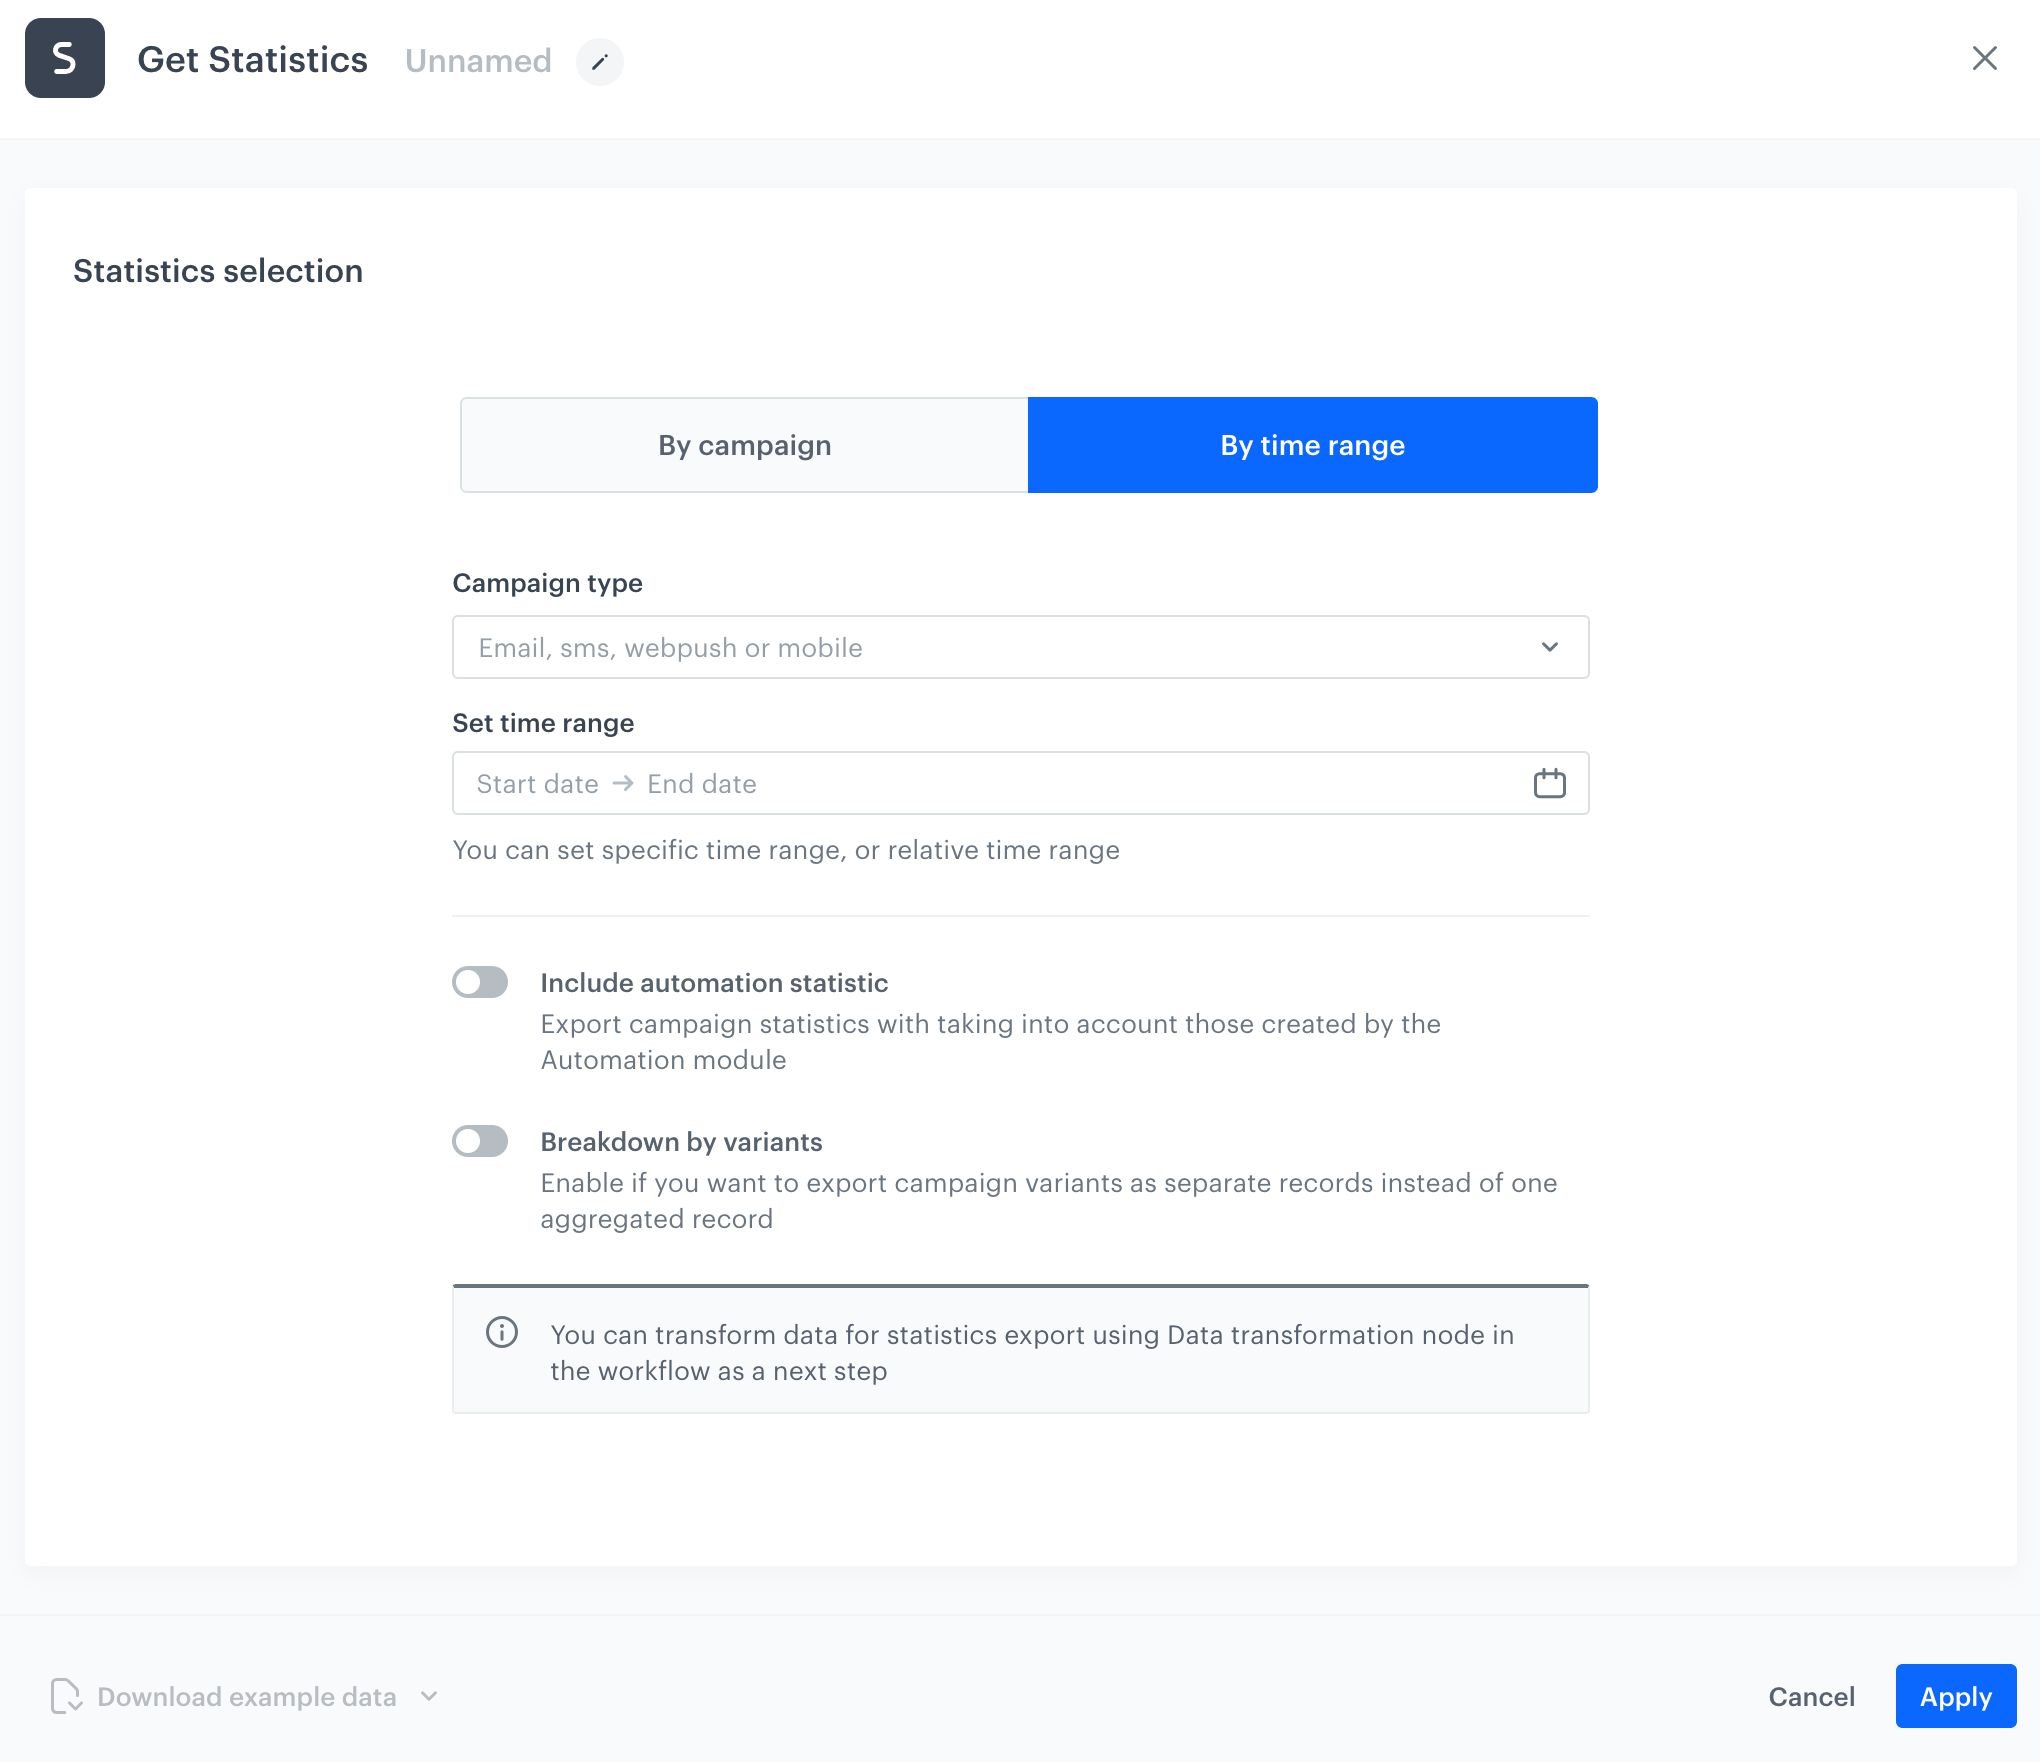
- Select one of the following tabs:
- By campaign - You can select campaigns whose statistics you want to export.
- By time range - It lets export statistics from selected time range from a specific campaign type. In this variant, you can select campaigns that were launched by the Automation module.
- Perform the instructions based on the selection in the previous step.
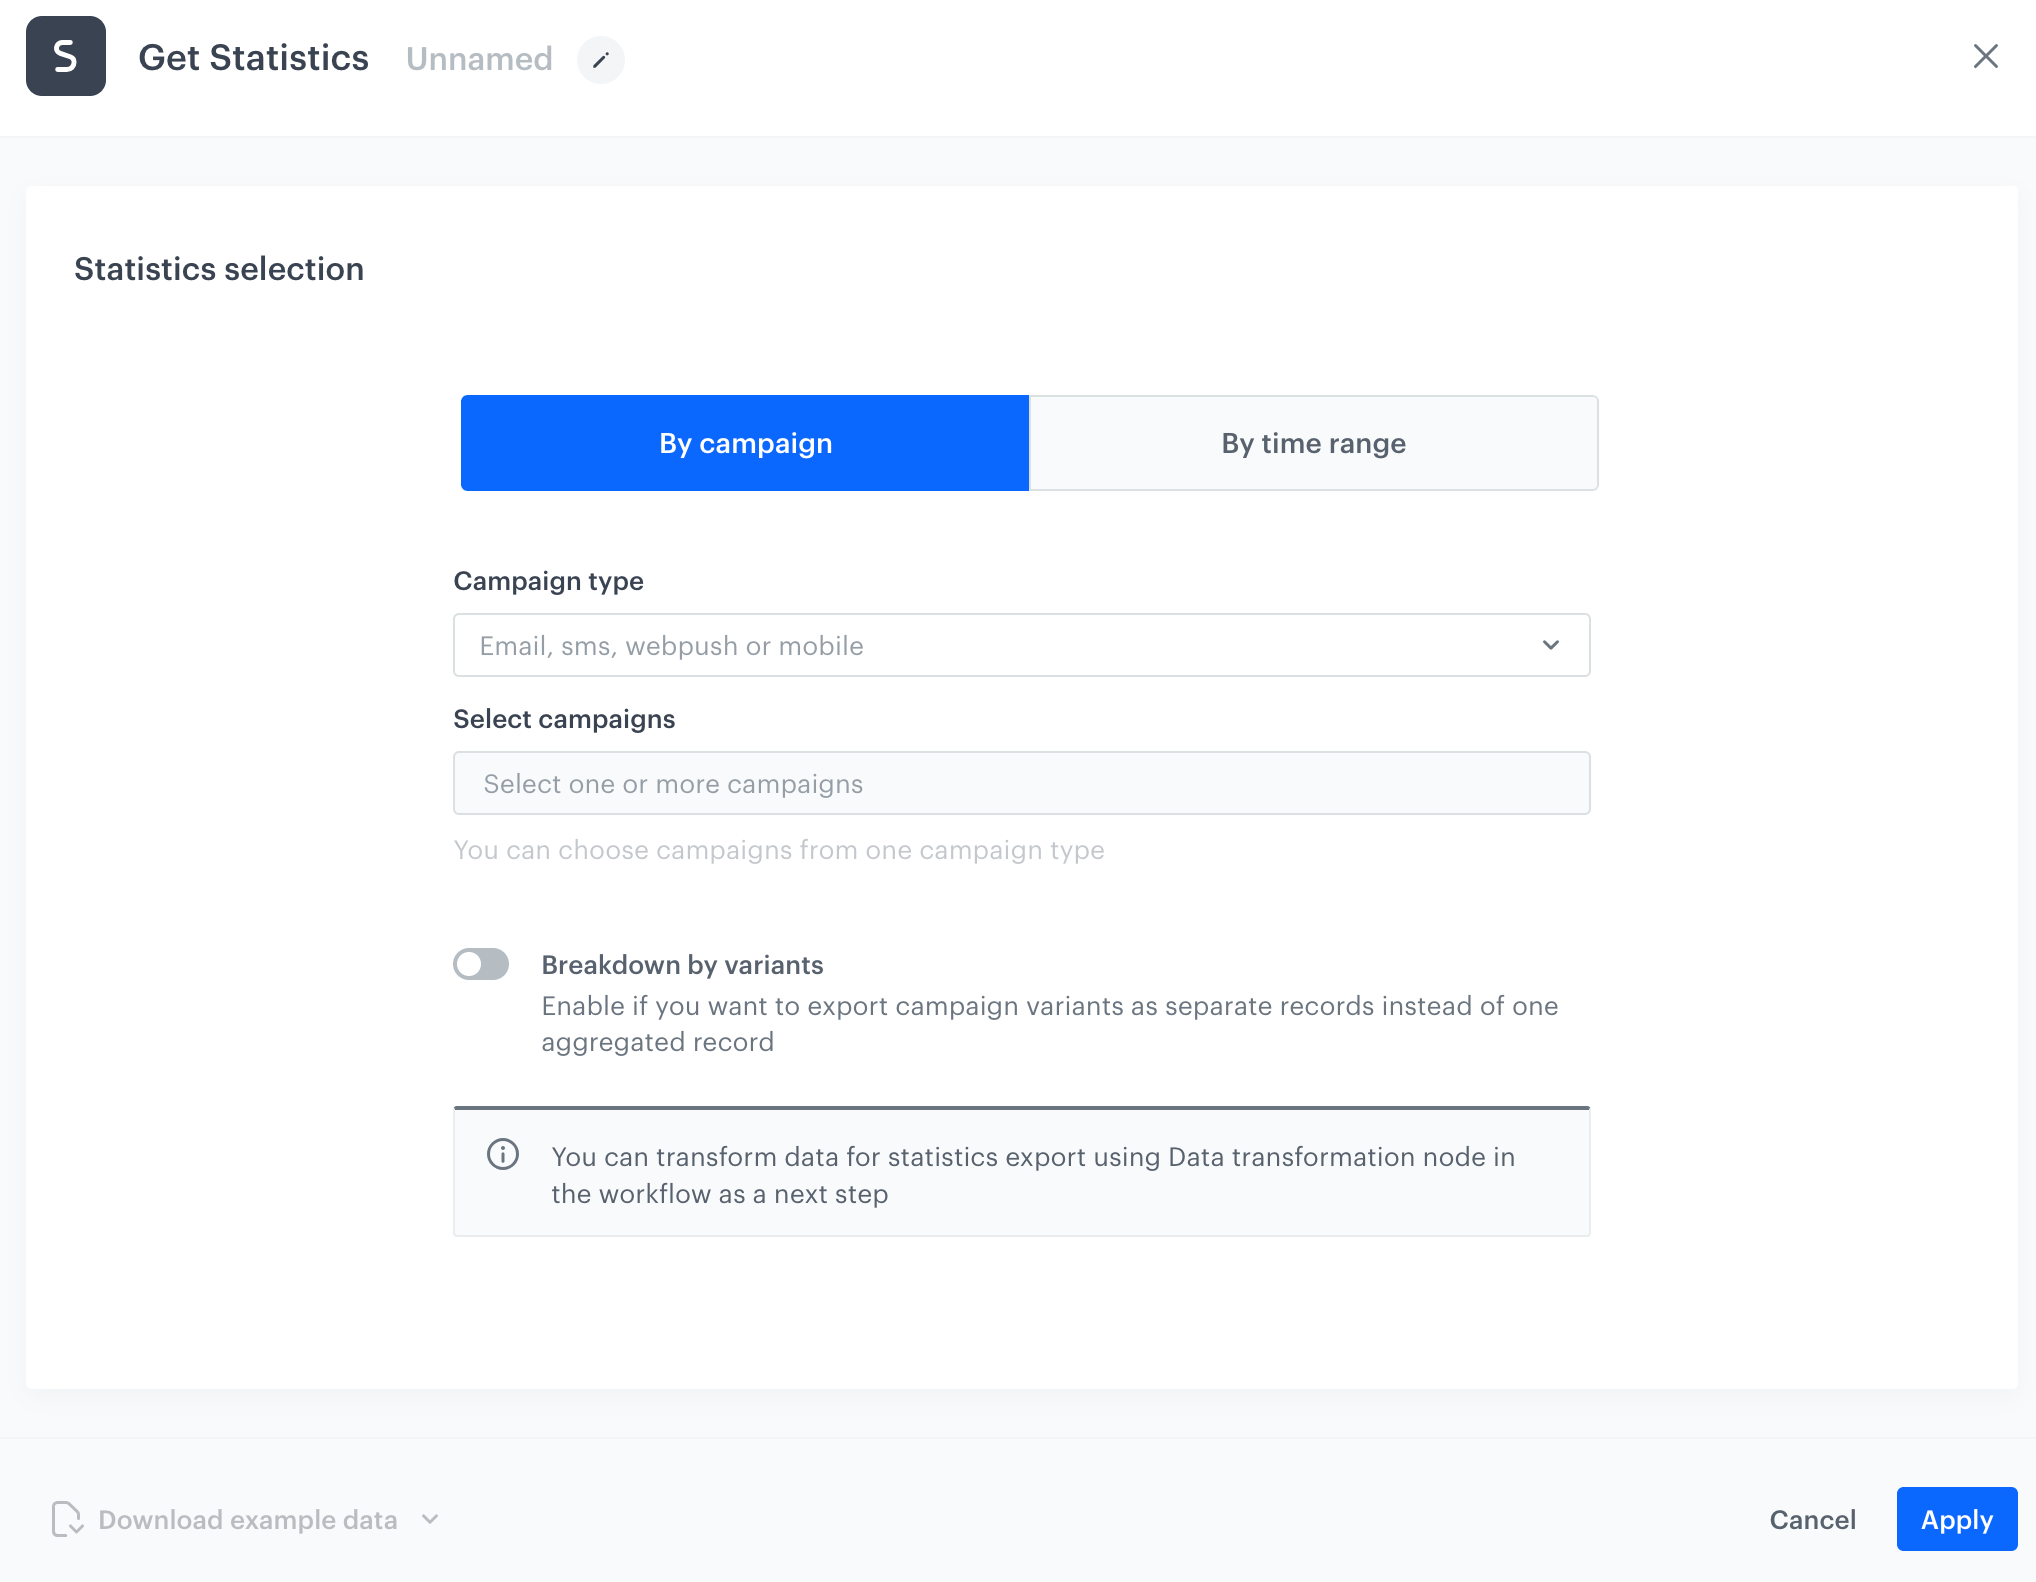
Blank configuration form in the By campaign tab - From the Campaign type dropdown, select from which campaign type you would like to export statistics.
Selecting a mix of campaign types is impossible. - From the Select campaigns dropdown list, select the campaigns whose statistics you want to export.
- Optionally, at the bottom of the Select campaigns dropdown, by switching on the Show drafts option, you can include scheduled campaigns on the list.
WARNING: If you select scheduled campaigns, set the trigger date that comes after the scheduled launch of the campaigns.
- Optionally, if you want to export variants of one campaign as separate records, enable Breakdown by variants.
By default, if statistics of a campaign selected for export contains more than one version (due to A/B testing), the statistics for each variant are a single aggregated record. - Before exporting campaign statistics to an external resource, you can transform the file structure.
- To obtain a sample file for input in a data transformation rule, click Download example data and select the desired file format (.csv, .json, .jsonl) from the dropdown list. All mentioned file formats are allowed as data input in a transformation rule.
- The workflow which modifies the campaign statistics file must use the Data Transformation node after the Get Statistics node.
- Confirm by clicking Apply.
- From the Campaign type dropdown, select from which campaign type you would like to export statistics.
Example of use
You can launch a workflow that exports the campaign statistics to Google Cloud Storage.
-
Start the workflow with the Scheduled Run node. In the configuration of the node:
- Set the Run trigger to one time.
- Select the Immediately tab.
-
Add the Get Statistics node. Configure the node according to the instruction in this article.
-
Add the Google Cloud Storage > Send File. In the configuration of the node:
- Select the connection.
- If no connections are available or you want to create a new one, see Create a connection.
- If you selected an existing connection, proceed to defining the integration settings.
-
Add the End node.
Result:
The configuration of the workflow